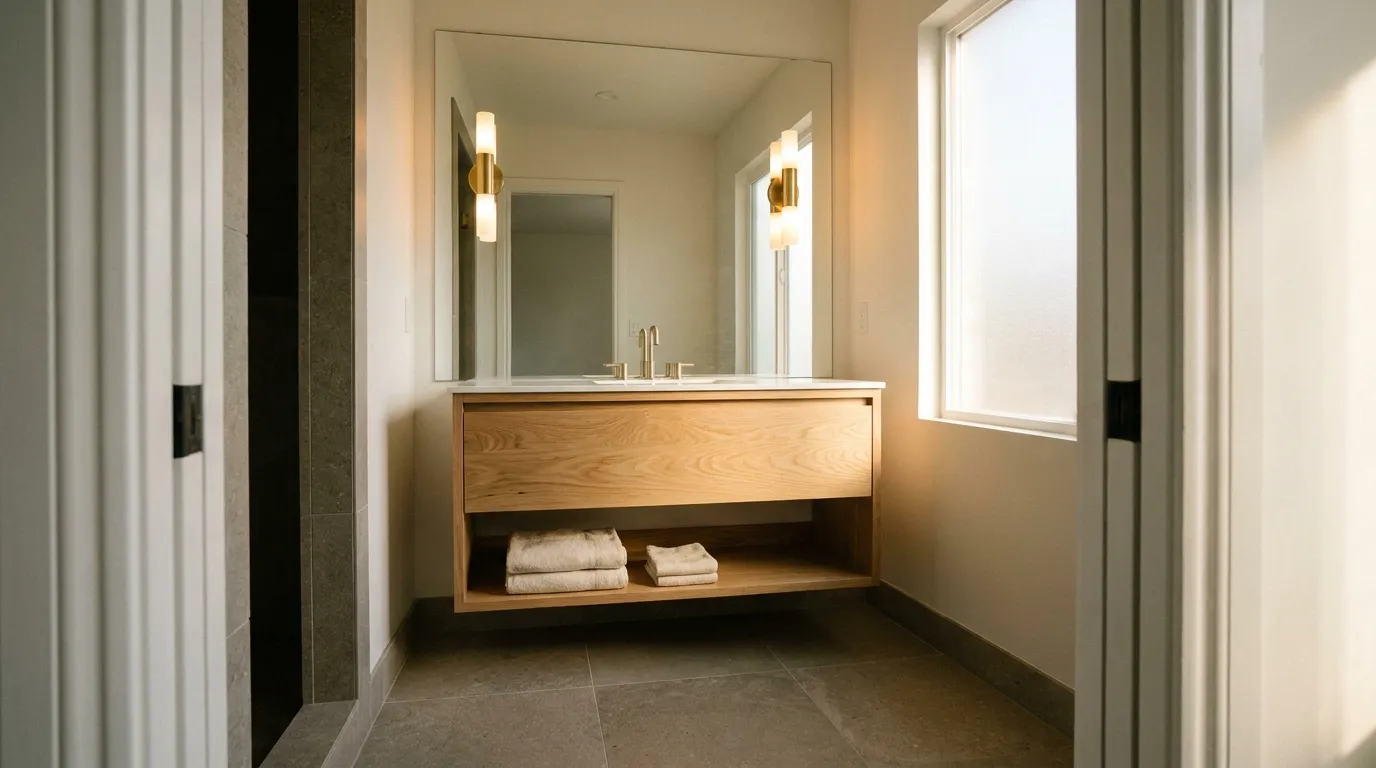
23 Floating Vanity Ideas That Modernize Small Bathrooms
The floating vanity does something no floor-standing cabinet can: it makes the floor visible from wall to wall, which is the single most effective visual trick for making a small bathroom read as larger than it is. The uninterrupted floor line beneath a wall-mounted vanity creates a sense of space that a pedestal sink doesn’t provide storage for and a floor-standing vanity physically blocks.
But the floor space benefit is only one reason floating vanities have become the dominant choice in bathroom renovations. They’re also easier to clean under, easier to customize for height, more architecturally versatile than their floor-standing equivalents, and — when chosen well — capable of transforming a dated, generic bathroom into a room with genuine design character.
The challenge is that floating vanity ideas span an enormous range: single-sink or double, wood or lacquer or concrete, open shelf or fully enclosed, vessel sink or undermount, with drawers or without, at standard height or raised. Getting the combination right requires understanding more than what looks good in a photograph.
These 23 ideas cover the full range — from compact single-sink configurations for powder rooms and small bathrooms to generous double-vanity setups for primary baths. Each one includes enough practical context to help you understand what suits your wall, your plumbing configuration, your storage needs, and the size of the room you’re working with.
1. A Slim Single-Sink Vanity for Narrow Bathrooms

In bathrooms under 5 feet wide, a standard 24-inch vanity is often the widest configuration the layout can accommodate while still leaving adequate clearance for the door swing and comfortable standing room at the sink. A floating version in this size — mounted at 18 to 20 inches above the finished floor — frees the visual floor plane and makes the narrow room read considerably wider than it is.
The depth matters as much as the width in a constrained bathroom. A shallow vanity at 16 to 18 inches deep rather than the standard 21 inches recovers several inches of standing room that make a genuine functional difference in a bathroom this size. Some manufacturers offer wall-mounted vanities specifically proportioned for small bathrooms; these aren’t simply smaller versions of standard cabinets but are designed with shallower depths that suit the spatial reality of compact rooms.
The finish should be light in a narrow bathroom: a white lacquer, pale oak, or natural ash reads as visually lighter than a dark walnut or charcoal, which can feel heavy when the room’s width is already limited.
2. A Wall-Mounted Vanity with Legs for a Furniture Feel
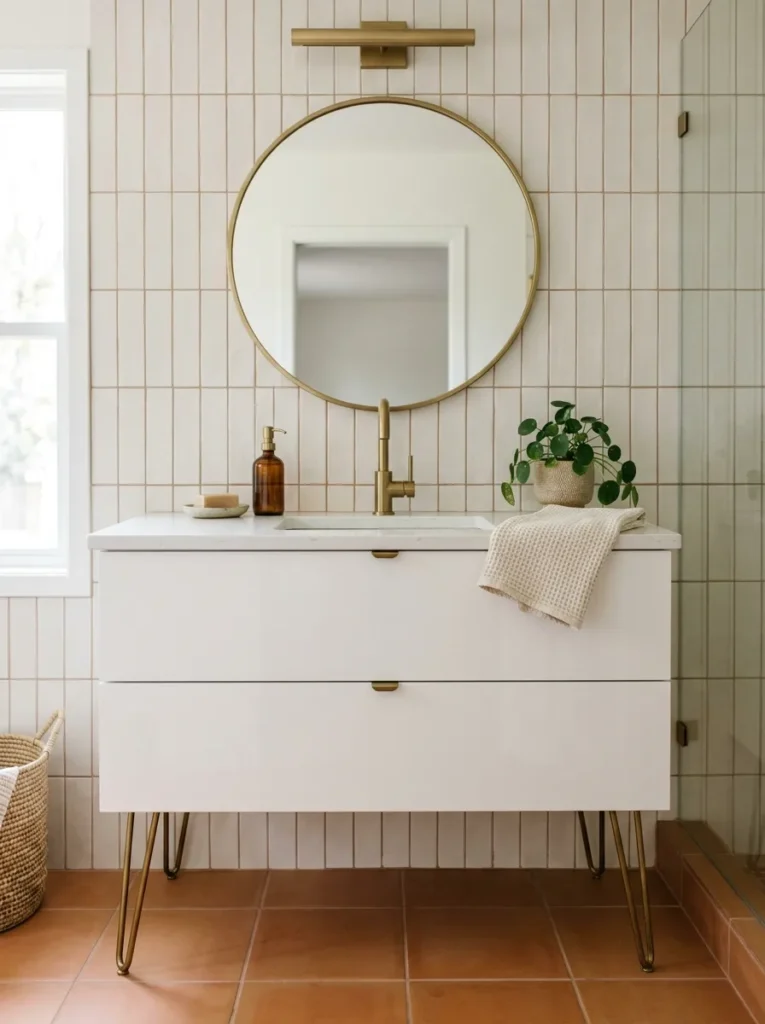
A floating vanity with visible metal legs — thin hairpin legs, tapered brass rods, or angular black iron supports — creates a hybrid between a wall-mounted cabinet and a piece of freestanding furniture. It retains the open floor quality of a floating vanity while introducing a material detail (the leg finish) that relates to the room’s other hardware and fittings.
This style suits transitional and eclectic bathrooms where a fully flush wall-mounted cabinet might read as too clinical. The leg detail softens the installation and makes the vanity look as though it was chosen rather than specified — a distinction that matters in a room where every visible element is significant.
The practical note: legs on a wall-mounted vanity add no structural support — the vanity is still anchored to the wall at the cabinet back. The legs are purely visual and typically don’t bear load. Verify this with the specific product before installation, as some legs-included designs are purely decorative and should not be relied on for stability.
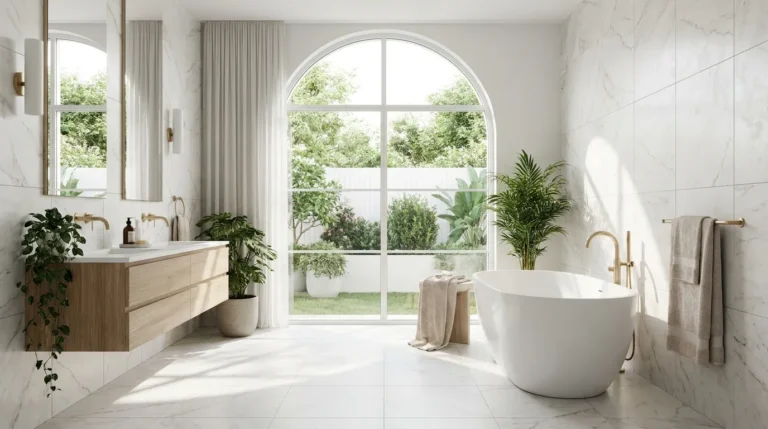
3. A Natural Oak Floating Vanity with Warm Grain

Natural oak in a bathroom was considered a maintenance risk for decades — wood and moisture don’t coexist easily without protection. Modern bathroom-grade oak vanities are typically sealed with a marine-quality or catalyzed lacquer finish that protects the grain from steam, splashing, and the inevitable wet surfaces of bathroom use while preserving the wood’s visible character.
The appeal is the warmth oak brings to a bathroom that tile, stone, and paint alone can’t provide. An oak floating vanity against white or off-white tile reads as architectural and organic rather than purely functional. The wood grain creates visual texture on the vanity’s face that no painted or lacquered surface replicates.
Undertone matching matters here. Oak ranges from pale, almost-white Scandi tones to amber-heavy honey tones to red-leaning warm browns. The vanity’s oak tone should relate to the room’s other warm elements — the floor tile, the mirror frame, the hardware finish — rather than introducing a competing warm register.
4. A Smoked or Fumed Oak Vanity for Evening Character

Where natural oak reads as warm and Nordic, smoked or fumed oak reads as darker, richer, and more atmospheric. The fuming process darkens the tannins in the wood rather than applying a surface stain, which means the grain remains fully visible but in a deep grey-brown palette closer to driftwood than honey.
In a bathroom with white or light grey tile, a smoked oak vanity creates a warm-dark accent that reads as considered without heaviness. Under warm artificial light — the typical condition of a bathroom in the evening — smoked oak deepens further and develops a quality that photographs and experiences beautifully.
The maintenance consideration: fumed oak requires the same sealing attention as natural oak in a bathroom context. Check that the specific vanity’s finish is rated for bathroom humidity. Unsealed or inadequately sealed smoked oak in a high-humidity environment can develop surface mold in the grain over time.
5. A Full-Width Floating Vanity with Integrated Storage

In primary bathrooms and master baths with generous wall length, a floating vanity that spans the full available wall — rather than a standard 30 or 36-inch unit centered on the wall — provides significantly more storage and creates a more architectural result. A 60 or 72-inch wall-mounted cabinet feels more like built-in millwork than furniture, which reads as higher-end regardless of the actual material.
The visual benefit of a full-width floating vanity is its relationship to the wall: it transforms the entire wall into a vanity wall rather than leaving awkward gaps on either side of a smaller unit. This suits bathrooms where the vanity wall is the primary architectural feature — where the mirror or mirrors, the lighting, and the sink are all part of one composed wall rather than isolated elements.
Practically, a longer floating vanity needs more wall anchors than a shorter one, and the installation requires finding studs or using appropriate wall anchors rated for the combined weight of the cabinet, the countertop, and the sink.
6. A Floating Vanity with an Open Lower Shelf

A floating vanity with one drawer or cabinet section above and a completely open shelf below — at floor level, between the cabinet and the floor — uses the space beneath the floating unit as visible display storage rather than dead space. The open shelf can hold folded towels, a woven basket with toiletries, a small plant, or decorative objects.
This creates a different visual dynamic than a fully closed cabinet: the eye travels under the cabinet to the open shelf, then to the floor beyond, and the layered view makes the bathroom feel deeper rather than simply open. The open shelf also allows access to stored items without opening drawers, which suits a bathroom where towels and frequently used items benefit from easy reach.
The shelf’s finish should match the cabinet above for visual continuity. The objects displayed should be styled with as much care as any shelf in the home — a randomly placed collection of cleaning products reads very differently from two neatly folded linen towels beside a small ceramic pot.
7. A Floating Vanity with a Rattan or Cane-Front Drawer
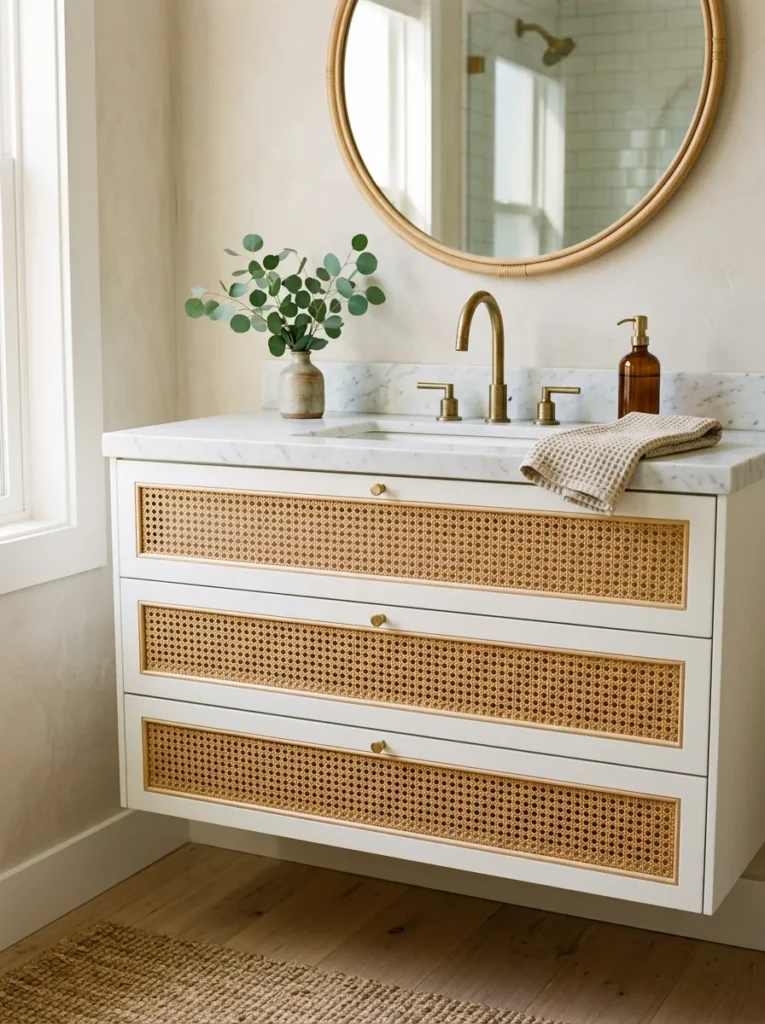
Adding a natural fiber detail — a cane-panel drawer front, a rattan-wrapped cabinet door, or a woven seagrass insert — to an otherwise plain floating vanity brings texture to the bathroom at furniture level. It’s the same principle that drives cane-front kitchen cabinets and rattan sideboards: the natural material softens an otherwise hard-surfaced room and introduces organic warmth without adding another paint color or tile pattern.
This works best in bathrooms decorated in natural materials — wood floors, linen towels, ceramic accessories, stone or concrete countertop. The cane front reads as consistent with that material story. In a bathroom with highly polished surfaces, chrome hardware, and glass everywhere, a cane-front vanity can feel like a material from a different room.
Cane requires some humidity management — sustained high moisture can cause the woven strands to sag over time. Ensure the bathroom has adequate ventilation before installing a cane-front vanity as the primary choice.
8. A White Lacquer Floating Vanity for a Clean Minimal Look

White or off-white lacquer is the most versatile floating vanity finish because it suits nearly every bathroom tile color, every hardware finish, and every size of room. In a small bathroom, white lacquer reads as visually recessive — the vanity doesn’t demand attention, which keeps the eye moving through the room rather than stopping at the vanity.
The specific white matters more than most buyers realize. A cool, blue-leaning white lacquer in a room with warm beige tile creates undertone conflict that reads as unresolved. A warm, slightly greige white or a true neutral white suits the widest range of tile colors. Test the vanity finish against a tile sample before committing — what reads as white under showroom lighting often has a distinct undertone under natural bathroom light.
For a minimal result, the hardware should be in a finish that almost disappears: matte white, brushed nickel in a cool room, warm brushed brass in a warm room. Heavily styled hardware competes with the simplicity the white lacquer is designed to support.
9. A Matte Black or Charcoal Floating Vanity as a Statement

A floating vanity in matte black, deep charcoal, or near-black paint makes the vanity itself the room’s primary design statement. Against white or light grey tile, a dark floating vanity reads as graphic and deliberate. Against a warm stone-effect tile or a terracotta floor, it reads as more grounded and architectural.
The dark vanity requires commitment from the surrounding elements. White subway tile that reads as a neutral backdrop beside most vanities reads as a strong color contrast beside a black vanity — the combination has a graphic quality that suits contemporary and industrial bathrooms but can feel stark in a room aiming for warmth.
Matte finish on a dark vanity is the right choice: satin or gloss dark finishes show every water splash and fingerprint, particularly in humid bathroom conditions. Dead matte black or a flat charcoal lacquer is more forgiving and reads as more refined than a reflective dark surface.
10. A Double Floating Vanity for Primary Bathrooms

A double floating vanity — two separate sinks on one extended wall-mounted cabinet — is the configuration that most transforms a primary bathroom into a genuinely functional two-person space. The visual effect of a long floating vanity (typically 60 to 72 inches for a double) against a full-width mirror and flanking sconces creates the most resolved and architecturally complete bathroom wall possible.
The spacing between the two sinks matters for both function and proportion. A double vanity where the sinks are centered too close together creates a crowded washing experience; 30 inches between sink centers is a practical minimum for comfortable simultaneous use. A 60-inch vanity with two 16-inch sinks centered at 30-inch intervals leaves adequate space between and at the ends.
The floating format is particularly beneficial for a double vanity because the floor remains fully visible across the entire width, which prevents a 72-inch cabinet from visually consuming the wall entirely.
11. Two Separate Single Vanities Instead of One Double

Rather than one extended double vanity cabinet, positioning two separate single floating vanities on the same wall — with open space between them — creates a different aesthetic and functional result. The gap between the two units (typically 12 to 18 inches) can hold a freestanding floor lamp, a small stool, or simply be left open as intentional breathing room between each person’s area.
This arrangement reads as more furniture-like and less built-in than an integrated double vanity, which suits bathrooms with an eclectic or collected aesthetic. It also allows different material choices for each unit — one in oak, one in white lacquer, for example — though this requires a shared element (same hardware, same countertop material) to maintain visual coherence.
Plumbing is the practical complication. Two separate vanities require two drain locations and two sets of supply lines, which may not align with the existing plumbing rough-in if this is a retrofit rather than new construction. A plumber should assess the feasibility before the vanities are purchased.
12. A Concrete or Microcement Floating Vanity

A concrete or microcement floating vanity is one of the most material-specific choices available: it reads as genuinely architectural rather than furniture, and it ages in a way that no other vanity material does — developing minor surface variations, slight darkening around the drain, and a character that grows richer rather than simply wearing. It suits bathrooms with an industrial, contemporary, or loft-influenced aesthetic.
Concrete vanities are typically heavy — significantly heavier than wood or MDF equivalents — which requires robust wall anchoring to studs or structural blocking rather than standard drywall anchors. A structural assessment before installation is not optional.
The maintenance reality: concrete and microcement surfaces are porous unless properly sealed, and bathroom use subjects them to water, toothpaste, makeup, and cleaning products continuously. A penetrating sealer applied correctly and reapplied every one to two years is necessary for a concrete vanity to perform well over time. Inadequately sealed concrete stains permanently.
13. A Terrazzo or Stone-Look Floating Vanity
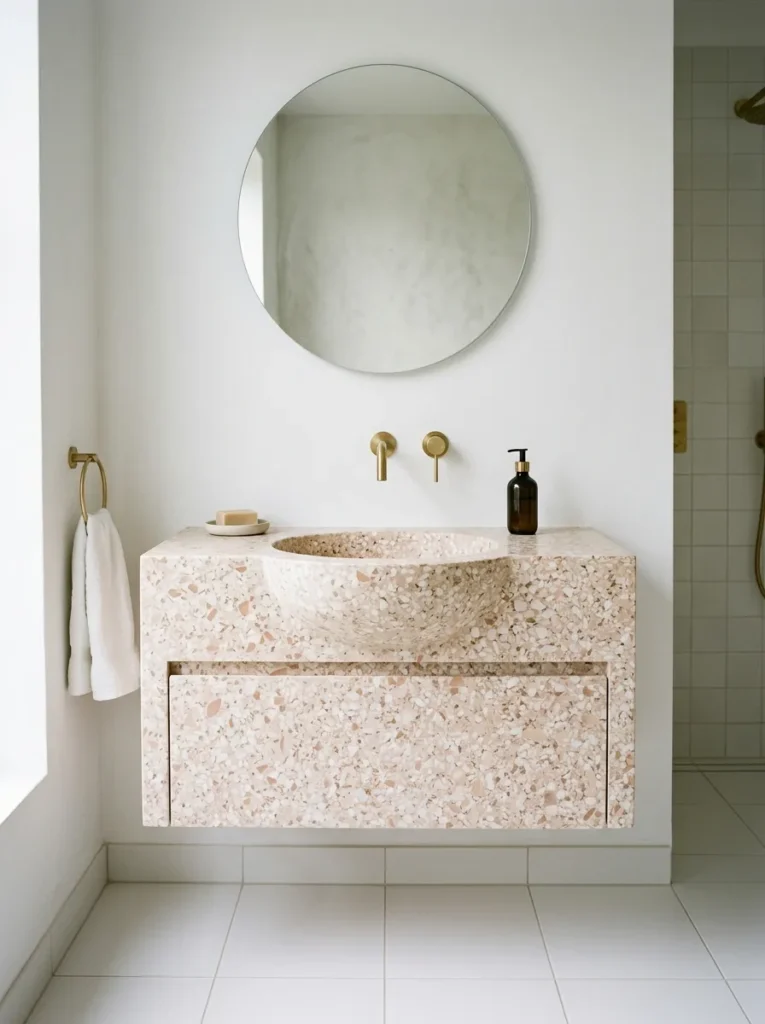
Terrazzo — the composite material of stone chips set in cement or resin — has re-emerged as a genuinely current material choice for bathroom surfaces including vanity cabinets, countertops, and even integrated sink-and-top configurations. A terrazzo floating vanity in a warm chip palette (pink, cream, pale gold on a white or grey background) reads as distinctive and craft-influenced rather than mass-produced.
The all-in-one terrazzo vanity — where the cabinet body, countertop, and sometimes the integral sink are all the same continuous material — is the most architecturally resolved version. The absence of a joint between countertop and cabinet face removes a typical maintenance point and creates a sculptural quality that separate-component vanities can’t replicate.
Weight and cost are the significant practical considerations. Terrazzo is heavy and requires appropriate structural support; it’s also one of the more expensive vanity material choices. For bathrooms where the vanity is the room’s primary statement, the investment is often justified by the result.
14. A Floating Vanity with a Vessel Sink

A vessel sink — a basin that sits on top of the vanity countertop rather than dropping into it — changes the visual dynamic of a floating vanity considerably. The sink becomes a visible object rather than a recessed fixture; its form and material are always on display. The vanity countertop is fully visible around the sink base, which creates a surface with a different quality than a standard undermount arrangement.
Vessel sinks require a taller faucet (a gooseneck or tall waterfall style to allow comfortable hand washing above the vessel’s rim) and a vanity mounted lower than standard — typically 12 to 14 inches lower than a standard undermount to compensate for the vessel’s added height. A vanity mounted at standard height with a vessel sink results in a working surface that’s ergonomically too high for most adults.
Material choices for vessel sinks: ceramic and porcelain read as clean and classic. Concrete, stone, and hammered copper read as more artisanal. Glass vessel sinks can look impressive but show water marks and soap residue more visibly than opaque materials, which is a practical consideration in a bathroom used daily.
15. A Live-Edge or Natural Edge Countertop on a Floating Cabinet

A floating vanity cabinet in a plain painted or lacquered finish paired with a live-edge wood countertop — one where the natural edge of the wood slab is preserved rather than cut straight — creates a material contrast between the clean, manufactured cabinet and the organic, found-in-nature countertop. The live edge introduces the most distinctly individual element possible into a bathroom: no two pieces are identical.
The countertop needs to be properly sealed for bathroom use — an oil-based finish specifically rated for wet environments, reapplied annually. The live edge creates an irregular front profile that may collect water if the surface isn’t perfectly level, so precise installation is critical.
This is a specific, committed aesthetic choice that suits bathrooms with a strong natural material story (wood floors, stone tile, organic textiles) and conflicts with bathrooms that are clean and contemporary in direction. The live edge reads as beautiful in the right context and jarring in the wrong one.
16. A Floating Vanity in Pale Blue or Sage Green
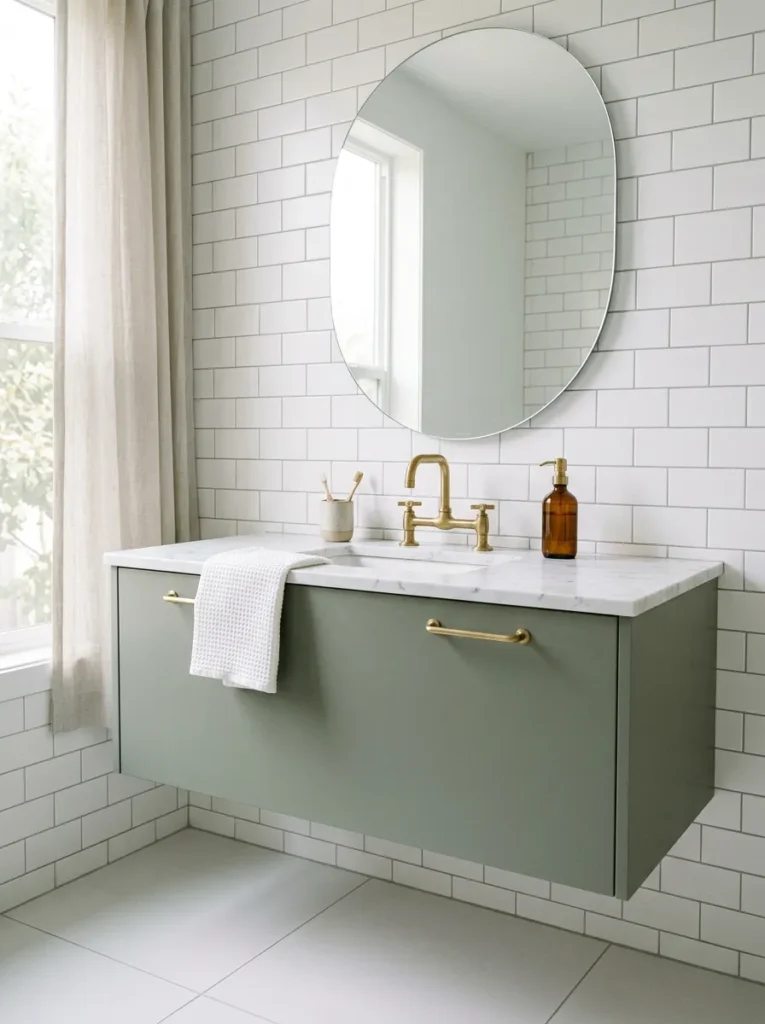
A painted floating vanity in a soft, muted color — pale dusty blue, sage green, warm mint, or celadon — introduces color at furniture level in the bathroom, which is different from color at wall level. The vanity’s color becomes the room’s primary palette decision, with tile, grout, and wall paint chosen to support rather than compete with it.
Pale blue vanities pair naturally with white subway tile, hexagonal white floor tile, or soft grey stone — the blue reads as watery and appropriate to the bathroom context. Sage green suits earthy, botanical bathroom aesthetics where natural materials and organic forms already appear in the room’s accessories and textiles.
The paint finish on a bathroom vanity should be a semi-gloss or hard lacquer rather than matte — bathroom vanities receive more direct water contact and cleaning than almost any other furniture surface, and a matte finish absorbs stains and wears unevenly in ways that a harder finish doesn’t.
17. A Floating Vanity with Integrated Lighting

A floating vanity with LED lighting integrated into the underside — projecting light downward onto the floor below — creates a visual effect that makes the vanity appear to float more dramatically than a standard wall-mounted unit. The floor plane becomes illuminated from above, emphasizing the space between the cabinet and the floor and creating a spa-like quality at night or in low ambient light.
This requires electrical work during installation: the LED strip or recessed fixtures need a power source routed through the wall and controlled either by the main bathroom switch or a separate circuit. It’s not a retrofit option for an existing floating vanity without opening the wall.
The light color temperature matters significantly. Warm LED strips (2700K) create a golden, atmospheric glow that reads as inviting rather than functional. Cool or daylight LEDs (4000K+) under a vanity read as clinical rather than architectural. Warm is almost always the right choice for this application.
18. A Floating Vanity with a Large-Format Mirror Spanning the Full Width
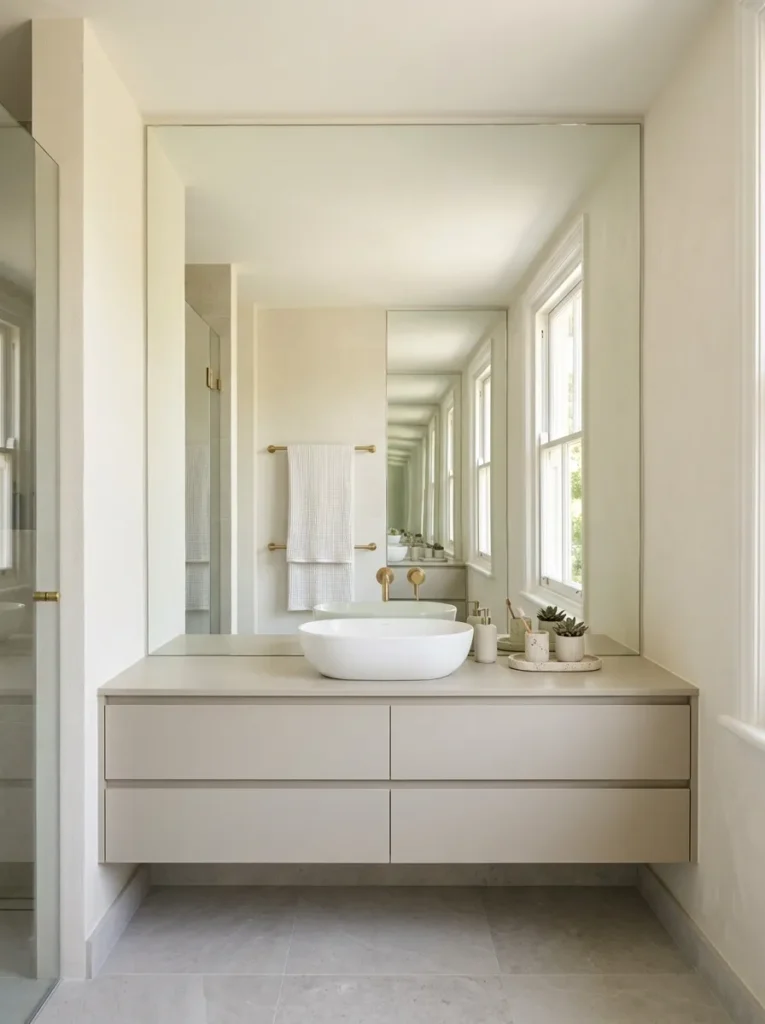
Pairing a floating vanity with a mirror that spans the full width of the vanity wall — rather than a mirror sized only to the vanity itself — creates an architectural moment that makes the bathroom feel significantly larger. The full-width mirror reflects the entire bathroom rather than just the area directly in front of the sink, doubling the apparent depth of the room.
The mirror edge should align with the wall’s architectural boundaries — side walls, window frames, or the room’s corners — rather than simply matching the vanity width and leaving visible wall on either side. A mirror that runs exactly from one wall to another reads as built-in and intentional; one that stops arbitrarily at the vanity’s edge reads as undersized.
Frameless mirrors in this format are the cleanest solution because a frame across a full-width mirror can feel heavy and can conflict with the wall edges at the mirror’s termination points. A thin edge-polished frameless mirror at full width reads as purely architectural.
19. A Floating Vanity in a Niche or Recessed Alcove
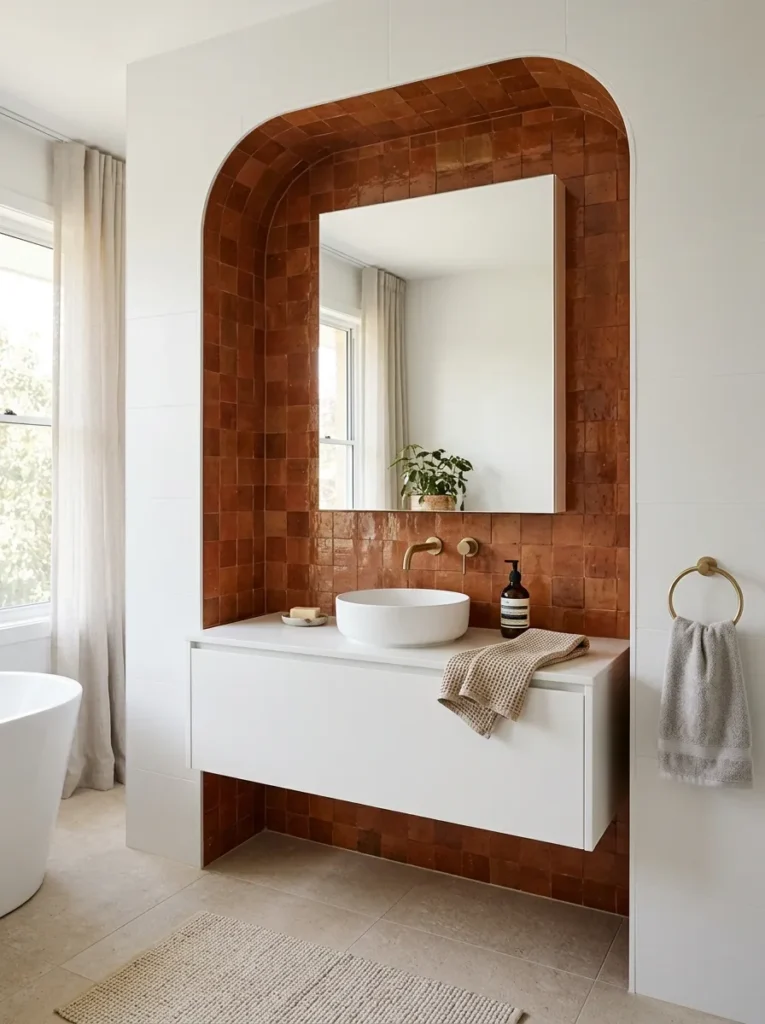
Building or framing a niche around a floating vanity — so the cabinet sits within a recessed architectural pocket rather than projecting from a flat wall — creates the most resolved vanity wall possible. The niche frames the vanity and mirror as a single composed element, with the surrounding walls forming natural boundaries for the arrangement.
In new construction or full renovations, a vanity niche can be built into a non-load-bearing wall section relatively easily. In retrofit situations, a soffit or partial wall built around an existing floating vanity creates the same visual effect without full wall modification.
The niche interior can be tiled in a material different from the surrounding room — a warmer stone, a different tile format, an accent color — to create a distinct zone that reads as intentional rather than decorative. The tile transition at the niche’s perimeter needs to be clean: a continuous surface from inside the niche to the surrounding wall with a neat inside corner is the standard that reads as considered.
20. A Floating Vanity with a Fold-Down or Integrated Seat

In bathrooms large enough to accommodate it, integrating a fold-down seat or a small built-in bench into the vanity design — at the same height and in the same material as the cabinet — creates a functional moment that standard bathroom furniture doesn’t provide. The seat allows someone to sit while applying makeup, putting on socks, or managing items at counter height.
The seat extends the vanity’s footprint without adding floor-standing furniture, which maintains the open floor quality that floating vanities are chosen for. A fold-down version (attached to the wall on a piano hinge, dropping to usable height when needed) takes up no space when not in use.
This works best in a primary bathroom or a bathroom with enough wall length that the extended vanity-with-seat doesn’t consume all available space. In a small bathroom, a built-in seat at the vanity is a luxury the room’s dimensions may not support without creating a circulation problem.
21. A Japanese-Inspired Minimalist Floating Vanity

A Japanese-influenced bathroom vanity — typically low to the floor (often only 12 to 14 inches above the finished floor), in a natural wood with a clean grain and a wabi-sabi-influenced approach to material character — creates a bathroom aesthetic that’s among the most serene and considered available. The lower mounting height emphasizes the floor plane more dramatically than a standard-height floating vanity and creates a room that reads as grounded and calm rather than functional.
The sink in this configuration is often an integrated stone basin, a shallow ceramic vessel, or a simple stainless or copper bowl rather than a conventional ceramic sink. The faucet is wall-mounted (coming from the wall rather than through the countertop) which removes all deck hardware from the vanity surface entirely.
This is a highly specific aesthetic that requires commitment from every other element in the room: the towels, the accessories, the lighting, the tile. A Japanese-influenced vanity in a bathroom with chrome fixtures, patterned wallpaper, and a conventional mirror reads as a single imported element rather than a cohesive design direction.
22. A Floating Vanity with Push-to-Open Drawers

A handleless floating vanity — with push-to-open mechanism or an integrated finger-pull channel rather than visible hardware — creates the cleanest possible cabinet face and suits bathrooms designed around visual calm and reduced detail. The absence of knobs, pulls, or bars removes the hardware finish decision entirely, which simplifies the room’s material palette.
Push-to-open mechanisms work reliably on drawer applications but can be less satisfying on door applications — the mechanism that opens a cabinet door often requires a slight push before the door springs open, which some people find awkward in daily use. Drawers feel more natural with push-to-open than doors.
The integrated finger-pull (a routed channel along the top or side edge of each drawer) provides a more tactile opening experience and doesn’t rely on a mechanical spring mechanism. For a floating vanity that sees daily heavy use, the integrated channel often proves more durable than a push-to-open mechanism over a five-to-ten-year horizon.
23. A Floating Vanity with Terrazzo Tile Countertop and Integrated Basin

An integrated basin — where the sink and the countertop are a single continuous piece rather than a countertop with a separately installed sink — is one of the most functionally elegant floating vanity configurations. There are no sink-to-countertop joints to collect mold, no caulk lines to maintain, and no transition between materials that can separate over time.
Terrazzo tile — small chips of stone or glass set in a resin or cement matrix — as the countertop and basin material creates one of the most visually distinctive integrated configurations. The basin interior and the countertop surface are the same material, which reads as architecturally resolved in a way that a standard white ceramic basin on a stone countertop cannot replicate.
This configuration is typically custom or semi-custom rather than off-the-shelf, which affects cost and lead time. For a bathroom where the vanity is the primary investment and the surrounding elements are intentionally quieter (plain white tile, simple lighting, frameless mirror), the integrated terrazzo basin creates a focal point that justifies the additional cost and planning time.
What to Know Before Installing a Floating Vanity
Beyond the visual and material decisions, a few practical considerations determine whether a floating vanity installation goes smoothly or becomes a problem.
Wall structure is the critical first step. A floating vanity needs to anchor to wall studs, structural blocking, or appropriately rated anchors — not simply into drywall. A standard floating vanity with a stone countertop can weigh 150 to 300 pounds or more. Anchoring into drywall alone will fail. Have a plumber or contractor assess the wall before purchasing the vanity.
Plumbing rough-in location determines installation options. The supply lines and drain rough-in in the wall need to align with the vanity’s internal plumbing access. A floating vanity that doesn’t align with the existing rough-in requires moving the plumbing — which is possible but adds cost. Measure the rough-in height from the finished floor and the horizontal position of the drain before specifying the vanity.
Mounting height is a genuine choice. Standard floating vanity height is 32 to 36 inches from the floor to the countertop surface. Raising this to 36 or even 38 inches suits taller households and reads as more contemporary. Lowering to 30 to 32 inches is appropriate with a vessel sink (which adds height) or in a Japanese-influenced aesthetic. The height should suit the primary users of the bathroom rather than defaulting to a standard specification.
The open floor area needs to be finished. The floor beneath a floating vanity is fully visible and should be tiled or finished to the same standard as the rest of the bathroom. An area of unfinished or differently tiled floor beneath a floating vanity reads as an oversight and partially defeats the visual purpose of the floating format.
Final Thoughts
The floating vanity earns its place in bathroom design because it solves real problems — limited floor space, difficult-to-clean under-cabinet areas, dated aesthetics — while opening up genuine design possibilities. The floor-to-ceiling visual continuity it creates is difficult to replicate with any other bathroom furniture choice.
Among the 23 ideas here, the ones that provide the strongest combination of visual impact, practical durability, and versatility across bathroom sizes and styles are the natural oak floating vanity with a frameless full-width mirror (Ideas 3 and 18 combined), the handleless white lacquer single or double unit (Ideas 8 and 22), and the floating vanity with integrated LED underlighting (Idea 17). All three suit a range of aesthetics, hold up under daily bathroom use, and photograph and live well simultaneously.
If you’re choosing for a small bathroom, prioritize Ideas 1, 6, and 8 — the configurations specifically designed to maximize visual space without compromising storage. If you’re renovating a primary bath with generous wall length, Ideas 5, 10, and 18 create the most complete and architecturally resolved result.
Save the ideas that suit your bathroom’s size and direction, and return to the practical section when you’re ready to begin the installation planning.