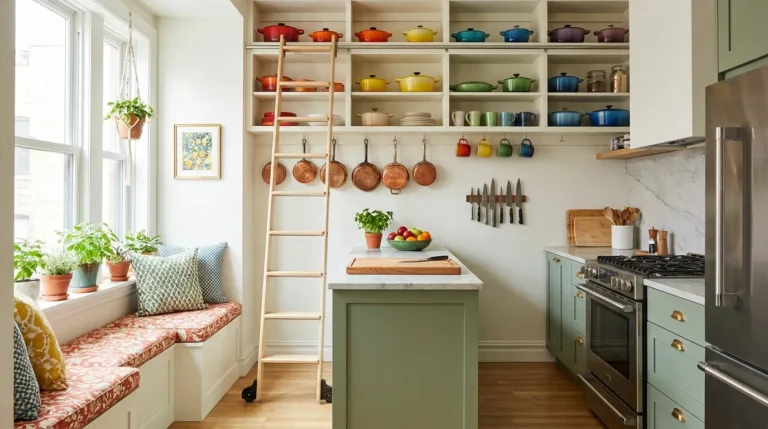
20 Rolling Kitchen Cart Ideas That Work Hard in Small Kitchens
A rolling kitchen cart is one of the most genuinely useful additions available to a small kitchen — not because it replaces a permanent island but because it does something a permanent island can’t: it goes where the work is. A cart can serve as a prep surface during cooking, roll to the dining table for serving, retreat to a corner when guests arrive, and double as a coffee station on Sunday mornings. Its flexibility is the point.
The challenge most people run into isn’t finding a cart — the market is full of them — but choosing one that actually matches how the kitchen is used, fits the available clearance without blocking circulation, has the right surface for the intended prep work, and looks like a considered design choice rather than a substitute for a real island. These 20 ideas work through every meaningful variation: material, size, storage configuration, surface type, and the styling decisions that determine whether a cart reads as a functional tool or a genuinely designed part of the kitchen.
1. Choose a Butcher Block Top for a Genuine Prep Surface

The surface material determines what a cart can actually do, and butcher block — solid edge-grain or end-grain wood — is the one material that earns a rolling cart a place in a serious cooking kitchen. It’s thick enough to absorb knife contact without damage, warm enough to work with as a prep surface for hours, and forgiving enough to develop character with use rather than deteriorating. A cart with a genuine butcher block top is a prep surface; a cart with a thin wood laminate top is storage with a flat lid.
A wood top kitchen island cart is a cost-friendly alternative to a true butcher block — though the real butcher block earns its higher price through durability and genuine knife-friendliness. The distinction matters for maintenance as well: genuine butcher block needs occasional oiling with food-safe mineral oil to prevent drying and cracking; wood veneer or laminate tops need protecting from moisture and heat that would ruin them quickly under active kitchen use.
2. Match the Cart Width to 30 Percent of the Kitchen’s Shortest Aisle

The most common rolling cart mistake isn’t the wrong style or the wrong material — it’s the wrong size for the available kitchen clearance. A cart placed in a kitchen aisle needs to preserve at least 36 inches of clear passage on all sides for safe single-cook movement; 42 to 48 inches is preferable when two people share the kitchen. A cart that reduces any aisle below 36 inches doesn’t just feel cramped — it creates genuine circulation problems and safety concerns around a hot stove.
Measure the shortest aisle in the kitchen before purchasing anything. Subtract 36 inches minimum (42 preferred) from that measurement to find the maximum cart width that can be parked in that position without blocking movement. In kitchens with very narrow aisles — common in apartments and small homes — this calculation often reveals that the available cart width is 18 to 24 inches rather than the 30 to 36 inches that most marketed kitchen carts target. The right cart is the one that fits within this clearance rather than the one that looks most proportionally satisfying in a product photo.
3. Use the Cart as a Movable Island in a Galley Kitchen

Galley kitchens — two parallel runs of cabinets with an aisle between them — have no natural island position because the aisle is the kitchen’s only work path. A rolling cart in a galley kitchen solves this problem by positioning itself at one end of the aisle during prep, closing the galley temporarily but providing additional counter space, then rolling to the side or out of the kitchen entirely when the aisle needs to be clear for circulation or serving.
The islands come on wheels, and you can scoot them around the kitchen as needed — which is precisely the use case that distinguishes a rolling cart from any fixed storage solution. In a galley kitchen, the cart’s ability to be repositioned throughout the cooking and serving sequence makes it more useful than a permanent island that would consume the aisle permanently. A cart with locking wheels is particularly important in this configuration — the lock should engage securely enough that the cart doesn’t move when force is applied during active prep. Taste of Home
4. Select a Drop-Leaf Cart to Double Counter Space When Needed

Consider whether you’ll need a drop leaf for even more countertop space — the answer for most small kitchens is yes. A drop-leaf cart has one or two hinged leaves that fold down flush with the cart body when not in use, reducing the cart’s footprint to its minimum width, and fold up horizontally when additional counter space is needed, extending the usable surface by 8 to 12 inches on one or both sides. Wayfair
The practical benefit in a small kitchen is substantial: a cart that’s 24 inches wide with one 10-inch drop leaf can become 34 inches wide for holiday prep and shrink back to 24 inches for a regular Tuesday. The leaf support mechanism — typically a hinged bracket or sliding rod — should be rated for the weight of the prep activities planned, since a leaf that flexes under a mixing bowl is effectively unusable as a prep surface. A drop-leaf cart also converts to a casual breakfast bar for two when paired with counter-height stools on the leaf side.
5. Use Locking Wheels That Actually Lock on Every Wheel

Locking wheels seem like a detail, but in active kitchen use they determine whether the cart functions as a stable work surface or as a frustrating rolling obstacle that slides away from pressure. The distinction between good and poor wheel locking is visible immediately: a properly locked wheel on a quality cart holds under significant lateral force; an inadequate wheel lock on a cheaper cart releases under the pressure of spreading butter or kneading dough.
Quality kitchen carts have locking mechanisms on all four wheels, not just two. Two-wheel locking leaves the cart able to pivot around the two locked wheels when force is applied off-center — a rocking quality that makes stable prep difficult. Locking on all four wheels eliminates that pivot and makes the cart functionally stationary when locked. For renters who use the cart as the kitchen’s primary island, this stability quality is the difference between a solution that genuinely works and one that requires constant repositioning.
6. Choose Stainless Steel Tops for Baking and Pastry Work

For kitchens where significant baking and pastry work happens, a stainless steel top cart provides the cool, hard, non-porous surface that pastry work specifically benefits from. Stainless remains significantly cooler than wood during kitchen use, which helps keep butter and dough at the right temperature for laminated pastry and rolled cookie work. It’s also completely non-porous — it won’t absorb food odors, stains, or bacteria the way wood does — and it cleans completely with a damp cloth after raw meat or flour contact.
The trade-off: stainless is loud under knife contact, scratches more visibly than wood, and has a more industrial visual quality that suits commercial and contemporary kitchen aesthetics more naturally than traditional or farmhouse ones. For kitchens where the primary counter use is baking rather than general prep, stainless is the functionally superior choice despite its visual specificity.
7. Style the Cart With Closed Cabinet Storage Below for a Cleaner Look

Rolling carts come in two fundamental storage configurations: open shelving below the prep surface, or closed cabinet doors with a shelf or drawers behind them. Open shelving is cheaper, provides easier accessibility, and suits kitchens where the stored items are visually consistent — matching cookware, beautiful ceramics, or neatly arranged pantry items. Closed cabinet storage is slightly more expensive, provides visual containment for the inevitable mix of practical kitchen items that don’t benefit from being seen, and makes the cart read as furniture rather than utility shelving on wheels.
The cabinets and drawers have proven to be incredibly useful by housing more glassware and trays than most people imagine, and a hook on the side handles kitchen towels — which describes the closed-cabinet cart’s specific advantage: it holds significantly more than its physical footprint suggests because the enclosed interior can be organized with dividers, trays, and bins that maximize every cubic inch behind the doors. Taste of Home
8. Add a Cart Specifically for Appliance Storage and Coffee Station

Not every rolling cart in a kitchen serves as an island. A smaller cart positioned against a wall specifically to hold and power appliances — a coffee maker, a toaster, an electric kettle — solves a specific small-kitchen problem: limited counter space for everyday appliances that need to be accessible without permanently occupying the main prep counter.
One tester uses the rolling cart for an ice maker and espresso machine — the cart works really well as a coffee cart or for extra storage even if the top isn’t ideal for heavy prep work. The cart’s mobility allows it to be pulled forward when the appliance is in use and returned against the wall when the kitchen needs the open floor area. A power strip mounted to the cart’s side or undersurface — or a cart with a built-in outlet — means appliances can be used at the cart’s position without searching for a wall outlet. Pinterest
9. Use a Narrow Cart as a Pantry Supplement in a Kitchen With Limited Cabinet Space

Some small kitchens don’t lack counter space as much as they lack vertical storage space — the cabinet runs are short, the pantry is inadequate, and dry goods, appliances, and kitchen tools share the counter surface because there’s nowhere else for them. A narrow cart with multiple open shelves rather than a single prep surface addresses this storage deficit by adding vertical shelving that rolls to wherever the space is available.
A cart in the 12- to 18-inch width range with three to four open shelves can hold a substantial pantry collection — canned goods, pasta, coffee and tea supplies, cereal boxes — while fitting into gaps between appliances, beside a refrigerator, or at the end of a counter run where a wider cart would interrupt circulation. This cart type prioritizes storage depth and shelf capacity over work surface area, which suits kitchens where the prep surface deficit is less pressing than the storage deficit.
10. Choose a Cart With a Built-In Towel Bar and Side Hooks

The auxiliary features on a rolling cart determine how well it integrates into the daily kitchen routine rather than sitting unused in a corner. A towel bar on the cart’s side handles the kitchen towel that’s needed within arm’s reach during any prep session — a towel that currently lives on the oven handle, the counter edge, or the shoulder can live on the cart where it actually belongs. Side hooks extend this organization to other small items: a silicone brush, a timer, a small colander.
Many of the best rolling kitchen islands offer towel bars and spice racks on the outside for easy access to go-tos — these small features are the ones that determine whether a cart functions as a passive piece of furniture or as an active extension of the kitchen’s workflow. A spice rack on the cart’s end panel keeps the most-used spices within reach of the prep surface rather than requiring a trip to the spice cabinet mid-recipe.
11. Convert a Rolling Cart Into a Dedicated Baking Station

A kitchen where baking happens regularly — weekly bread, regular cookie batches, frequent pastry work — benefits from a dedicated baking cart that keeps everything baking-specific organized and ready without the setup and teardown that using the main prep counter requires. The rolling function is key: the baking cart parks beside the stand mixer when in use and rolls to the side or another room when baking isn’t happening.
The ideal baking cart combines a cool, smooth prep surface (marble or stainless) with deep drawers for baking tools, a lower shelf for stand mixer storage when not on the counter, and a side hook or small rack for the most-used measuring cups and spoons. This configuration doesn’t need to be expensive — a serviceable baking station can be assembled from a rolling cart with an appropriate surface and simple organizers in the drawer and shelf sections.
12. Use a Drop-Leaf Cart With Nested Stools as a Kitchen Dining Solution

In studio apartments and very small homes where a separate dining table isn’t practical, a rolling cart with a drop-leaf extension and nested stools serves as both a prep island and a kitchen dining surface simultaneously. The cart’s compact footprint during cooking expands when the leaf is raised to accommodate two seated diners, and the stools nest under the cart when the dining function isn’t needed.
A drop-leaf island can transform into an inviting breakfast bar for two in seconds — when it’s not in use you can tuck it out of the way and lock the wheels, and some models come with stools that can be nested inside the cart when not in use. This two-in-one use case is the most space-efficient configuration available for kitchens that need both prep counter and dining surface without the floor area for two separate pieces of furniture.
13. Position a Cart as a Dedicated Coffee and Tea Bar

A rolling cart positioned against a kitchen wall or in a corner, styled as a dedicated coffee and tea station, is one of the most visually compelling small-kitchen cart applications — and one of the most practical. Coffee equipment, tea collections, mugs, filters, and the morning routine paraphernalia that typically clutters the main counter moves to the cart, which clears the prep surface and creates a contained morning ritual zone.
The coffee bar cart works particularly well in kitchens that open to a living area or dining room — the cart can be positioned at the kitchen-living room boundary where it’s accessible from both spaces. Styling matters for a coffee cart: matching mugs, a small plant, a tray organizing the most-used items, and the coffee equipment arranged by height — shorter items at the front, tall French press or pour-over kettle at the back — create the composed, intentional quality that elevates the cart from a utility piece to a design feature.
14. Style a Cart as a Bar Cart for Entertaining

A rolling kitchen cart used as a bar and entertaining cart — holding a wine rack, glassware, a cocktail shaker, and a small ice bucket — converts the kitchen’s most flexible piece of furniture into an entertainment tool that rolls to wherever the party is: the kitchen, the living room, the patio. The cart’s mobility means it can travel with the gathering rather than requiring guests to return to the kitchen for refills.
The bar cart configuration requires a wine rack insert or lower shelf designed for bottle storage (horizontal storage keeps corks moist), a surface area for mixing and setting glasses, and a hook or small rack for bar tools. Some rolling kitchen carts are specifically designed with wine storage integrated; others accommodate a purchased wine rack that sits on the lower shelf. The surface should be resistant to liquid rings — sealed wood, stainless, or a stone-look surface — since a bar cart sees more liquid contact than any other kitchen use.
15. Use a Steel Frame Cart for Industrial or Contemporary Kitchens

A rolling cart with a powder-coated steel frame — rather than a wood-bodied cabinet on casters — has a visual language that suits industrial, contemporary, and loft-style kitchen aesthetics more naturally than wood-forward designs. The steel frame is visibly structural: the shelves sit between exposed vertical supports rather than being enclosed in a cabinet body, which creates an airy, open quality that reads as modern and intentional.
The steel frame cart is typically lighter in actual weight than a solid wood cabinet cart despite its visual strength, which makes it genuinely easy to move — a benefit in small kitchens where the cart is repositioned frequently throughout the day. The open shelf configuration is the default for steel frame carts, which suits kitchens where the stored items are visually consistent (matching cookware, stacked cutting boards, organized pantry items) rather than a practical mix that benefits from concealment.
16. Add Baskets to Open Cart Shelves for Contained, Organized Storage

A rolling cart with open lower shelves is more visually versatile than it first appears when baskets are added to the shelf levels. Baskets contain the practical kitchen items — extra towels, cleaning supplies, produce, bread — that don’t look considered when displayed on an open shelf without containment. The basket material connects the cart to the kitchen’s overall material palette.
Woven seagrass or rattan baskets on a wood-bodied cart read as organic and warm. Wire baskets on a steel frame cart read as consistent with the cart’s industrial register. Solid linen bins on a painted cart read as more refined and considered. The basket should fit the shelf depth with enough clearance to be removed easily — a basket that fits perfectly flush with the shelf edge catches on the shelf lip during every use, which defeats the purpose of easy-access open storage.
17. Build a DIY Cart With a Butcher Block Top and Hairpin Legs on Casters

The DIY rolling cart is the most cost-effective route to a genuinely good butcher block prep surface in a small kitchen. The construction is straightforward: a butcher block cut to the desired dimensions, mounted to a base frame (which can be as simple as two wooden end panels connected by a stretcher), fitted with hairpin legs that accept screw-in casters at the base rather than fixed feet. The total material cost for a 30-by-20-inch cart is considerably lower than any comparable retail product.
The casters chosen for a DIY cart should match the load requirements — the butcher block’s weight alone can reach 30 to 50 pounds for a medium-sized piece, and the full loaded cart must be within the casters’ weight rating. Swivel casters on all four positions with a brake mechanism on two of the four provides the combination of mobility and stability that most kitchen carts require. The butcher block surface should be finished with food-safe mineral oil before use.
18. Paint or Stain a Basic Cart to Match the Kitchen’s Cabinet Color

A basic retail rolling cart — the kind available inexpensively at most furniture and home goods stores in a raw wood or generic white finish — can be elevated significantly by painting or staining it to match or complement the kitchen’s existing cabinet color. A cart painted in the same forest green, navy, or warm white as the kitchen’s cabinets reads as an intentional design extension of the kitchen rather than a piece of furniture that was added later.
This is one of the most effective ways to make a rolling cart look like a permanent design decision in a kitchen that can’t accommodate a built-in island. The cart’s wheels are the only visual cue to its mobility — everything else reads as part of the room’s design language when the finish is coordinated. Chalk paint or a milk paint in a matte finish works well for this application because it adheres to most surfaces without extensive prep and produces the flat, considered quality that matches most kitchen cabinet finishes.
19. Style the Cart Top as a Composed Surface, Not a Landing Zone

Rolling carts in active kitchens accumulate the same way any horizontal surface does: items land there and stay. A cart whose top surface reads as a landing zone rather than a composed prep surface communicates disorder even when the rest of the kitchen is clean. Treating the cart top as a styled surface — with a consistent arrangement of the items that genuinely live there — converts it from a clutter magnet into the kitchen’s most designed horizontal plane.
A cart top styled for daily use might hold a cutting board propped against the back (the same board used for prep, stored where it belongs), a small ceramic bowl for salt, a plant or herb in a pot at one end, and a ceramic tray that corrals the small items that need to be accessible. This arrangement has a clear visual logic: everything present is either functional or considered, and nothing is simply there because it landed. The cart looks the same after cooking as it did before — a quality that makes it read as a permanent, designed feature of the kitchen.
20. Lock the Cart in Position and Style It as a Permanent Island

For kitchens where the cart has found its ideal position — parked in the best clearance with adequate circulation on all sides — locking the wheels and styling the cart as a permanent island is the most visually effective use of the piece. The best rolling kitchen islands have locking wheels to keep them in place when used as fixed prep surfaces, and a cart that stays in one position develops the same visual role as a permanent island: it anchors the kitchen’s spatial organization and provides a consistent reference point for meal preparation.
The styling of a permanently positioned cart differs from a frequently moved one. The permanently positioned cart can hold larger items — a fruit bowl, a plant in a heavier pot, a larger cutting board arrangement — that would need to be cleared for repositioning. It can also be connected to the kitchen’s visual composition more deliberately: a matching pendant light hung above it, a rug positioned beneath it, and items around it arranged in relationship to its fixed position. In this configuration, the rolling function becomes an emergency feature rather than a daily use case.
Choosing the Right Rolling Cart for Your Kitchen
Three decisions determine whether a rolling kitchen cart genuinely improves the kitchen or adds frustration:
Surface material matched to use. Butcher block and end-grain wood suit general prep and knife work. Stainless steel suits baking and pastry. Marble inserts suit pastry work in hot kitchens. Painted wood or laminate suits light use, styling, and storage but not active knife contact. Match the surface to the primary use before any other consideration.
Width matched to available clearance. Measure the narrowest aisle the cart will occupy and confirm 36 inches of clearance (42 preferred) remains on at least one side with the cart in its primary position. A cart that compromises kitchen circulation creates a problem larger than the problem it was purchased to solve.
Storage type matched to the kitchen’s specific deficit. A kitchen short on prep counter space needs a cart with a quality top surface. A kitchen short on storage needs a cart with closed cabinet doors and drawers. A kitchen short on appliance landing space needs a cart with open shelving and outlet access. Identify the deficit first, then find the cart that specifically addresses it.
Final Thoughts
A rolling kitchen cart is one of the best small-kitchen investments available precisely because it addresses multiple problems simultaneously — prep space, storage, appliance landing, dining surface — without requiring any structural change to the kitchen itself. For renters especially, it’s the closest thing available to a genuine kitchen island without any commitment beyond a floor space decision.
The ideas here span the full range of cart uses — from an active prep island in a galley kitchen to a dedicated coffee bar to a styled appliance station to a DIY butcher block build — each with the material, size, and styling specifics that determine whether the cart actually solves the intended problem.
Start with the clearance measurement. Then identify the kitchen’s single most pressing deficit — counter space, storage, appliance home, or dining surface. Choose the cart idea from this list that addresses that specific deficit most directly. Everything else — styling, color, material finish — is refinement on top of a sound functional decision.
Save the ideas here that match your kitchen’s layout and come back to this guide when the refinement stage begins.