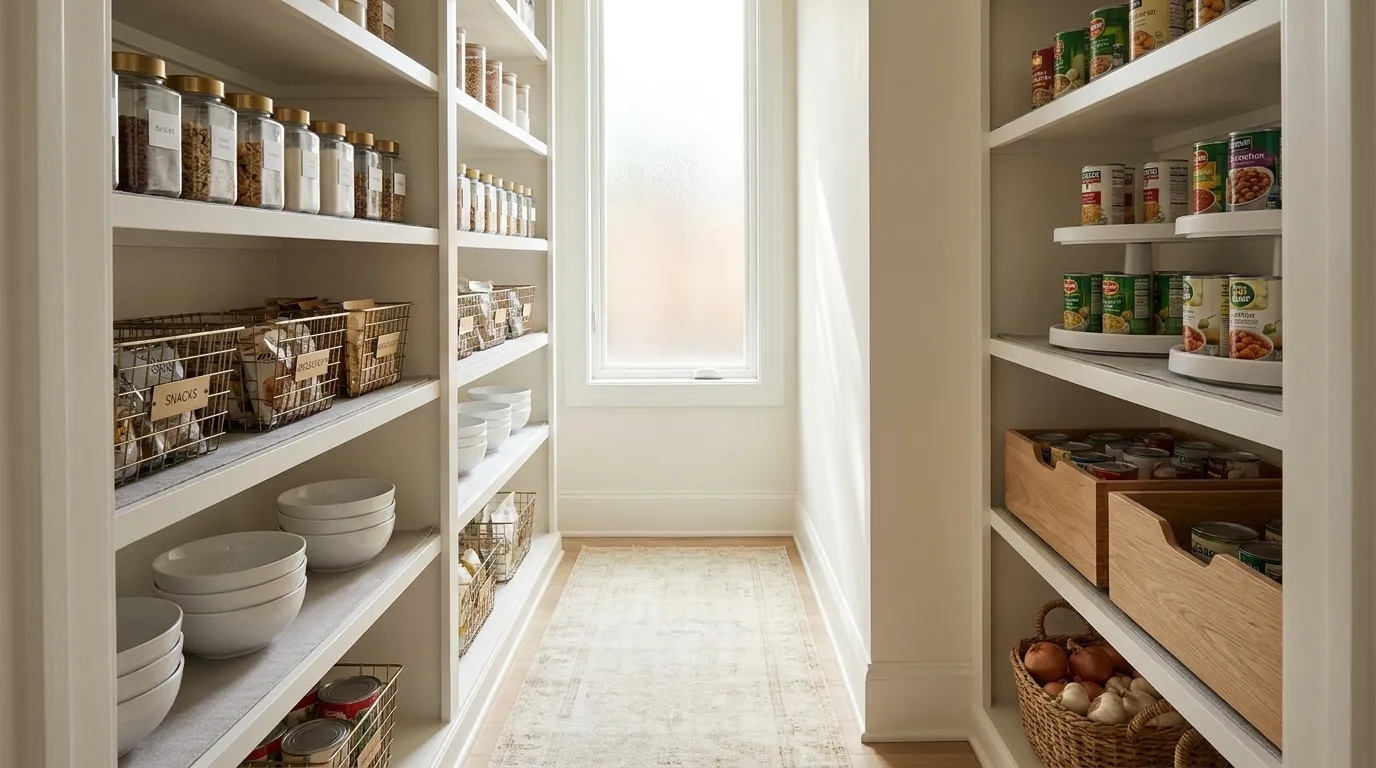
20 Pantry Organization Ideas That Actually Reduce Kitchen Clutter
A disorganized pantry isn’t just visually frustrating — it quietly costs you money. Items get buried, duplicates accumulate, and ingredients expire unnoticed. The good news is that most pantry chaos follows predictable patterns, which means there are equally predictable ways to fix it.
This guide covers twenty ideas for a range of pantry sizes and types, from deep walk-in shelves to shallow reach-in cabinets. Some involve a small investment; others require nothing more than rethinking what goes where. For each idea, the goal isn’t just to show you what looks good — it’s to help you understand why a particular approach works, whether it suits your space, and how to avoid the mistakes that make well-intentioned reorganizations collapse within a week.
Start by identifying where your pantry currently fails you. That friction point is usually where the biggest improvement lives.
1. Assign Zones Before You Buy a Single Bin
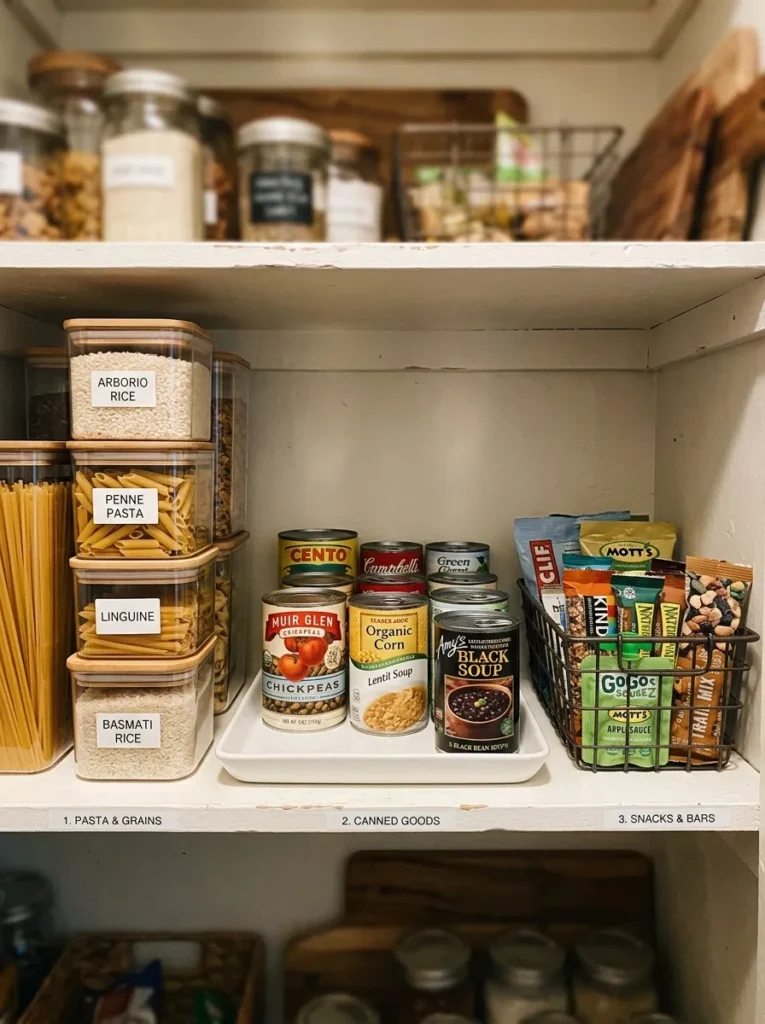
Most pantry reorganizations fail not because of the wrong containers, but because there was no plan before the shopping trip. Zones — dedicated areas for baking ingredients, snacks, canned goods, breakfast items, and so on — are the architecture everything else hangs on.
Sketch your pantry shelves on paper and assign one category per zone before purchasing anything. Consider frequency of use: items grabbed daily belong at eye level; seasonal baking supplies can live on higher shelves. Once zones are set, label the shelf itself, not just the containers. This way, when the system gets disrupted (and it will), it’s immediately obvious where things should return. The zone plan also prevents the common mistake of buying fifteen matching containers and then discovering there’s nowhere logical to put half of them.
2. Decant Staples Into Clear, Uniform Containers
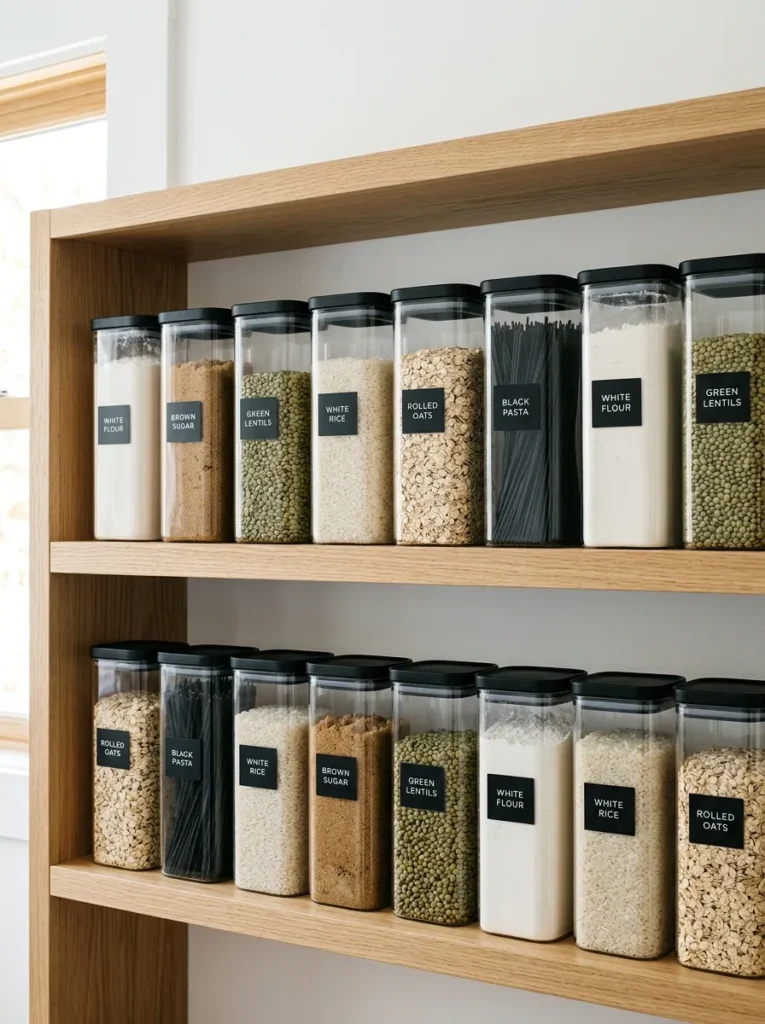
Transferring dry goods — flour, rice, pasta, oats, lentils — into matching clear canisters is one of the most visually transformative things you can do for a pantry. The practical case is equally strong: you can see exactly how much remains, airtight seals extend shelf life, and rectangular containers use shelf space more efficiently than the irregular shapes of retail packaging.
The mistake most people make is going too small. A standard 4-litre canister holds a typical bag of all-purpose flour with room to spare — buy that size rather than the decorative small ones. Before you commit to a canister system, measure your shelf depth. Canisters deeper than the shelf are a daily irritation. Wide-mouth openings also matter: narrow-neck containers look sleek but are awkward to scoop from and harder to clean. Keep the original packaging inside the canister or use a label maker to note the item and any specific cooking instructions you’d otherwise lose.
3. Use Pull-Out Drawers for Deep Lower Shelves
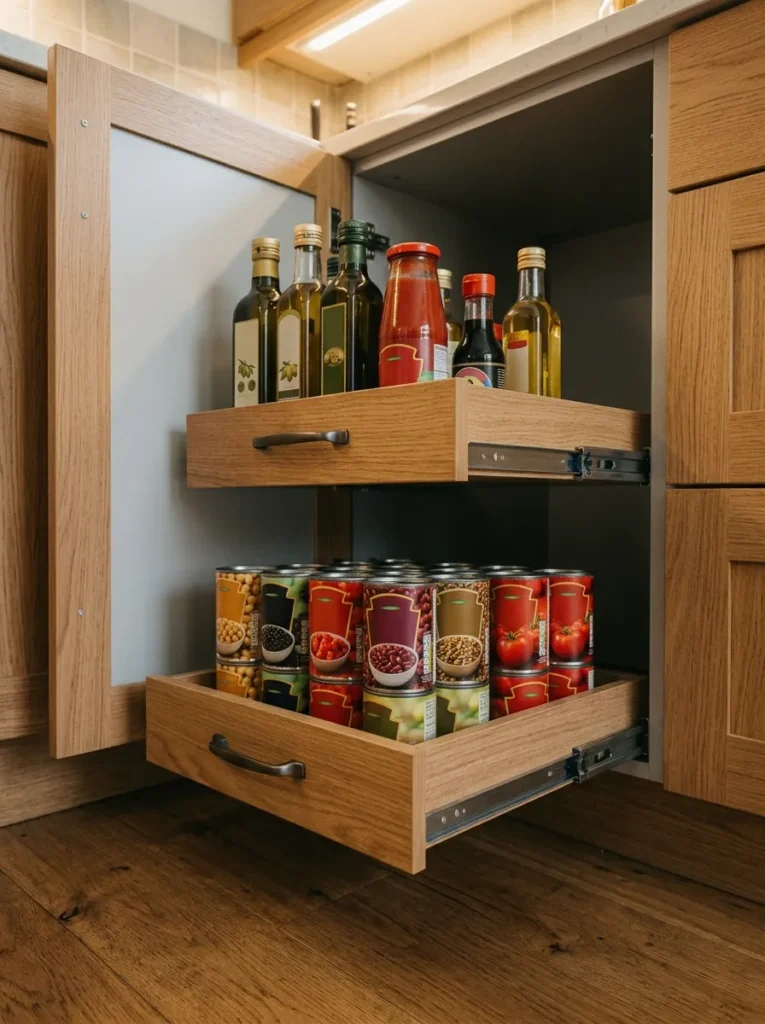
Deep lower shelves are where organization goes to die. Items pushed to the back become invisible, and the path of least resistance is stacking things in front of them. Pull-out drawers or sliding wire baskets solve this structurally: the entire shelf comes to you rather than requiring you to excavate.
This is especially valuable for canned goods, root vegetables, or bulky items like large olive oil bottles. Many pull-out organizers fit standard cabinet shelves without tools — look for models with adjustable width. For a walk-in pantry with fixed wooden shelving, freestanding rolling drawers can accomplish the same result without any installation. The one limitation: pull-out drawers require the shelf above to be high enough to allow the drawer to open fully without friction. Measure before buying.
4. Install a Spice Drawer or Tiered Spice Riser
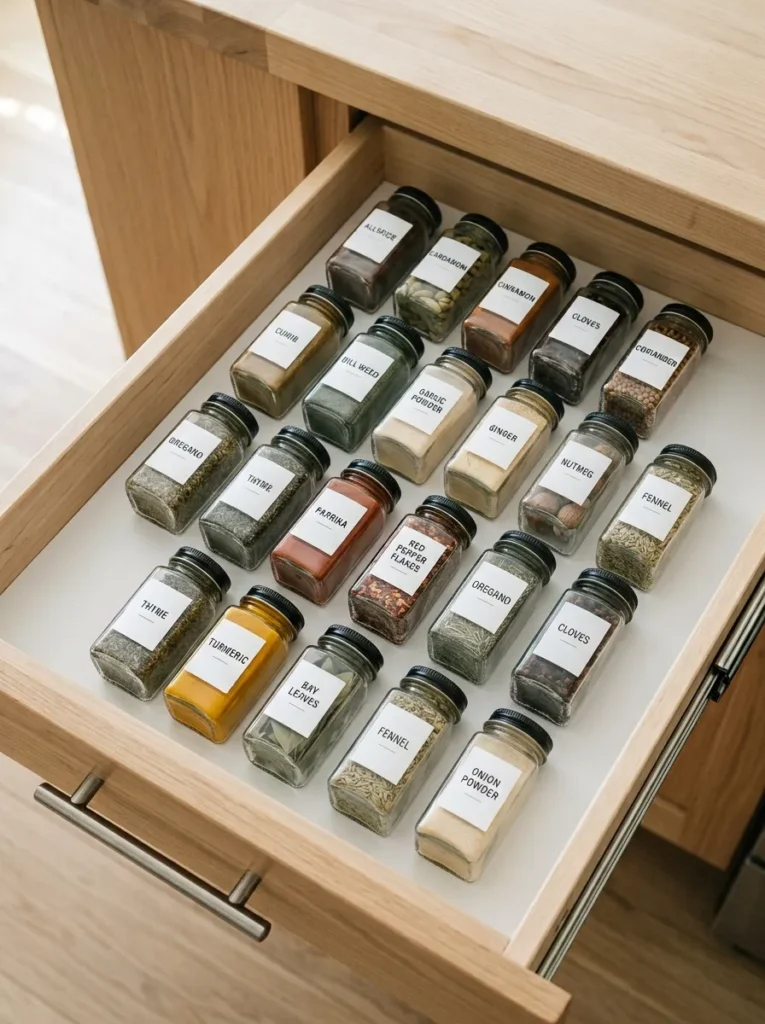
Spices are typically small, frequently used, and stored so that only the front row is visible — which means the back row effectively doesn’t exist. A tiered spice riser (a stepped shelf insert) solves this inside a cabinet or on a pantry shelf by raising the back row above the front, creating a clear sightline to every label at once.
If space allows, a dedicated shallow spice drawer is even more functional. Lay jars on their sides or flat with labels facing up — you can read every spice at a glance without lifting a single container. Either approach works best when jars are roughly the same height; a mix of tall and short jars undermines the effect. Decanting spices into matching jars is optional but makes the drawer significantly easier to navigate.
5. Group Canned Goods on a Rotating Lazy Susan
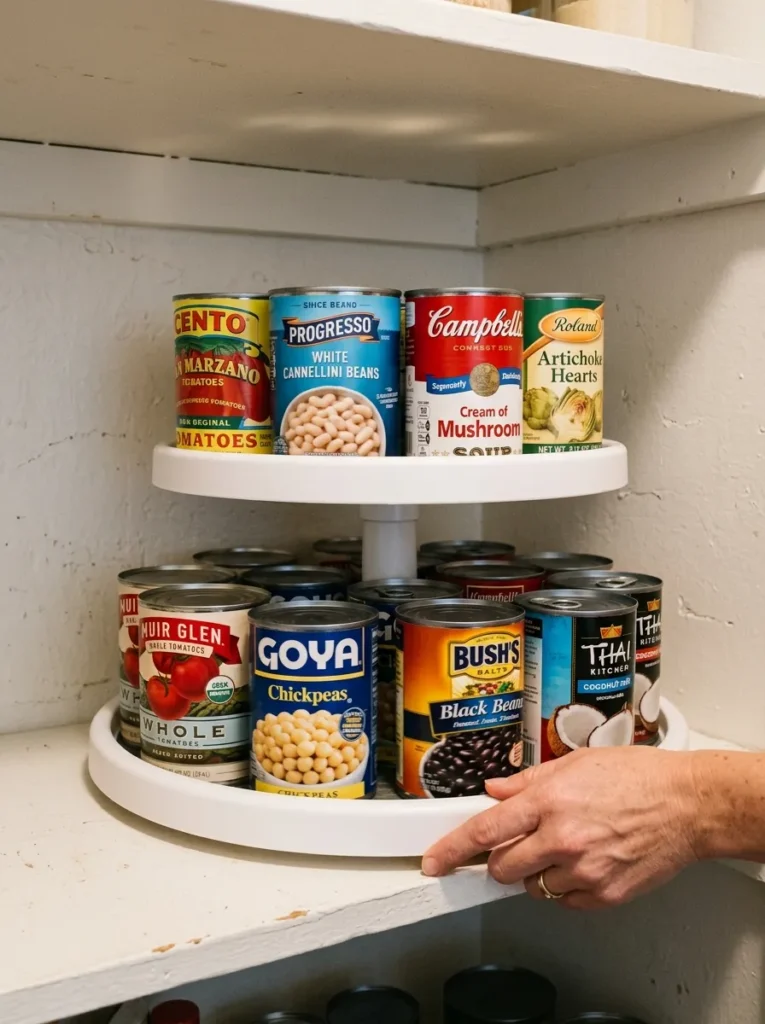
A lazy susan on a pantry shelf turns a static storage arrangement into a genuinely accessible one. Canned goods placed in a circle on a rotating turntable can all be accessed from the front of the shelf with a simple spin — no reaching to the back, no accidentally knocking things over to retrieve the one can you actually want.
The practical detail most guides skip: the lazy susan’s diameter matters more than any other specification. A turntable that’s narrower than your shelf depth wastes the space beside it; one that’s wider than the shelf depth is a problem on its own. Measure your shelf depth and width before buying. For pantries with three or more shelves of canned goods, a two-tier lazy susan doubles capacity without requiring additional shelf space.
6. Create a “First In, First Out” Canned Goods System
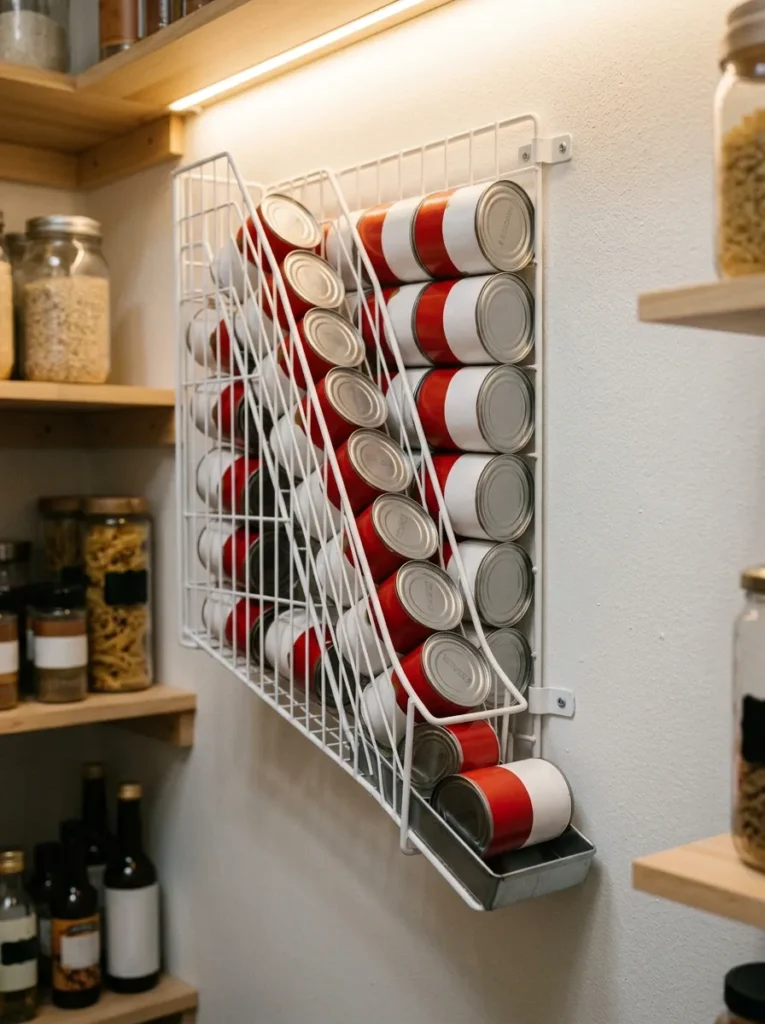
Even a beautifully organized pantry wastes food if rotation is ignored. The principle borrowed from commercial kitchens — first in, first out, meaning oldest items at the front — prevents the all-too-common discovery of a can of tomatoes that expired two years ago.
The simplest physical implementation is a can dispenser or gravity-fed rack: you load cans from the top, and the oldest can rolls to the front for retrieval. These racks stack and take up minimal floor or shelf space. For a less hardware-intensive approach, simply establish a front-to-back rule when restocking: new cans go behind existing ones, always. The discipline takes about thirty seconds to teach a household and significantly reduces food waste over time.
7. Hang a Door-Mounted Organizer for Small Items
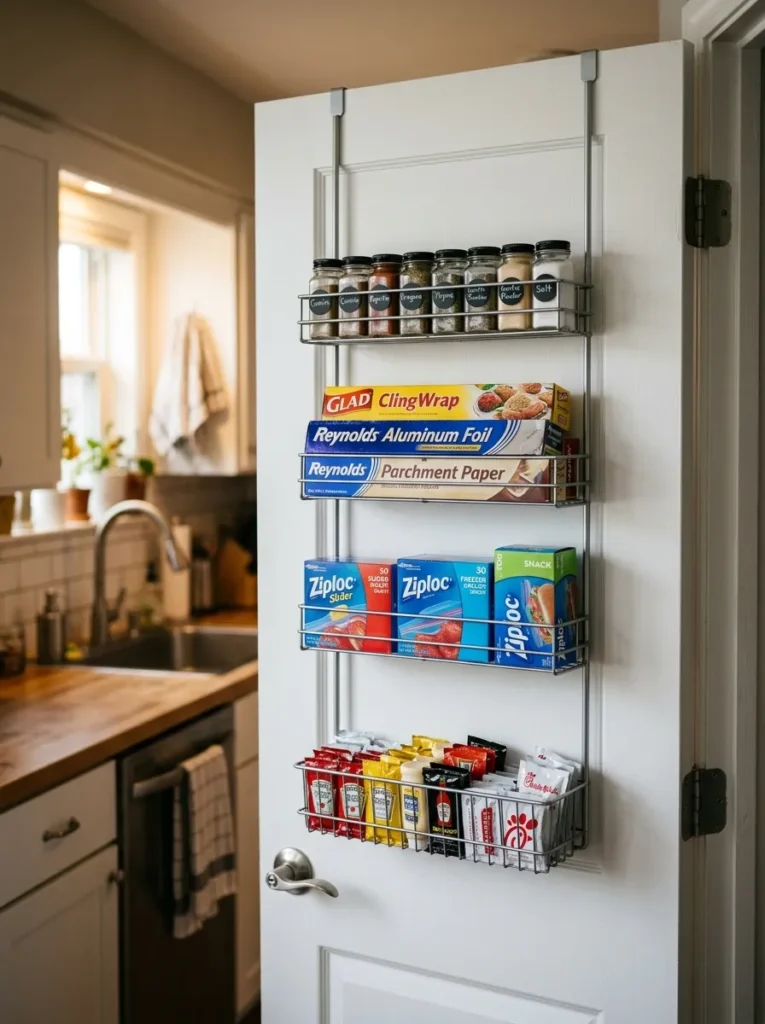
The inside of a pantry door is usable vertical real estate that most people leave blank. Door-mounted racks, over-door organizers with clear pockets, or slimline shelving units can hold spices, foil and cling wrap, snack pouches, small condiment bottles, or any category that tends to clutter the main shelves.
Check the clearance between your door and the nearest shelf before buying any door organizer. This gap varies significantly depending on how your pantry was built, and many door-mounted systems are deep enough to conflict with shelves when the door closes. A depth of 2–3 inches is generally safe, but measure your specific setup. Weight is also a consideration: heavier items on the door can cause it to sag over time on pantries with hollow-core doors.
8. Decant Snacks Into Open Bins by Category
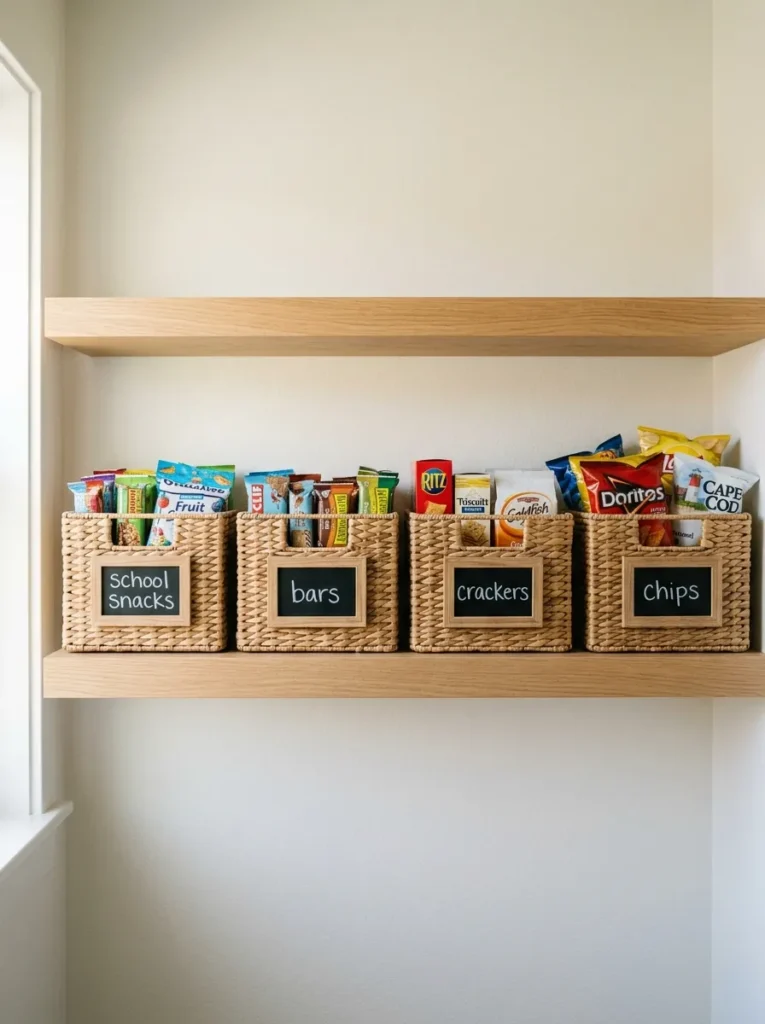
Snack organization works differently from pantry staples. Chips, crackers, granola bars, and dried fruit don’t always come in packaging that stacks or stores neatly, and the contents change frequently. Open bins or large baskets — one per snack category or household member — handle this better than decanting into rigid containers.
Label the bin rather than the item. “Kids’ snacks,” “grab-and-go,” and “afternoon snacks” are intuitive category names that make restocking and retrieval almost automatic. The important sizing note: bins that are too tall become a jumble where smaller packages disappear. A bin with a maximum height of about 6–8 inches keeps things visible without requiring a complete excavation to find the item at the bottom.
9. Use Shelf Risers to Double Up Short Items
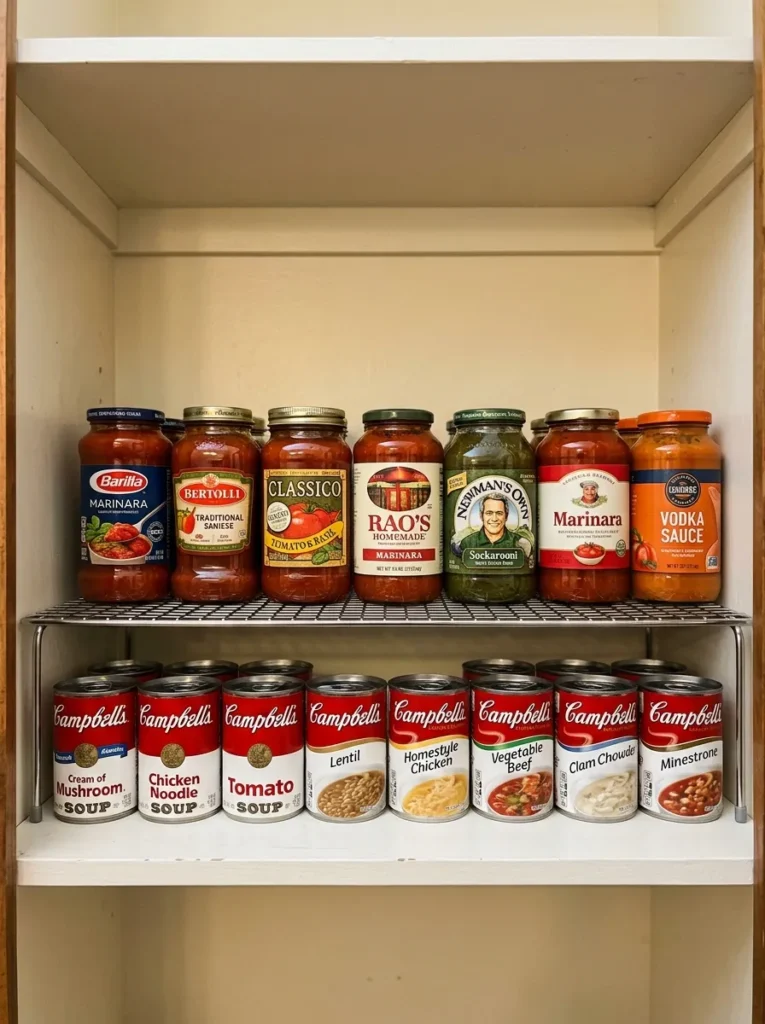
Standard pantry shelving is typically spaced for the tallest items, which means a shelf holding soup cans, sauce jars, or spice containers has a significant dead zone above every item. A shelf riser — essentially a small secondary shelf that sits on the main shelf surface — creates a second storage level within the same vertical space.
This works best with items of uniform, predictable height. A riser full of matching soup cans is tidy and functional; a riser of varied random items becomes a visual and organizational mess within days. Metal risers with open wire construction let you see what’s on both levels, which matters more than aesthetics — if you can’t see an item, it essentially disappears from your pantry inventory.
10. Dedicate a Shelf to Meal Prep Staging
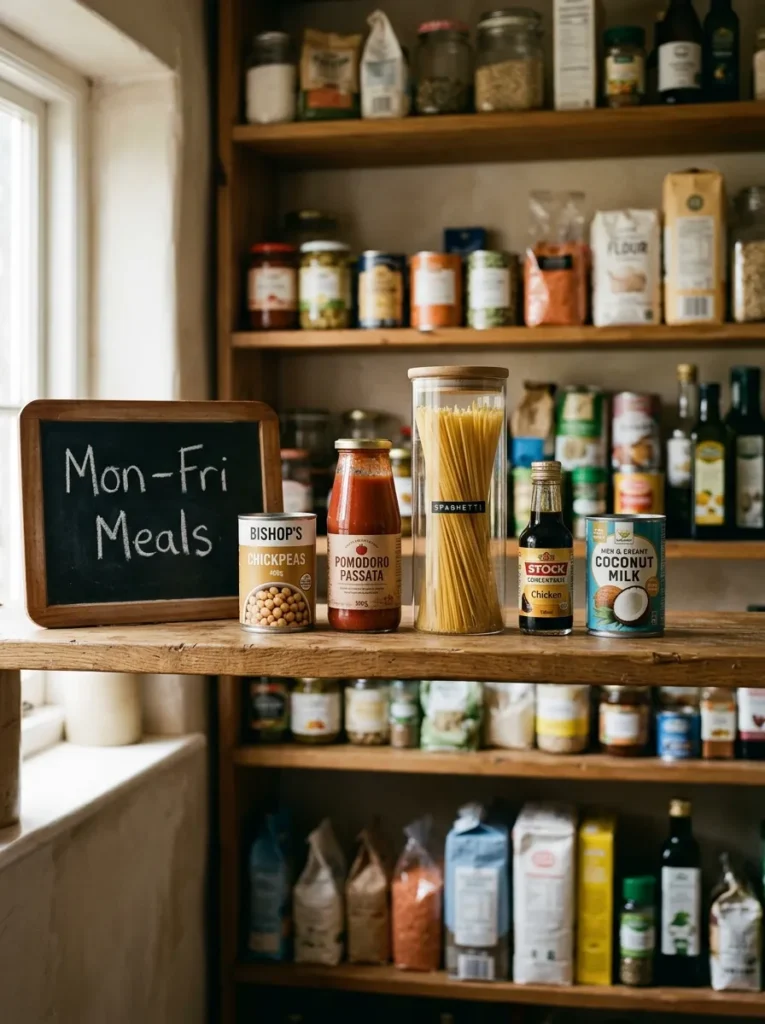
A meal prep shelf — one dedicated area stocked with the components of meals you actually plan to cook that week — dramatically reduces the “what’s for dinner” paralysis that turns kitchen time into a pantry expedition every evening.
The practical setup: after your weekly shop, pull the pantry items relevant to planned meals and group them together on a designated shelf. Pair them visually with a sticky note or small chalkboard listing the meals. This is less about the containers and more about workflow. The result is that you don’t have to mentally scan your entire pantry at 6pm when you’re tired. This idea works especially well in larger walk-in pantries where items can easily spread out and become disconnected from each other.
11. Label Everything — Including the Shelf Itself
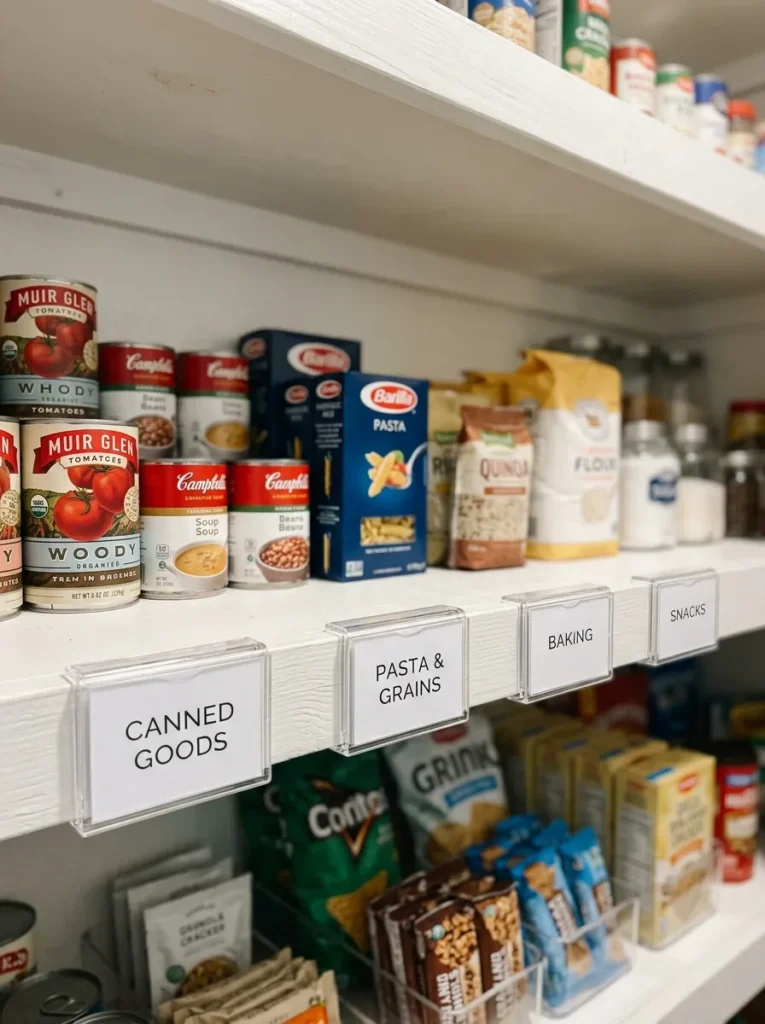
Labeling is the maintenance system of pantry organization. Without it, a well-organized pantry gradually reverts to its previous state as items are returned to the wrong location. Labels on containers help, but labels on the shelf itself — either adhesive labels directly on the shelf surface or small tags hung at the shelf edge — are what make a system self-correcting.
This is particularly important in shared households where multiple people put groceries away. When the correct location is visibly marked, there’s no ambiguity about where the pasta belongs. Chalkboard labels allow updates without replacing the label. For a cleaner look, small acrylic label holders clipped to the shelf edge are barely visible but serve the same function.
12. Store Oils, Vinegars, and Sauces at a Consistent Height Level
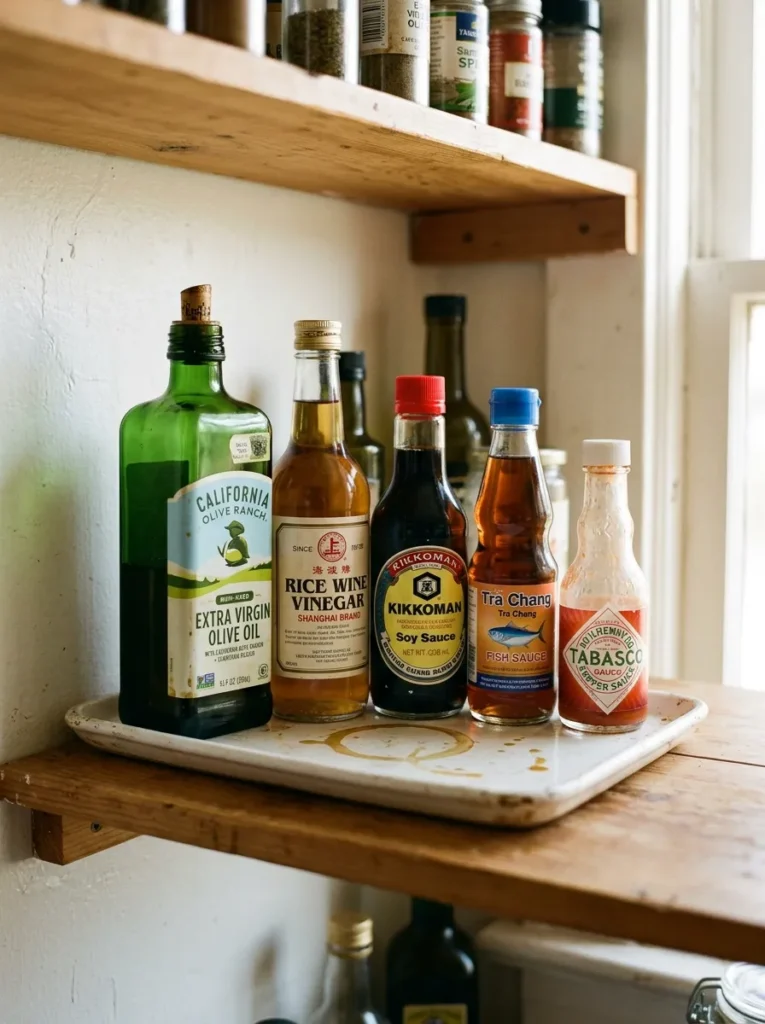
Cooking liquids — oils, vinegars, soy sauce, fish sauce, hot sauces — tend to be a chaotic mix of heights, shapes, and finishes. Grouping them by use rather than size, and storing them at a single level on a dedicated shelf, makes the pantry more intuitive to navigate while giving this section a more cohesive appearance.
A low-profile tray underneath these bottles serves two purposes: it contains any drips (and there will be drips), and it unifies the visual grouping even when bottle heights vary. Look for a tray with a slight raised edge — baking trays work well if you don’t want to buy a dedicated pantry tray. Grouping by cuisine style (Asian sauces, Mediterranean staples, baking acids) can be more useful than grouping by bottle type.
13. Use a Pegboard Wall for Frequently Grabbed Items
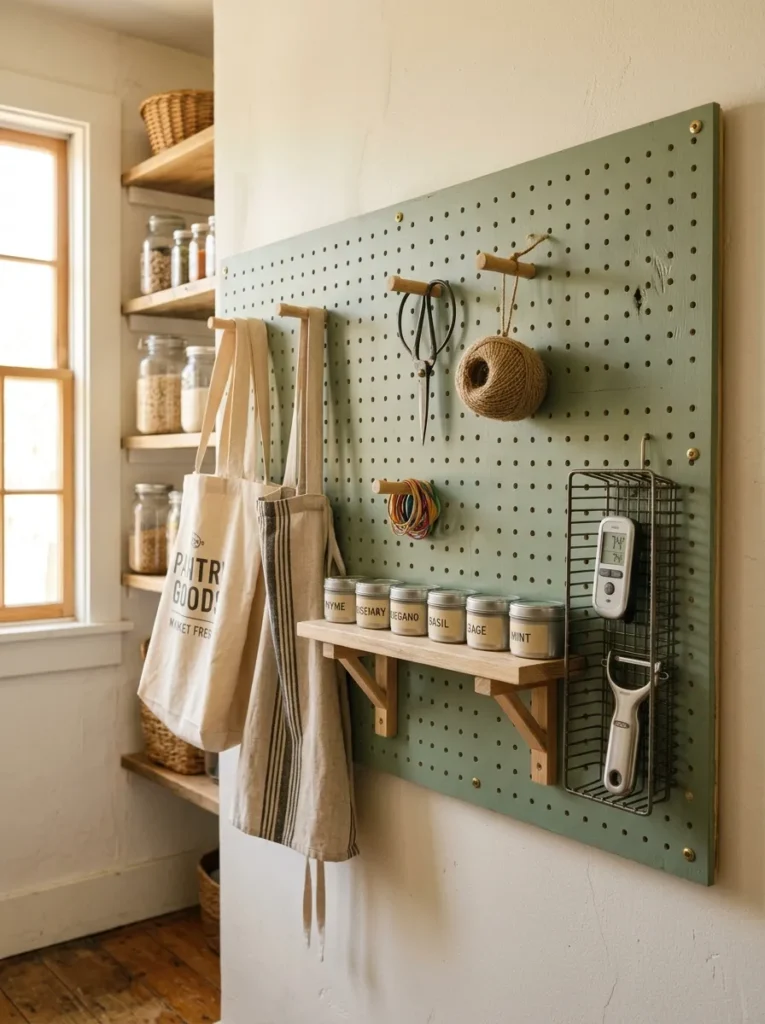
In a walk-in pantry with available wall space, a pegboard section — fitted with hooks, small shelves, and bins — creates flexible, visible storage for the items you reach for most. This might be reusable bags, kitchen scissors, frequently used dry herbs, small gadgets like an instant-read thermometer, or twine and rubber bands for food storage.
The advantage over shelf storage is that pegboard items are immediately visible from the pantry entrance, so you don’t need to walk in and scan shelves. The practical caution: pegboard only stays organized if every hook has a designated item. A pegboard with miscellaneous items hanging randomly becomes its own form of clutter. Spray painting the pegboard a single color before installing makes it look intentional rather than utilitarian.
14. Corral Plastic Bags and Wraps in a Single Drawer or Box
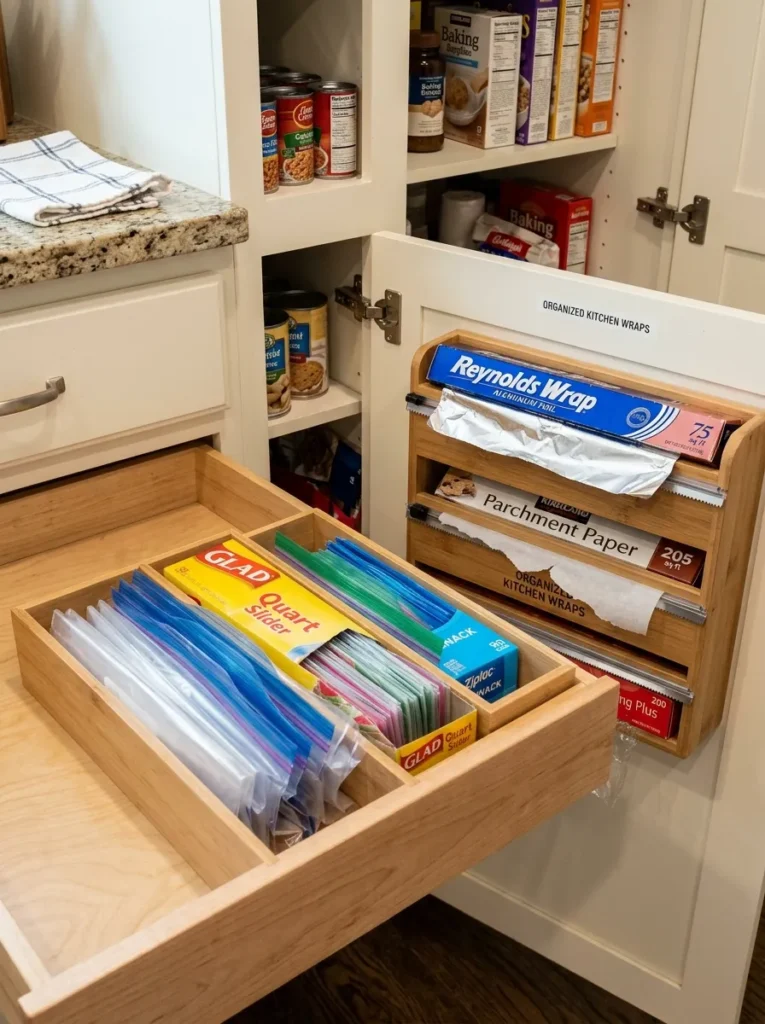
Plastic bags, cling wrap, parchment paper, aluminum foil, and zip-lock bags in various sizes are collectively one of the most reliably chaotic pantry categories. They’re awkward shapes, they tangle, and they tend to migrate out of whatever space was initially assigned to them.
A dedicated drawer for these items — or, in the absence of a drawer, a wall-mounted dispenser or a flat-sided bin — keeps them contained and accessible without consuming prime shelf space. Wrap dispensers with separate slots for foil, wrap, and parchment paper are particularly useful: they hold the box in place while you pull and cut, which is something the original packaging doesn’t do well. If you use plastic bags heavily, a simple bag holder mounted inside the door or on a wall keeps them from spreading.
15. Elevate Baking Supplies Into a Self-Contained Kit
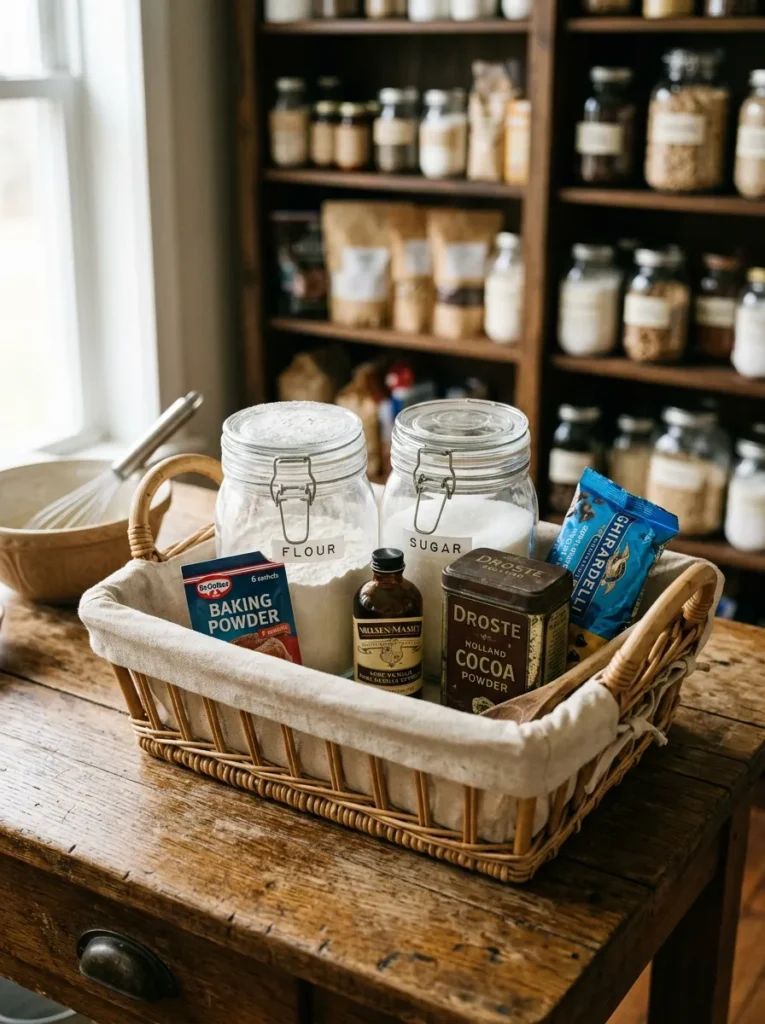
Baking supplies are used infrequently enough that they can share a shelf peacefully; the problem is that they’re spread across three shelves and two cabinets. Consolidating all baking-specific items — flours, sugars, leavening agents, extracts, chocolate chips, sprinkles, decorating tools — into one dedicated zone makes baking a significantly more enjoyable process.
A deep pull-out bin or a large handled basket that can be lifted entirely off the shelf is more useful here than fixed containers. When you bake, pull the basket to your counter; when you’re done, return it. This is especially practical in galley kitchens and smaller homes where baking is an occasional rather than daily activity. Just make sure your “baking basket” has a defined boundary — once it starts absorbing non-baking items, the system collapses.
16. Build a Drink and Beverage Station Into the Pantry
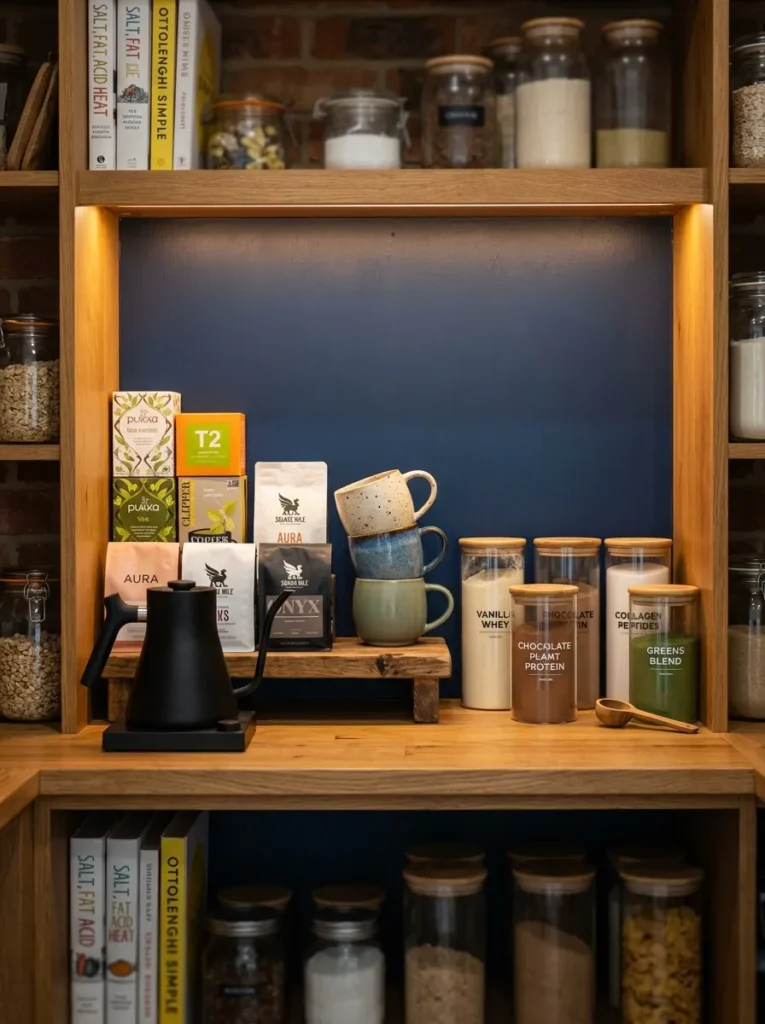
If your pantry has the depth for it, a dedicated beverage zone — coffee, tea, hot chocolate, protein powder, drink mixes — prevents these items from cluttering countertops or spreading across multiple kitchen areas. The key to making this work is thinking about the whole beverage ritual, not just the ingredients.
Group the drinks with their related accessories: mugs or travel cups nearby, the electric kettle or a basket designated for the kettle area, a small scoop or measuring spoon for coffee. This category benefits from open shelving rather than closed containers, because the visual variety of different boxes and tins actually helps people quickly identify what they want. Reserve this zone for items used in the pantry itself, not items that require refrigeration.
17. Consider a Produce Basket System for the Pantry Floor
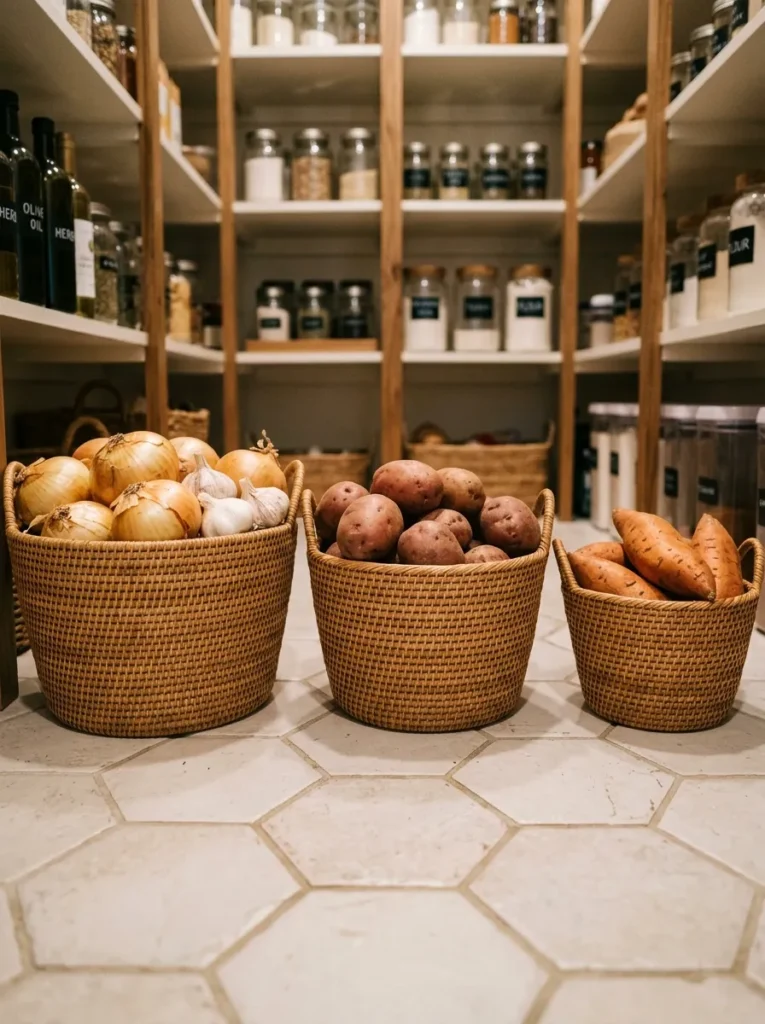
Not everything that’s considered pantry-appropriate needs to go on a shelf. Root vegetables, onions, garlic, and potatoes store well at room temperature and take up shelf space that could be used more efficiently by other items.
Open wire or rattan baskets placed on the pantry floor — or on a low dedicated shelf — allow airflow around produce (important for longevity) while keeping these bulkier items organized at a level where they can be accessed easily. Separate baskets for onions, potatoes, and garlic prevent odor transfer between varieties. This arrangement also brings a natural, market-style quality to the pantry that contrasts well with uniform shelf containers. Just don’t store these baskets near the furnace vent or any heat source — warmth accelerates sprouting.
18. Standardize Container Sizes to Maximize Shelf Efficiency
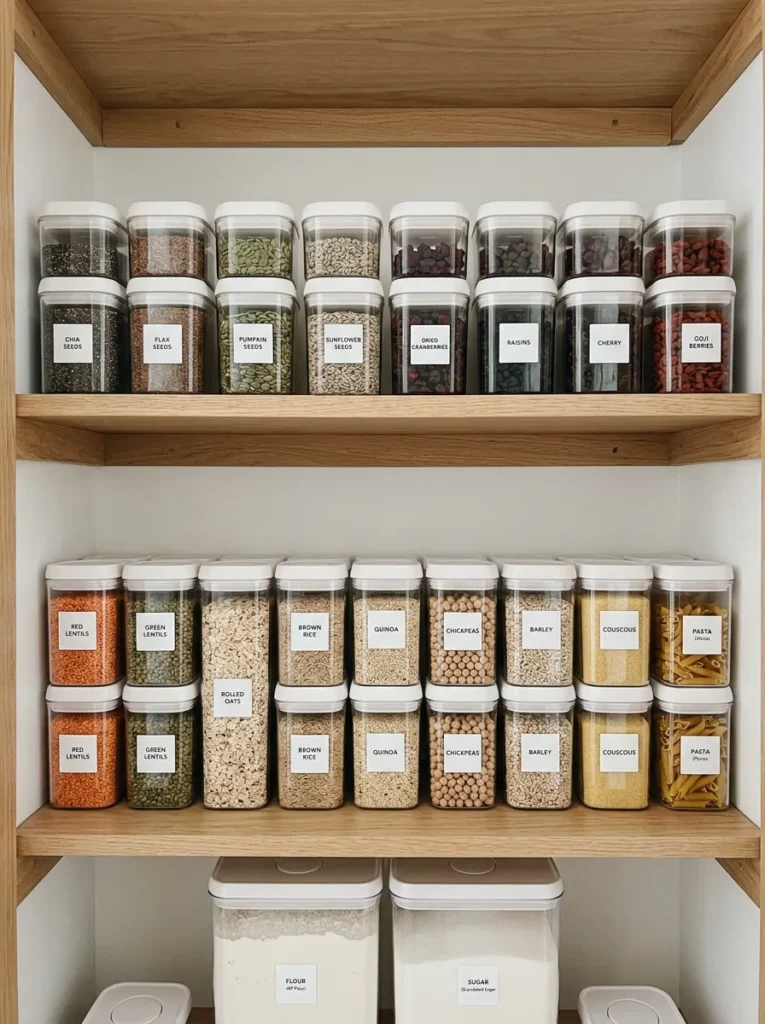
One of the quieter efficiency gains in pantry organization is choosing storage containers in a limited range of sizes — say, three standard sizes — so that shelves pack cleanly without odd gaps. Containers of inconsistent sizing create visual clutter and waste shelf space even when the individual containers are tidy.
Before buying a canister set, measure both your shelf depth and height, and look for container lines that offer stackable or standardized rectangular footprints. Rectangular containers use approximately 15–20% more shelf space efficiently than round ones of similar volume. This matters most in smaller pantries where every inch counts. Sticklers for aesthetics often prefer matching sets, but from a purely functional standpoint, any consistent rectangular format achieves the efficiency goal.
19. Designate a “Use First” Bin for Items Near Expiry
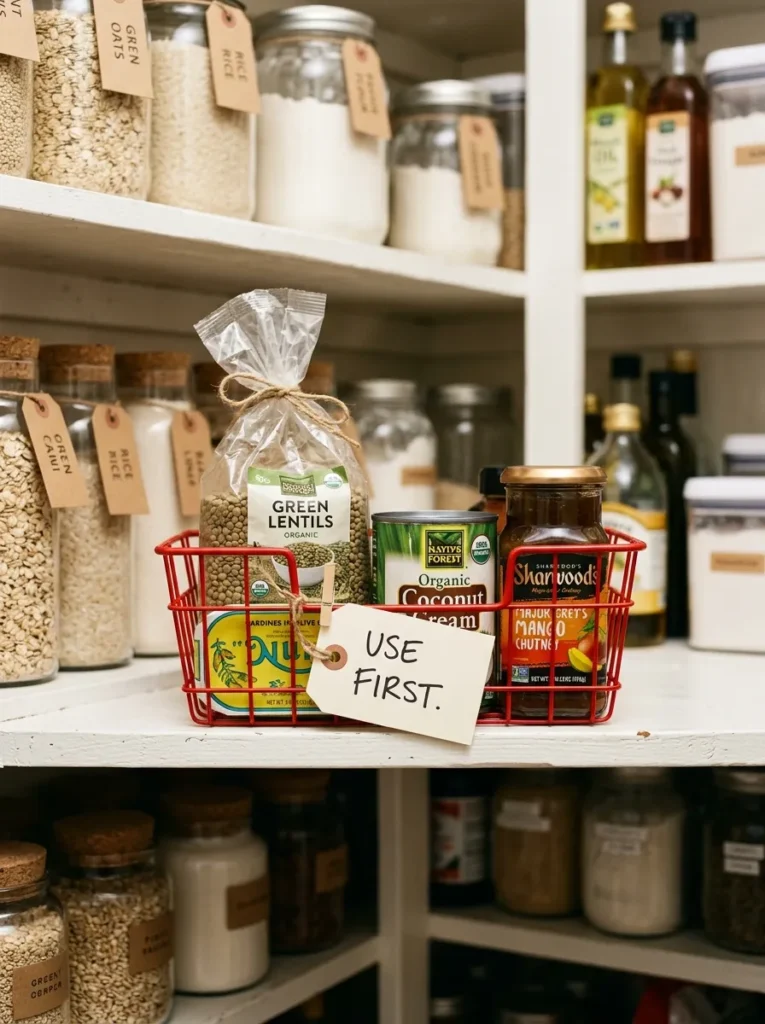
Even with good rotation habits, items nearing expiration slip through — particularly things bought in bulk or received as gifts. A dedicated “use first” bin or basket, clearly labeled and placed at eye level in a visible pantry location, gives near-expiry items a second chance before they’re discovered months too late.
Keep this bin limited in size — if it’s too large, it becomes a repository for unwanted items rather than a priority queue. A single small basket that holds six to ten items is enough. The practice of doing a weekly pantry scan (timed to shopping day works well) to check expiry dates and populate this bin takes about three minutes and meaningfully reduces food waste. This small habit is worth more than any organizational system in terms of keeping the pantry functional long-term.
20. Maintain the System With a 10-Minute Weekly Reset
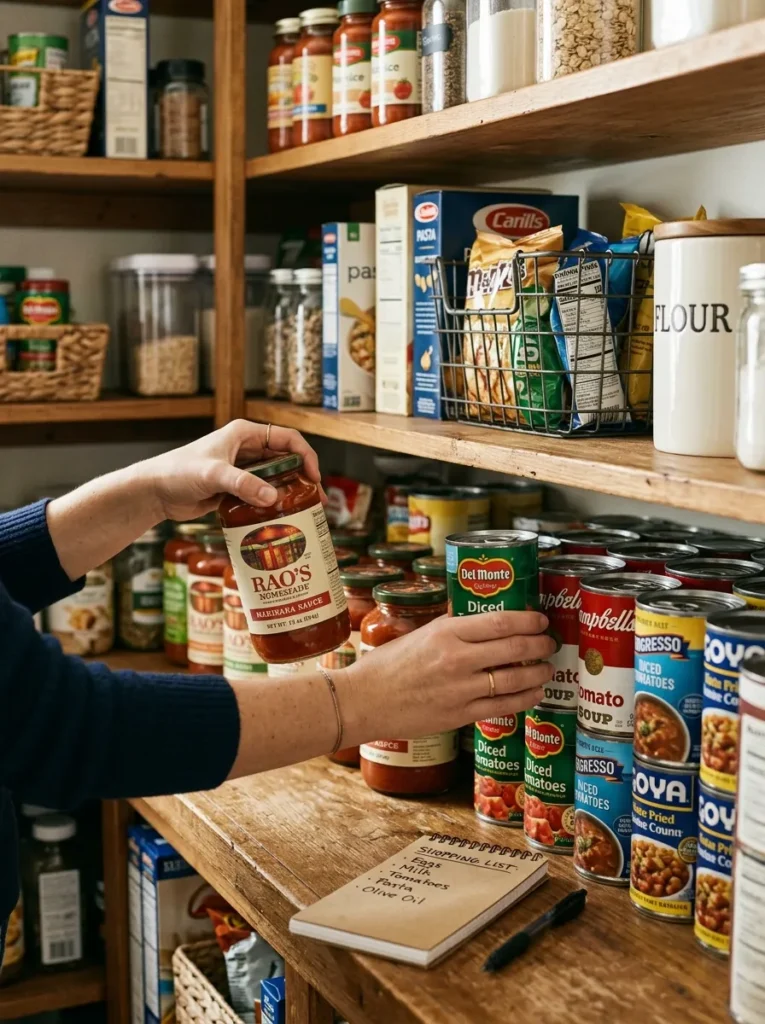
No pantry organization system maintains itself indefinitely. Items get put back in the wrong place, deliveries disrupt the arrangement, and weekly shopping introduces new elements. Building a brief weekly reset into your routine — ten minutes on the day you shop, before putting away new groceries — prevents gradual entropy from undoing the entire system.
The reset has a defined scope: return misplaced items to their zones, check the “use first” basket, wipe down any sticky shelves, and add items to the shopping list based on what’s running low. This isn’t a reorganization — it’s maintenance. If the reset regularly takes longer than ten minutes, that’s usually a sign that the zone system needs refinement, not that more containers are needed. The simpler the underlying system, the easier this maintenance becomes.
What to Prioritize First — A Quick Decision Guide
If you’re starting from a genuinely disorganized pantry, the sequence matters. Buying containers before establishing zones almost always leads to wasted money and frustration.
Start here:
- Empty everything out and identify what you actually have
- Discard expired items immediately
- Group remaining items by category on the counter
- Decide your zone layout based on how you actually cook and what you reach for most
- Assign zones to shelves before purchasing anything
Then address:
- Deep shelf access problems (pull-out drawers or sliding baskets)
- Visibility issues (clear containers, shelf risers, turntables)
- Category overflow (snack bins, baking baskets)
Finally, add:
- Labeling
- Aesthetic cohesion (matching containers, consistent color trays)
The temptation is to start with the aesthetics — the matching canisters and printed labels — because they’re the most satisfying to photograph. But a beautiful container system built on a poorly planned zone layout looks good for about three weeks before the whole thing fragments.
Final Thoughts
The best-organized pantries aren’t the most elaborate ones. They’re the ones where every item has a logical home, and returning things to that home takes no more effort than placing them somewhere random.
If this list feels overwhelming, pick one friction point — the category that causes you the most irritation on a daily basis — and solve that first. A single pull-out drawer where you previously lost soup cans in the back of a shelf will improve your kitchen experience more than twenty mismatched containers sorted into loose categories.
Before saving ideas or buying products, take ten minutes to identify what your pantry is actually missing: access, visibility, capacity, or a system. Most pantry problems fall into one of those four categories, and each one has a different set of solutions.
Save any ideas here that resonate with your specific setup — the more relevant the system is to your actual pantry and cooking habits, the longer it’ll hold up.