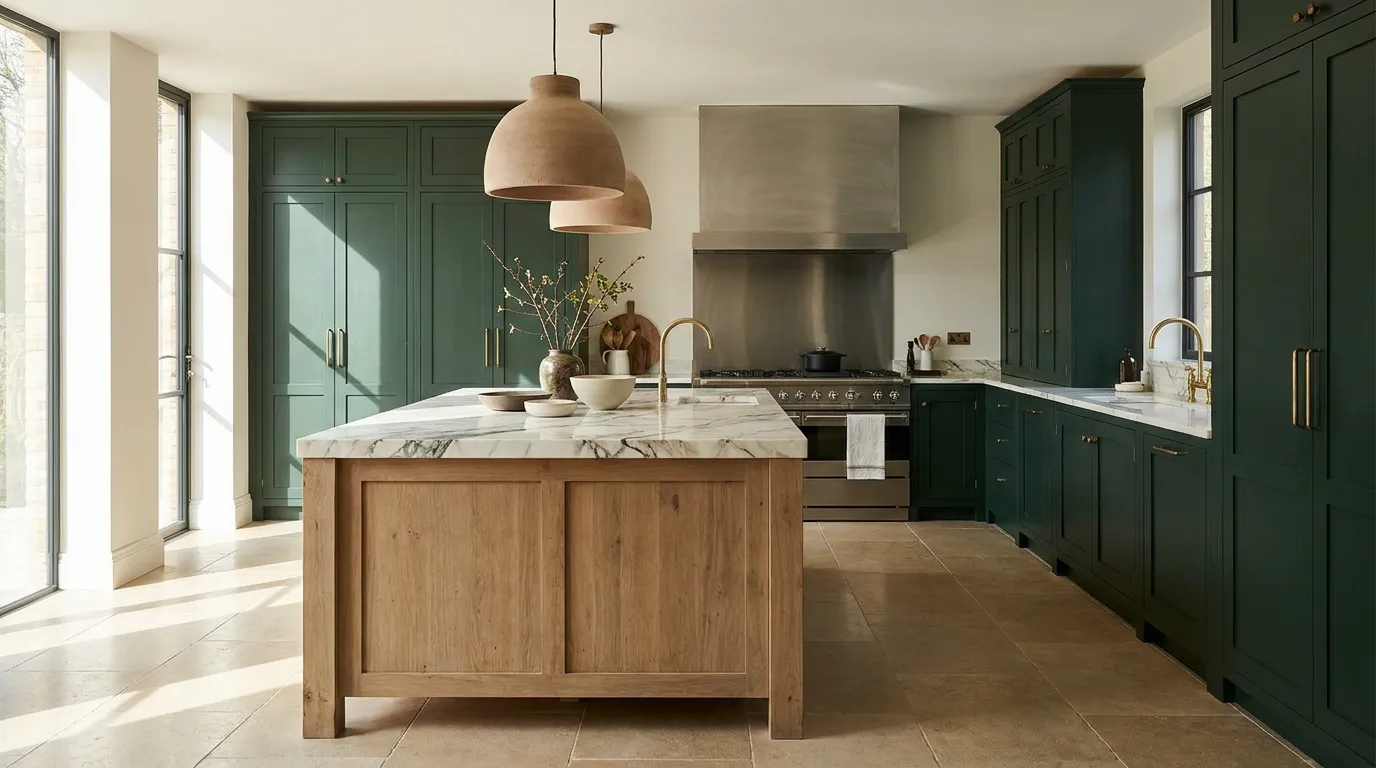
23 Luxury Kitchen Ideas That Are Elegant Without Being Impractical
A kitchen that photographs well but functions badly is more frustrating than any other room design failure, because kitchens are used constantly and under conditions — heat, moisture, grease, children, time pressure — that reveal every compromise immediately. The best luxury kitchen ideas hold both requirements together: they look considered and they work. That’s a harder brief than it sounds.
These 23 ideas span cabinetry, countertops, layout, lighting, storage, and finishing details, covering the full range from significant architectural decisions to smaller choices that quietly shift the character of a kitchen. Each section addresses not just what looks impressive but why it works and, where relevant, what the trade-offs actually are. Because at the point where a kitchen renovation becomes a meaningful investment, the decisions deserve more than a mood board.
1. Commit to Full-Height Cabinetry on at Least One Wall
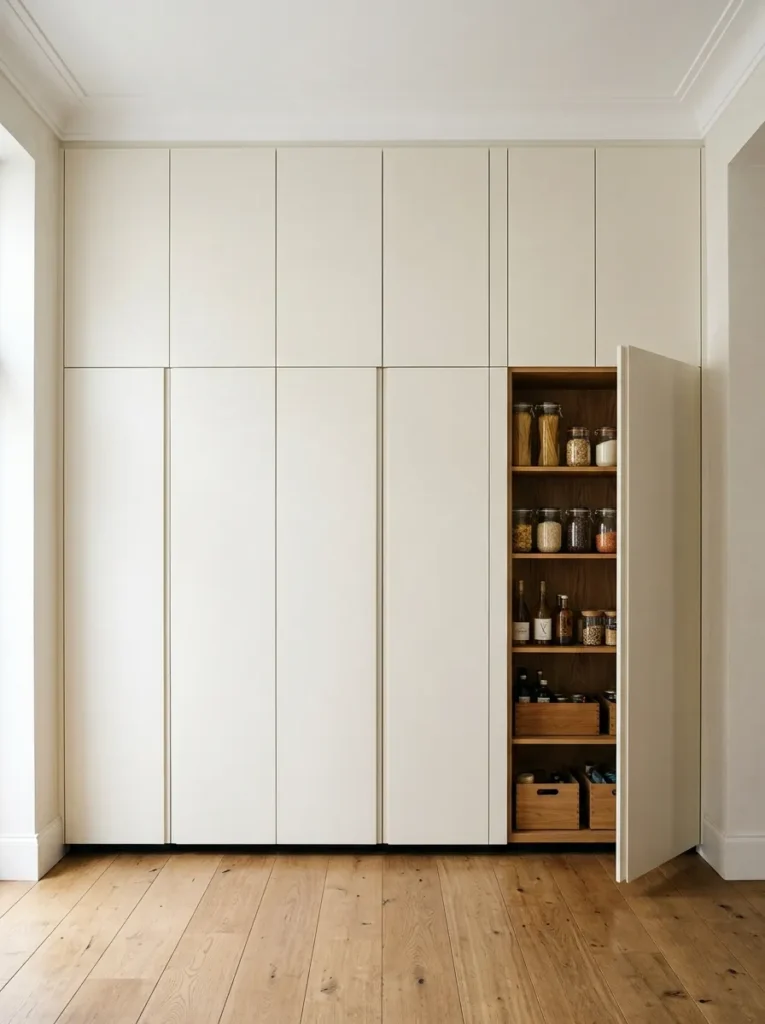
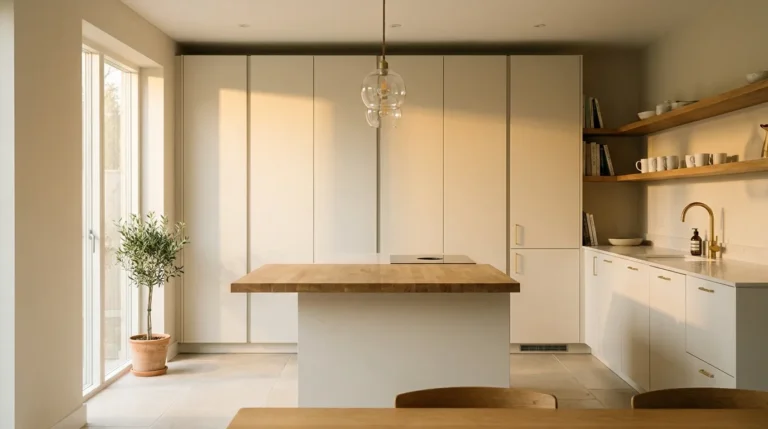
Floor-to-ceiling cabinetry is one of the most reliable ways to give a kitchen genuine architectural presence. The floor-to-ceiling proportion makes the room feel more resolved — like a room that was designed rather than assembled — and substantially increases storage capacity, which in a high-spec kitchen is often needed to conceal the equipment that would otherwise clutter worksurfaces.
The design principle that makes this work well is treating the full-height wall as a single composition rather than a stack of independent units. Handleless cabinetry in a consistent finish, with doors that run from skirting level to ceiling cornice, reads as integrated architecture. Visible unit gaps, varying depths, or mismatched heights fight that impression. In a kitchen with ceiling heights above standard, this idea has the most impact; in lower-ceilinged rooms, full-height cabinetry can feel oppressive rather than impressive unless the palette is kept light.
2. Specify a Statement Range Cooker as the Kitchen’s Focal Point
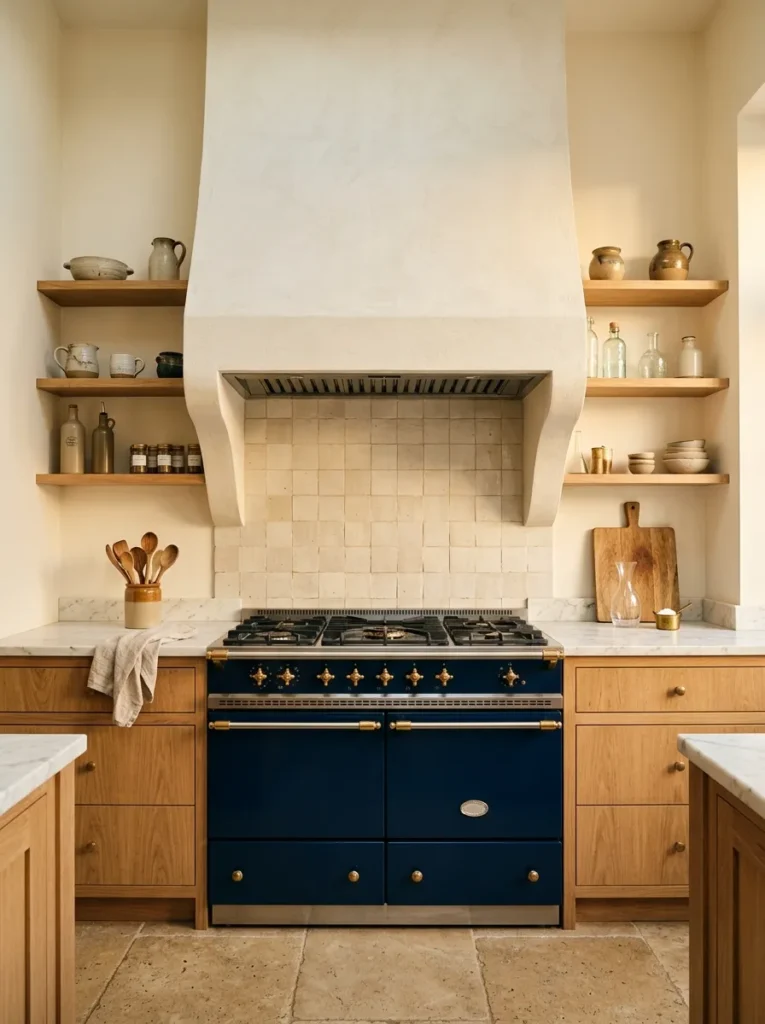
A range cooker — a freestanding or semi-integrated unit combining multiple ovens, a large-format hob, and sometimes a warming drawer or grill — functions differently from a standard built-in oven arrangement both practically and visually. Practically, the cooking capacity is substantially higher, which suits households that cook seriously or entertain regularly. Visually, a wide range cooker with an appropriately scaled extractor hood above it creates a natural focal point that organizes the kitchen’s composition around it.
The extractor hood choice is as important as the cooker itself. A custom-built plaster or brick chimney breast enclosing a commercial-grade extractor, or a large-format stainless canopy at the right scale for the cooker below, reads as intentional. A standard domestic hood at the wrong size for the range beneath it undermines the whole effect. Budget for the extraction solution properly rather than treating it as an afterthought once the cooker is purchased.
Range cookers retain more heat in the kitchen than fully integrated appliances and require adequate ventilation in the room as well as the extraction system above them.
3. Use an Oversized Island as Both Workspace and Gathering Point
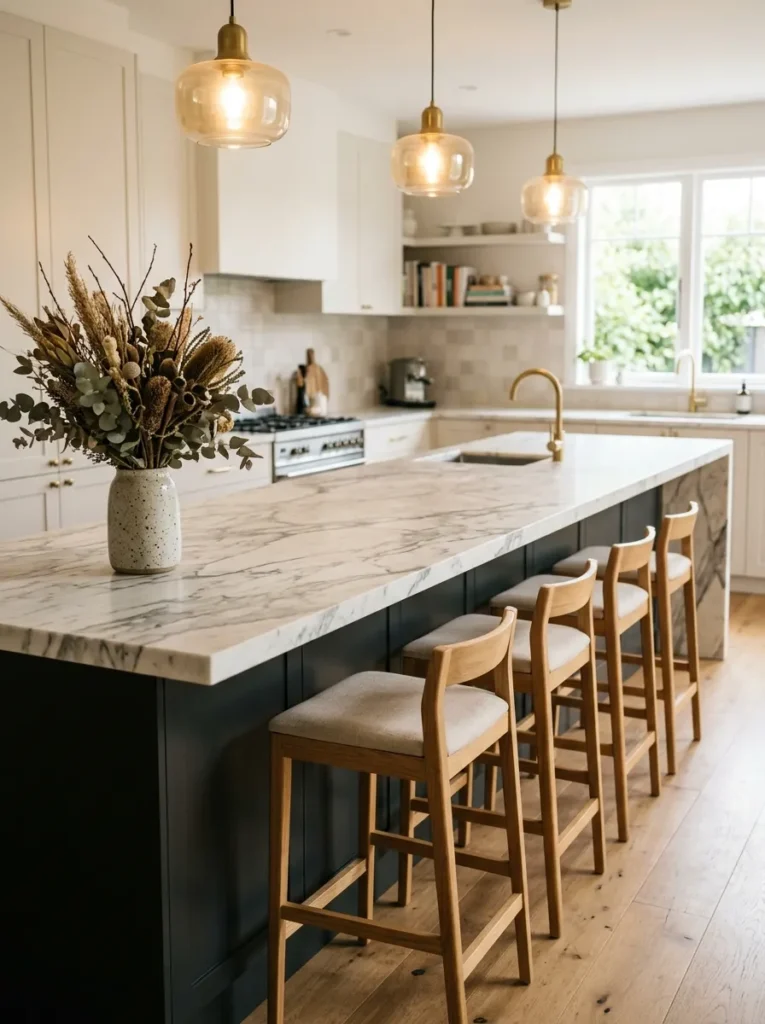
A kitchen island that’s sized properly for the room — with at least 90cm of clear circulation space on all walkable sides — becomes the room’s social center as well as its most practical preparation surface. The sizing consideration matters because undersized islands create bottlenecks; an island that fits the plan dimensions but leaves only 60cm of clearance means the kitchen essentially can’t be used by two people at the same time.
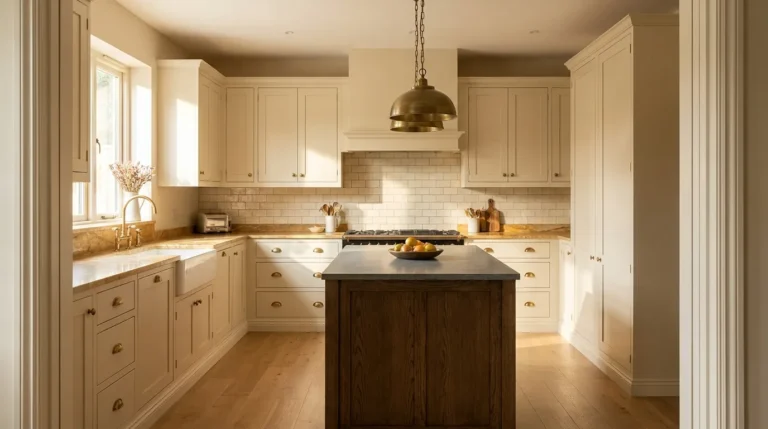
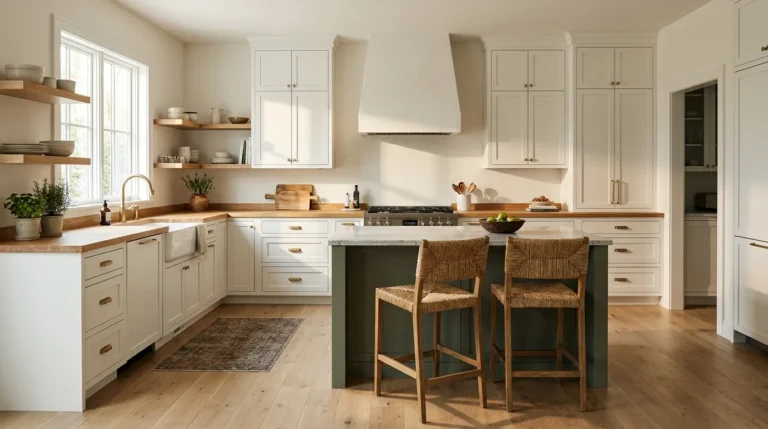
In a luxury kitchen context, the island’s material treatment is usually where the most interesting design decisions happen. A top surface in honed Calacatta marble or a thick-edged engineered stone, combined with base cabinetry in a contrasting finish to the perimeter units (a darker painted color, or natural oak against painted walls), immediately reads as more considered than an island that merely extends the existing cabinetry. Seating on one side — with enough overhang for comfortable knee clearance — adds a social dimension that a kitchen with only a dining table in an adjacent space lacks.
4. Choose Calacatta or Carrara Marble Thoughtfully, Not Automatically
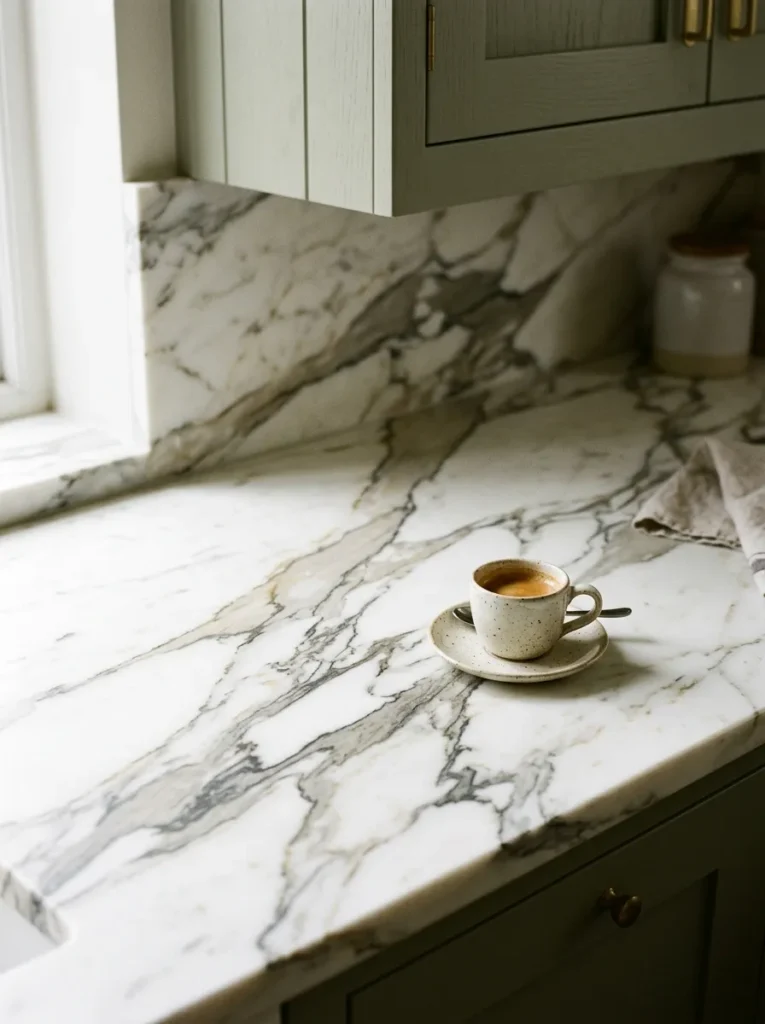
Marble has become so associated with high-end kitchens that it’s easy to specify it without thinking through the implications. Natural marble — particularly the white varieties most commonly used for kitchen surfaces — stains from oils and acids, etches from citrus and coffee, and develops a patina that some owners love and others find distressing. A Calacatta or Carrara slab looks extraordinary when new and requires deliberate maintenance and a certain acceptance of change over time.
The decision point is honest self-assessment: how is the kitchen actually used? A household that cooks heavily with acidic ingredients, has children, and wants surfaces that stay looking like new is better served by a high-quality engineered quartz in a Calacatta-effect finish, which replicates the visual appearance with substantially better resistance to staining and etching. For households that cook carefully and appreciate the way natural stone matures, real marble remains one of the most visually distinctive countertop choices available. The mistake is choosing it for appearance without accounting for the maintenance reality.
5. Install a Separate Scullery or Preparation Kitchen
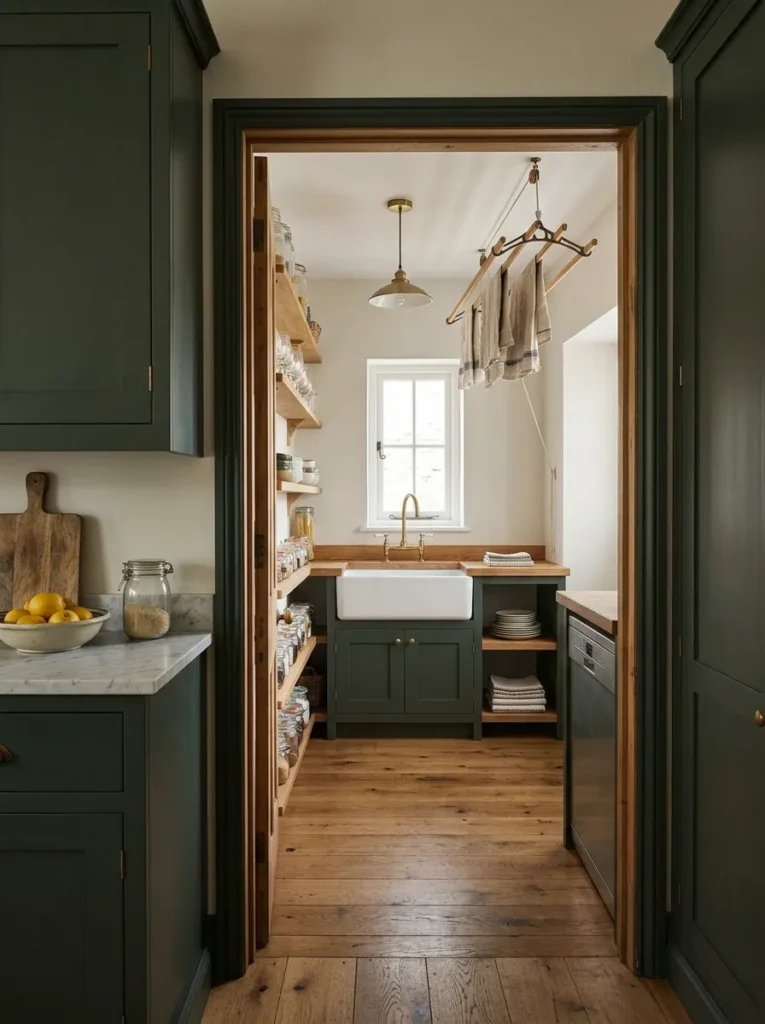
The scullery — a secondary kitchen space tucked behind or beside the main kitchen, used for preparation, storage, washing up, and hiding the evidence of actual cooking — has reappeared in high-spec residential projects and for good reason. It allows the main kitchen to function as a showpiece while the less photogenic work happens elsewhere. More practically, it separates wet areas from dry, keeps breakfast chaos away from the main kitchen when it’s not in use, and provides a logical location for a second sink, a chest freezer, and the bulkier kitchen equipment that doesn’t need to live on a worksurface.
A scullery doesn’t require a separate room — a deep larder alcove or a well-planned galley-style pantry accessible from the kitchen can serve the same purpose. The key requirement is direct access from the main kitchen with no wasted circulation, and enough depth to include a sink and worksurface alongside storage.
6. Specify Integrated Appliances to Preserve Visual Calm
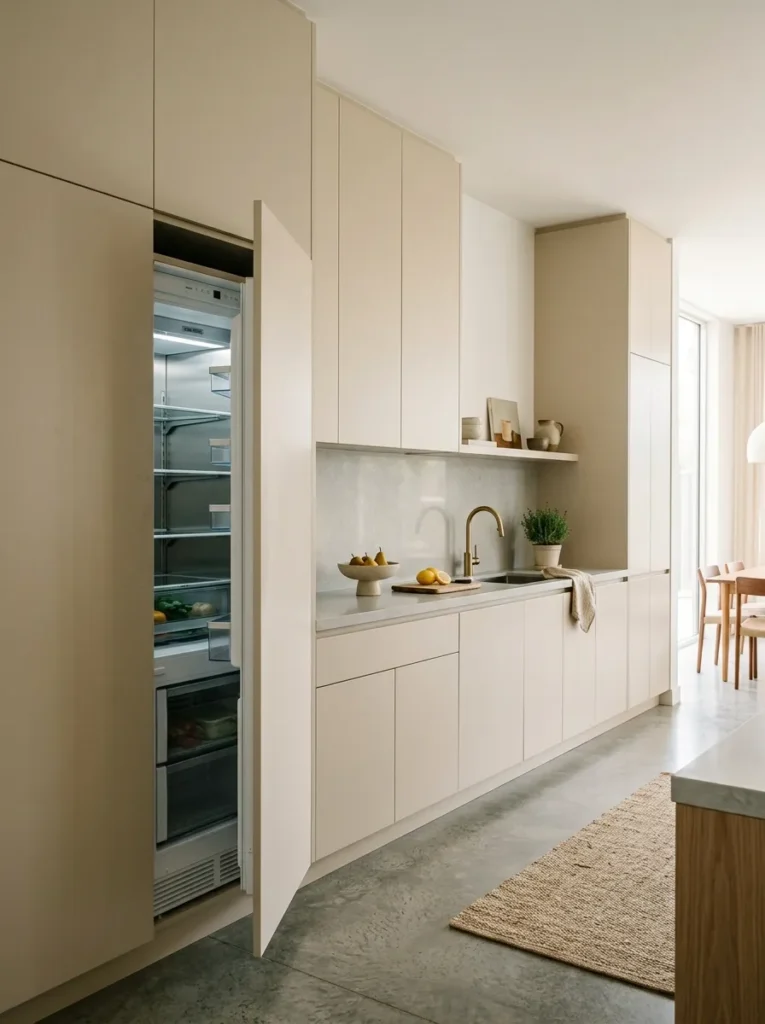
In a kitchen where the cabinetry composition is the visual priority, integrated appliances — fridges, dishwashers, and even warming drawers concealed behind matching cabinet doors — maintain the surface and reduce the visual noise that exposed stainless appliances introduce. An integrated tall fridge-freezer behind a full-height door looks like a cabinet from any angle. A dishwasher panel-matched to the under-counter units is simply invisible.
The practical trade-off is access and service. Integrated appliances are harder to repair without removing the door panel, and if the appliance needs replacement, the new model must match the original door fixing system or new doors will be required. This is worth knowing before specifying, particularly for dishwashers, which are replaced more frequently than fridges. Semi-integrated appliances — where the control panel is visible but the door is panel-matched — resolve some of this practical limitation.
7. Select Dark Cabinetry With Deliberate Restraint
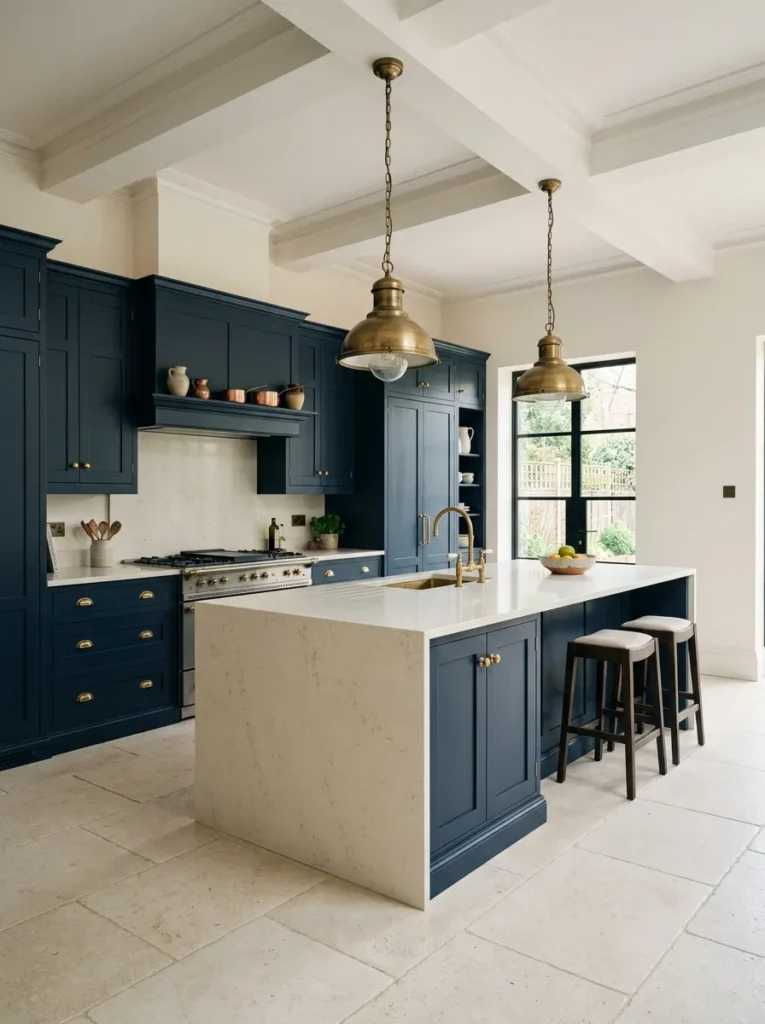
Dark kitchens — deep navy, forest green, charcoal, and near-black — have moved firmly away from trend status and into considered territory. The caveat is that dark cabinetry requires deliberate management of two things: light and contrast. In a kitchen with good natural light and pale countertops or splashback, dark cabinetry reads as rich and grounded. In a kitchen with limited natural light, dark cabinetry on all surfaces can make the room feel heavy and absorb the artificial lighting rather than reflecting it.
The most successful dark kitchens typically keep one element — the countertop, the island, the worksurface upstands — in a light or warm neutral tone. Warm brass or unlacquered bronze handles and fixtures reinforce the palette without adding color complexity. Full dark-on-dark — dark cabinetry, dark stone countertops, dark splashback — works in very large rooms with significant ceiling height and multiple natural light sources; in smaller kitchens it often requires more artificial lighting than the room’s plan originally anticipated.
8. Consider Bespoke Cabinetry Versus High-Quality In-Frame Options
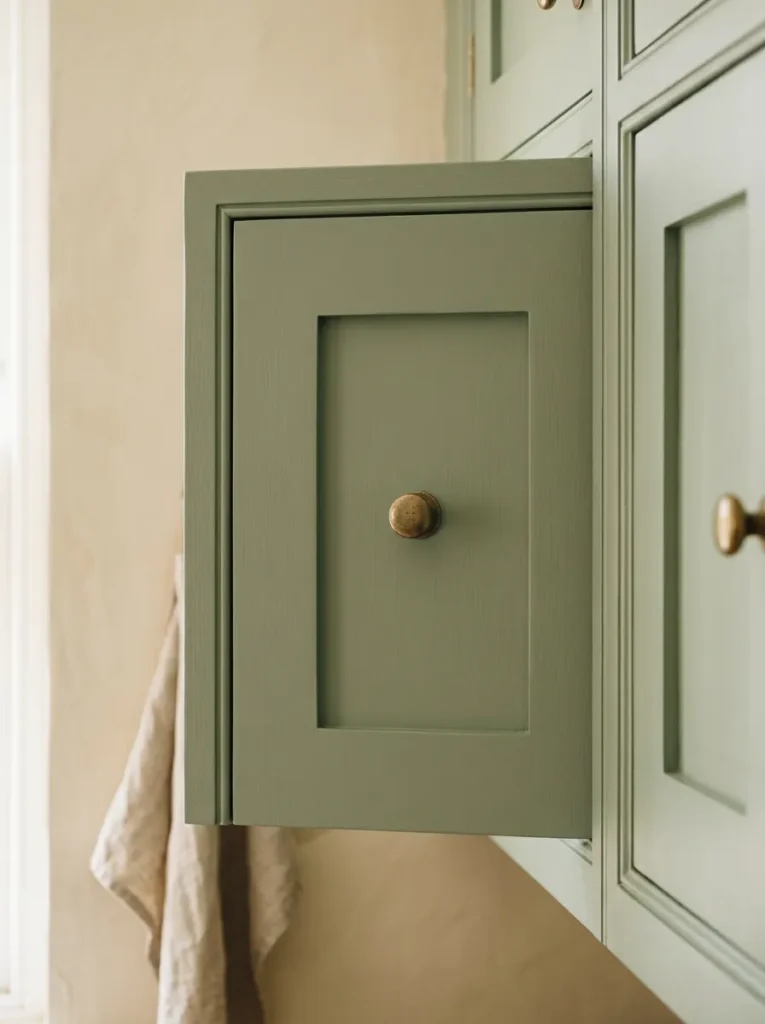
The distinction between bespoke and in-frame cabinetry matters when planning a luxury kitchen budget. Bespoke cabinetry is designed and built specifically for the space — every measurement, profile, and finish is made to order, which produces the most integrated result and handles awkward architectural features (sloping ceilings, alcoves, non-standard heights) without compromise. It is also significantly more expensive and typically takes longer to manufacture.
In-frame cabinetry — where the door sits within a visible structural timber frame rather than overlapping the cabinet box — is available from a range of manufacturers at varying price points, produces a traditional or transitional aesthetic, and offers a high-quality result without full bespoke cost. For contemporary or handleless kitchens, frameless cabinetry with high-quality door materials and precise installation can be equally impressive.
The most useful question isn’t bespoke versus off-the-shelf — it’s whether the chosen supplier can handle the room’s specific complications without visible compromise, and whether the finish quality holds up at the point where it matters most: drawer mechanisms, corner solutions, and the internal organization of tall pantry units.
9. Invest in Quooker or Boiling Water Tap Infrastructure
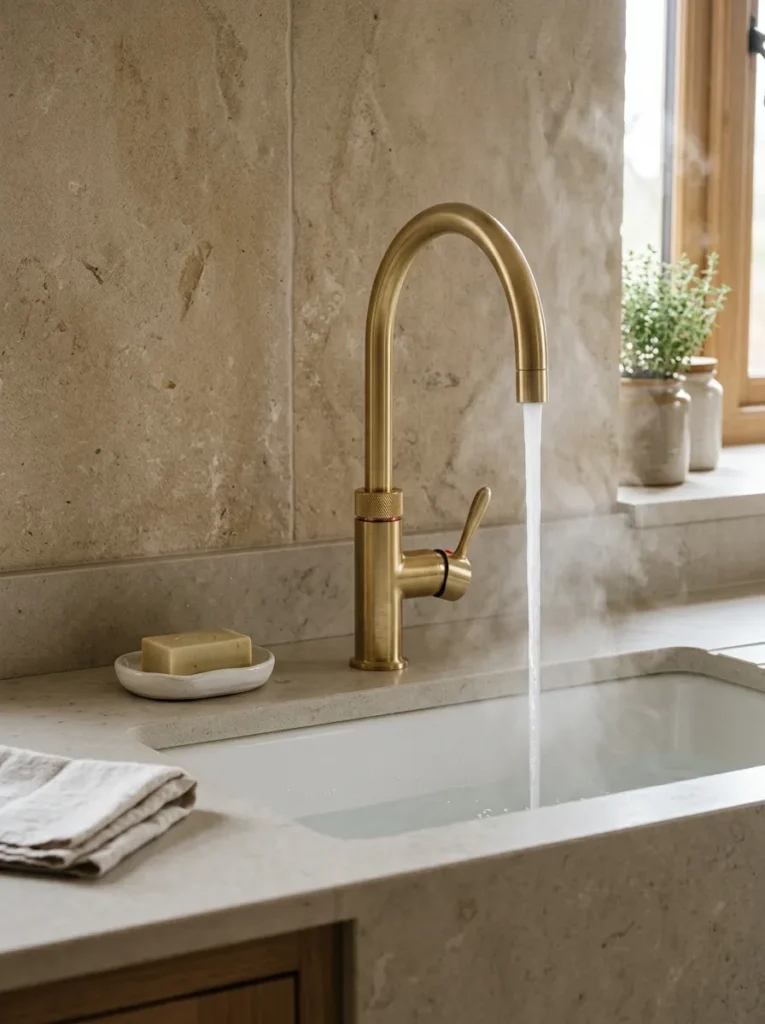
A boiling water tap — delivering instant filtered boiling, chilled, or sparkling water at the sink — is one of the luxury kitchen additions that functions differently enough from the standard alternative to justify genuine consideration rather than pure status. Removing the kettle from the worksurface is the visible benefit; removing the need to wait for water to boil in any practical cooking or tea-making context is the daily functional benefit.
The installation requires a small tank fitted inside a base cabinet near the sink, which takes up roughly the space of a medium mixing bowl and occupies one shelf of a base unit. It needs both plumbing and an electrical connection at that cabinet. These connections need to be planned before cabinetry is installed — retrofitting afterward is possible but more disruptive. Running costs are comparable to or lower than regular kettle use over time since the tank is well insulated and doesn’t reheat from cold repeatedly.
10. Design the Worksurface Height for How You Actually Cook
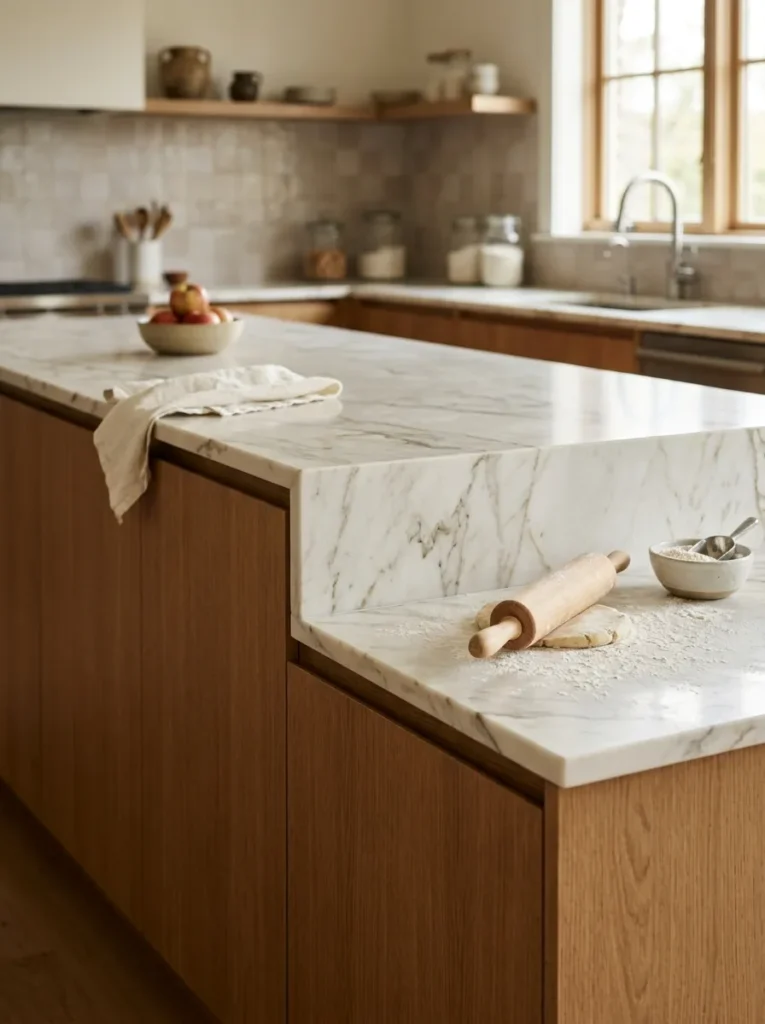
Standard kitchen worksurface height is set at approximately 90cm, which suits a person of average height performing light preparation tasks. This is a compromise that suits nobody precisely, and in a bespoke or high-specification kitchen where counter height can be varied, it’s worth addressing. Taller individuals often find standard height causes back strain over extended cooking sessions; shorter individuals lose leverage for tasks like kneading or rolling.
A second, lower surface on the island (with the island’s base recessed to allow standing closer to the surface) is one of the more practical solutions in a kitchen where different people cook with different needs. The island seating height also affects this: a surface at sitting counter height (approximately 90–95cm) with bar stools is different from a standard table-height island (approximately 75cm) with dining chairs, and the choice affects the kitchen’s social dynamic as much as its practical function.
11. Use Fluted Glass or Reeded Timber on Select Cabinet Fronts
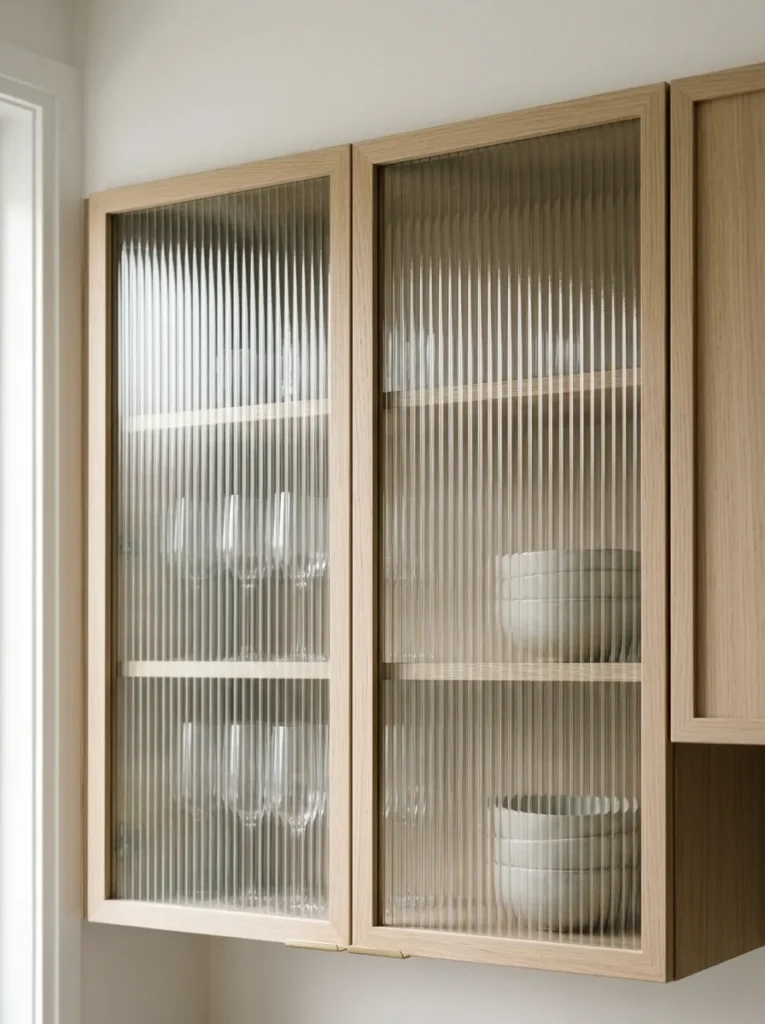
One detail that appears in more thoughtfully designed kitchens — and that reads as genuinely considered rather than merely decorative — is the selective use of textured cabinet fronts: fluted or reeded glass in upper cabinet doors, or reeded timber panels on a section of base units or island cabinetry. The texture catches light differently at different times of day, breaking the visual flatness of a kitchen where all surfaces are the same material and finish.
The key word is selective. A kitchen where every upper cabinet has fluted glass becomes visually loud rather than refined. One or two glass-fronted upper cabinets — used to display considered items (good glassware, ceramics, a small arrangement of objects) rather than everyday storage — is enough. Reeded timber on an island base, combined with painted or lacquered cabinetry elsewhere, similarly reads as deliberate.
What’s displayed behind glass matters: organized, curated items reinforce the intended impression; crowded or mismatched everyday items undermine it regardless of the cabinet quality.
12. Plan a Layered Lighting Scheme Before the Kitchen Is Installed
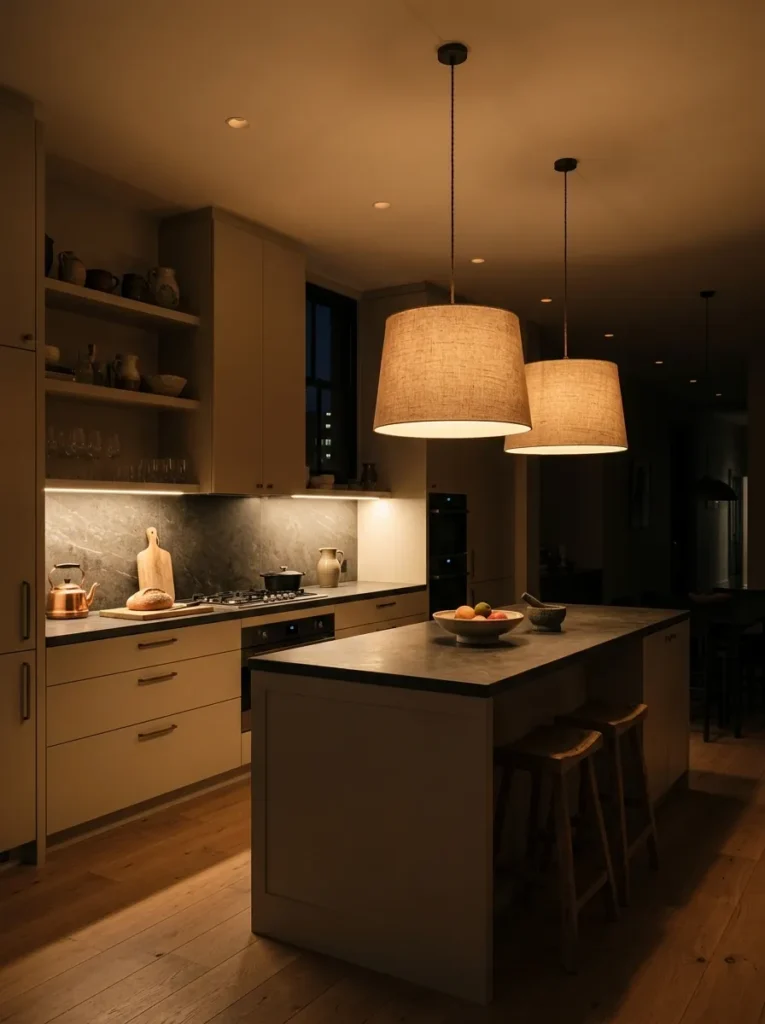
Kitchen lighting is one of the most frequently underplanned elements in renovation projects and one of the hardest to fix afterward without significant disruption. The reason is structural: ceiling lighting positions, pelmet lighting channels, under-cabinet lighting wiring, and island pendant positions all need to be determined before plasterboard is fixed and cabinetry is installed. Retrofitting any of these after completion typically involves opening up finished ceilings or walls.
A working luxury kitchen needs at least three light sources operating independently: general ambient light for the room overall (usually recessed ceiling fittings on a dimmer), task lighting at worksurface level (under-cabinet LED strips), and a decorative layer — typically pendants over the island or dining area — that contributes to the room’s atmosphere without serving a functional purpose. Pendants over the island should hang low enough to feel present without obstructing sightlines across the island surface; as a rough guide, the bottom of the shade 75–85cm above the counter surface works for most proportions, but ceiling height and pendant scale affect this.
13. Clad the Splashback in a Single Large-Format Material
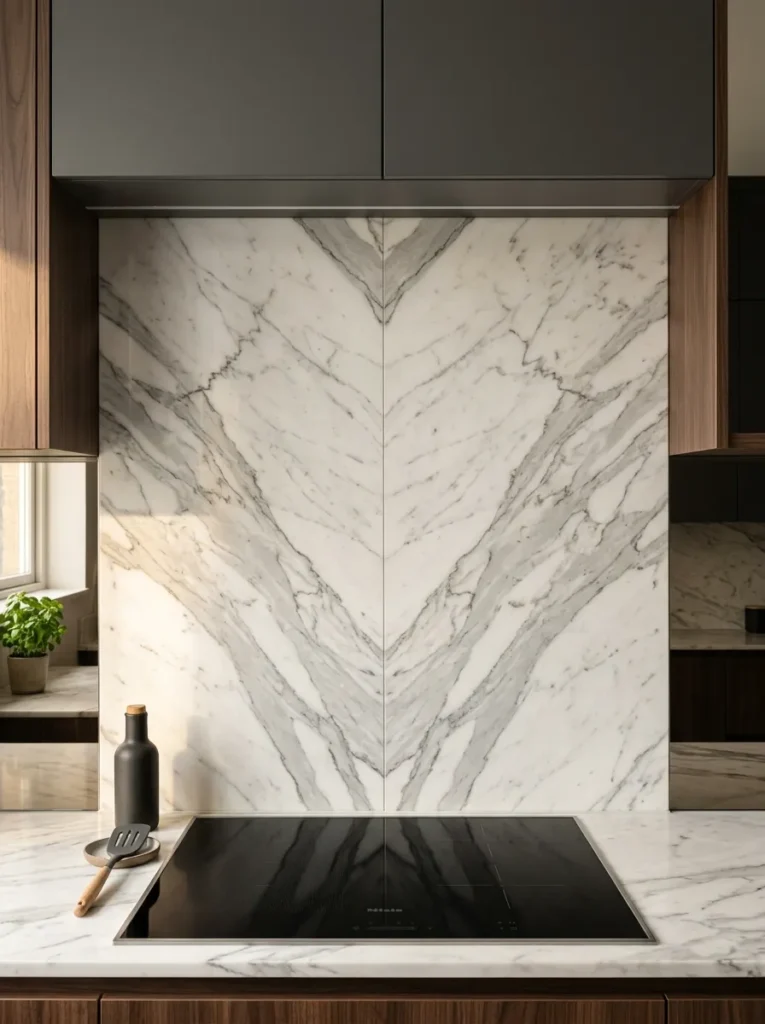
Tiled splashbacks are the standard choice and entirely competent — but for a kitchen aiming at a more seamless, architectural result, a single-material splashback has a significantly different visual effect. Full-height Calacatta or Statuario marble slabs behind the hob and running the length of the worksurface read as continuous and confident in a way that tiled splashbacks rarely do, even when the tiles are high quality.
Alternatives that achieve a similar effect without marble: sintered surfaces like Dekton or Neolith, which can be fabricated in very large panels, are heat-resistant, scratch-resistant, and available in marble-effect and stone-effect finishes; a single slab of natural stone (bookmatched for a symmetrical veining pattern behind the range is a particularly strong visual); or a full-height glass panel in a warm neutral tone, which is easy to clean and creates a clean, simple surface.
The practical advantage of any full-height single-material splashback over tile is the near-elimination of grout lines, which are the primary cleaning challenge in a kitchen splashback over time.
14. Add a Coffee Station With Dedicated Counter Space and Cabinetry
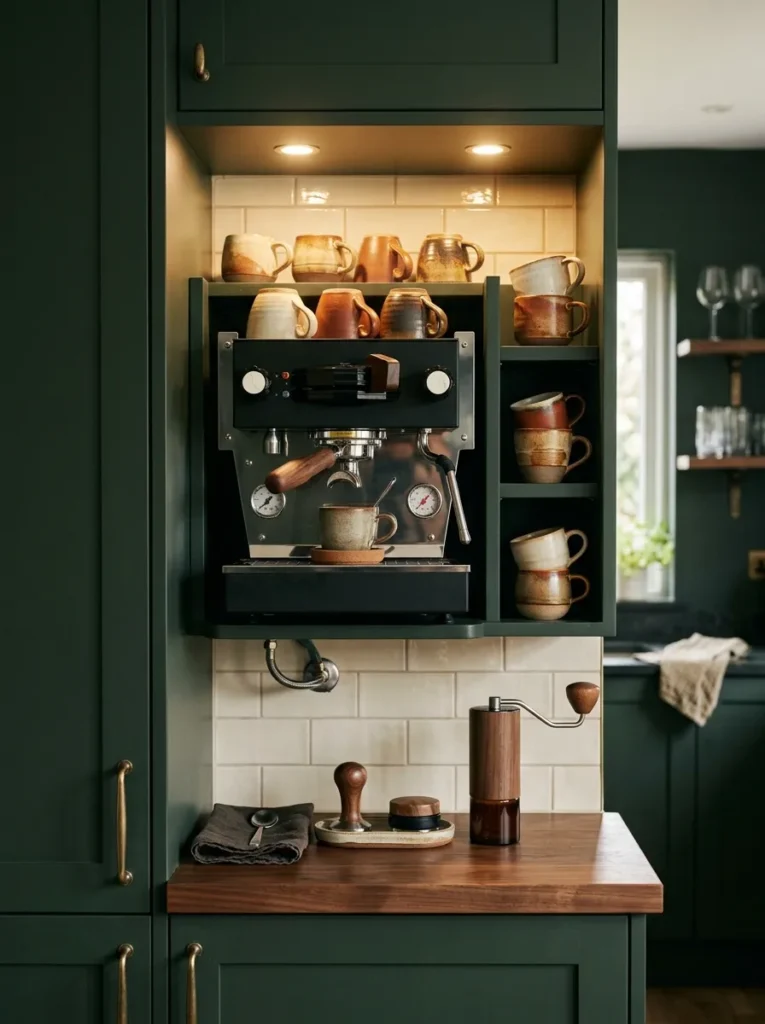
In a kitchen where the worksurface is genuinely clear — where the toaster, the knife block, the fruit bowl, and the mail have all found other homes — a coffee station with its own dedicated zone reads differently from a coffee machine sitting on an otherwise multi-use counter. A built-in recess or a dedicated section of cabinetry housing a built-in coffee machine (integrated into upper cabinetry at eye level, which avoids bending), with a small dedicated counter section below for cups and accessories, creates a morning routine infrastructure that a kitchen designed purely around cooking often lacks.
Plumbing the built-in machine directly to the water supply eliminates the need to refill a reservoir, which is a quality-of-life improvement that integrates well with the overall spirit of a kitchen designed to function without unnecessary friction. This requires a cold water supply to that cabinet position, planned during the kitchen installation phase.
15. Use Unlacquered Brass Hardware That Will Age in Place
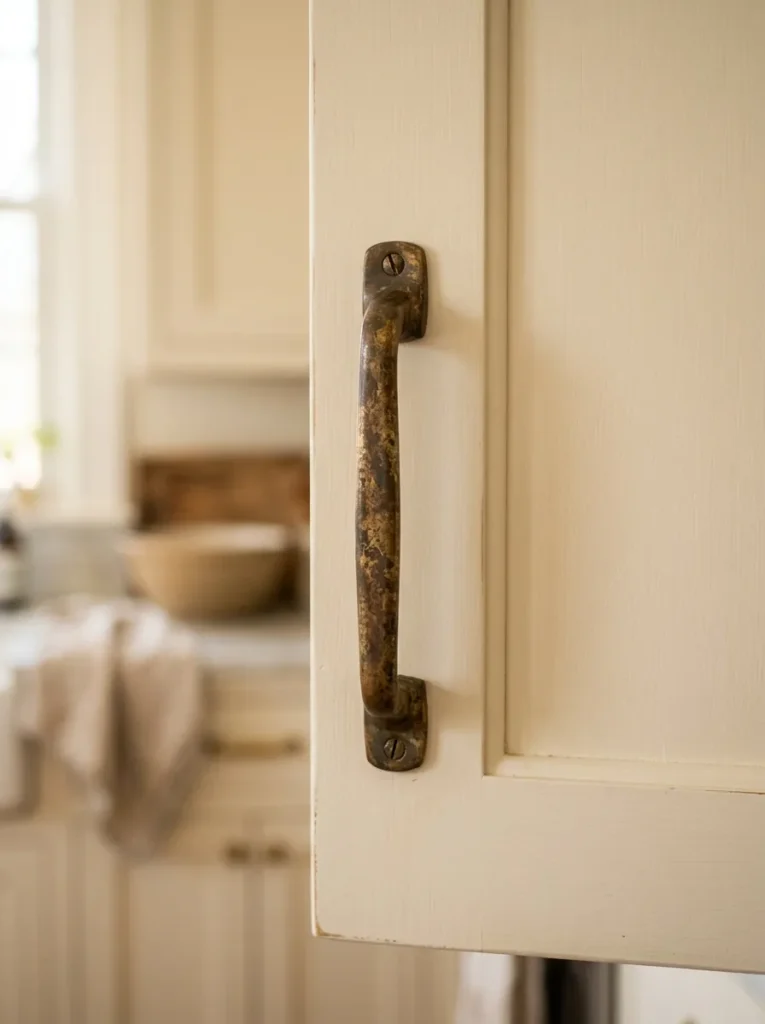
Unlacquered brass handles, taps, and hardware develop a patina over time that many owners find more appealing than the original bright finish — the surface develops depth, some areas polish back where they’re touched frequently, and the metal starts to read as material rather than coating. In a kitchen with warm neutral cabinetry, natural stone, or timber elements, this aging quality integrates into the palette rather than fighting it.
The important expectation to set: unlacquered brass will look different within months. It’s not a low-maintenance finish — it tarnishes unevenly in high-humidity areas, particularly near sinks and steam sources. Owners who want consistent warmth without the variability of natural aging are better served by PVD-coated brass, which provides a durable warm tone without significant change over time. Brushed gold or satin brass finishes occupy a middle ground — warmer than chrome, more consistent than unlacquered, and available from most fixture manufacturers at the quality level a high-spec kitchen demands.
16. Create a Dedicated Drinks Fridge or Wine Cooling Cabinet
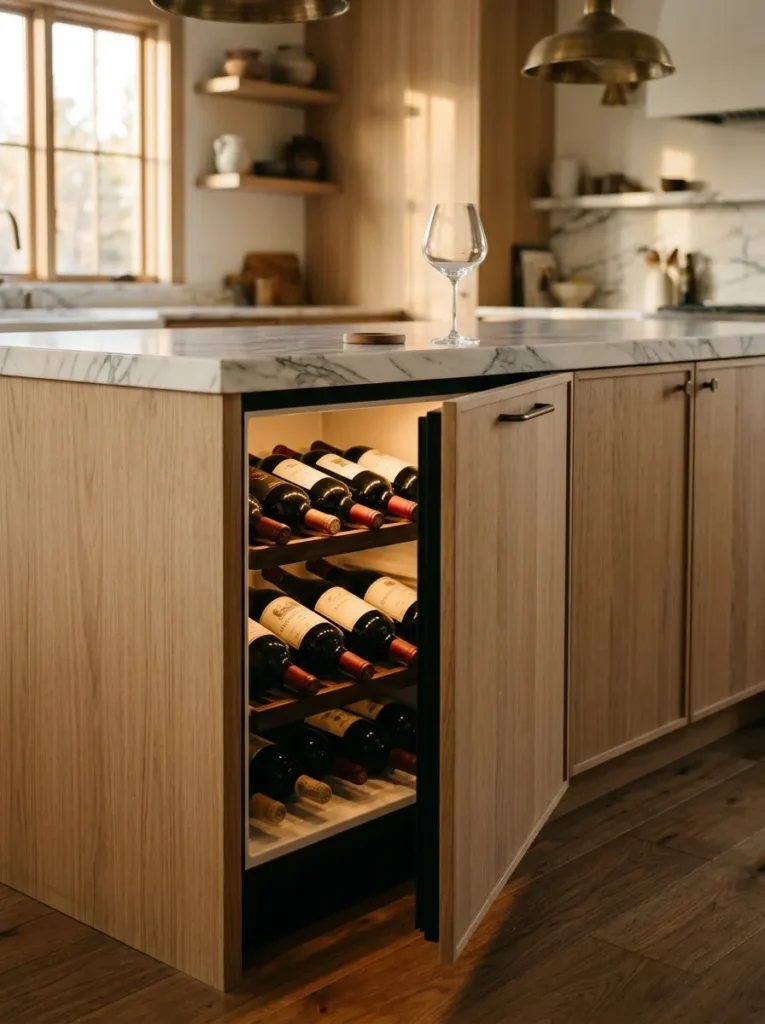
A wine or drinks fridge built into the kitchen cabinetry — positioned in the island, the lower cabinetry under a drinks station, or a separate tall integrated unit — changes the functional logic of the kitchen for households that entertain. The practical benefit is straightforward: the main fridge stays organized for food; the drinks fridge holds wine, beer, and soft drinks at their correct temperatures and is accessible during social gatherings without having to open the kitchen’s working fridge repeatedly.
Under-counter wine fridges require a minimum clearance at the front for ventilation and must not be fully enclosed on all sides without the correct built-in model that allows front ventilation. Specifying a standard wine fridge into a fully enclosed cabinet void is a common mistake that causes overheating and compressor failure. A genuine built-in model with front ventilation, or a unit positioned in an open ventilated space, handles the installation requirement correctly.
17. Incorporate Open Shelving Selectively, Not Systematically
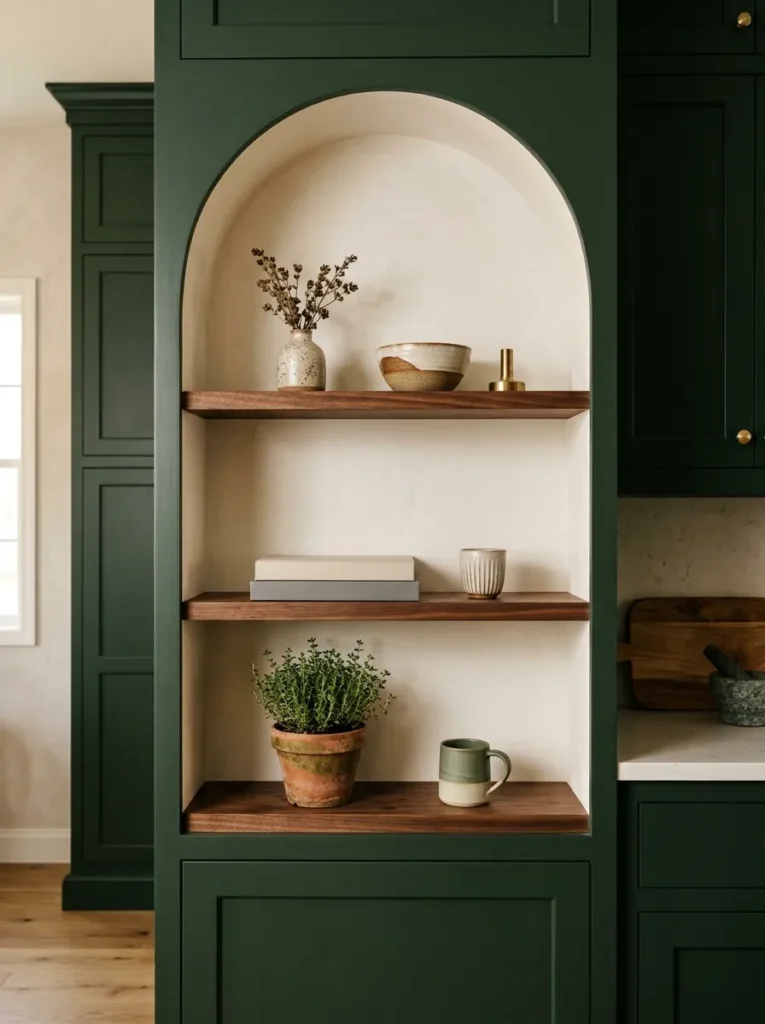
Open shelving in kitchens is often presented as a choice between fully open or fully closed cabinetry. In practice, the most successful high-spec kitchens use open shelving in one or two deliberate zones — above the coffee station, beside the range, in an alcove — while keeping the majority of storage behind closed doors. This selective approach gives the kitchen a lived-in, considered character without the practical consequences of fully open shelving (dust accumulation, the constant effort to keep everything looking organized, lack of enclosed space for less attractive items).
Materials for open shelving in a luxury kitchen context: solid oak, walnut, or marble ledges in a simple profile read as architectural rather than decorative. Avoid prefabricated laminate shelves or floating shelves with visible brackets in a kitchen of this specification — the detail should match the overall caliber of the cabinetry.
The objects on open shelving should be genuinely edited: items used regularly enough to justify their prominent position, with enough visual coherence that the arrangement reads as curated rather than accumulated.
18. Specify In-Drawer Knife and Utensil Organization
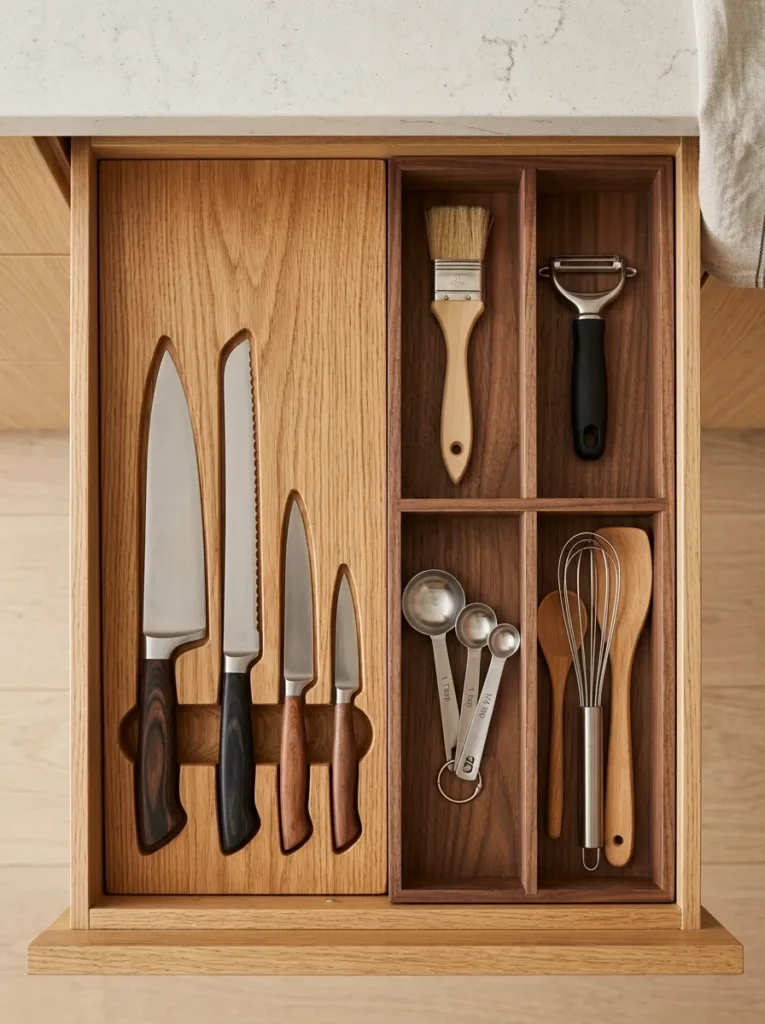
At the point where a kitchen is designed to function precisely, the internal organization of drawers becomes as relevant as the external appearance of cabinetry. In-drawer knife blocks — a recessed section of drawer fitted with angled slots cut into solid wood — keep knives accessible, safely stored, and invisible when the drawer is closed. In-drawer utensil dividers in wood or acrylic keep preparation tools in fixed positions rather than sliding to the front of the drawer every time it’s opened.
These fittings are specified during the cabinetry design phase, not purchased afterward and inserted into standard drawers. The drawer box must be the right depth and internal width for the fitting, which is why they’re part of the original cabinetry brief rather than an upgrade. Standard kitchen drawer inserts from organizer brands can approximate this, but the result is rarely as precise or as visually resolved as fitted organization that was planned from the start.
19. Use Stone or Porcelain Flooring That Runs Under the Cabinetry
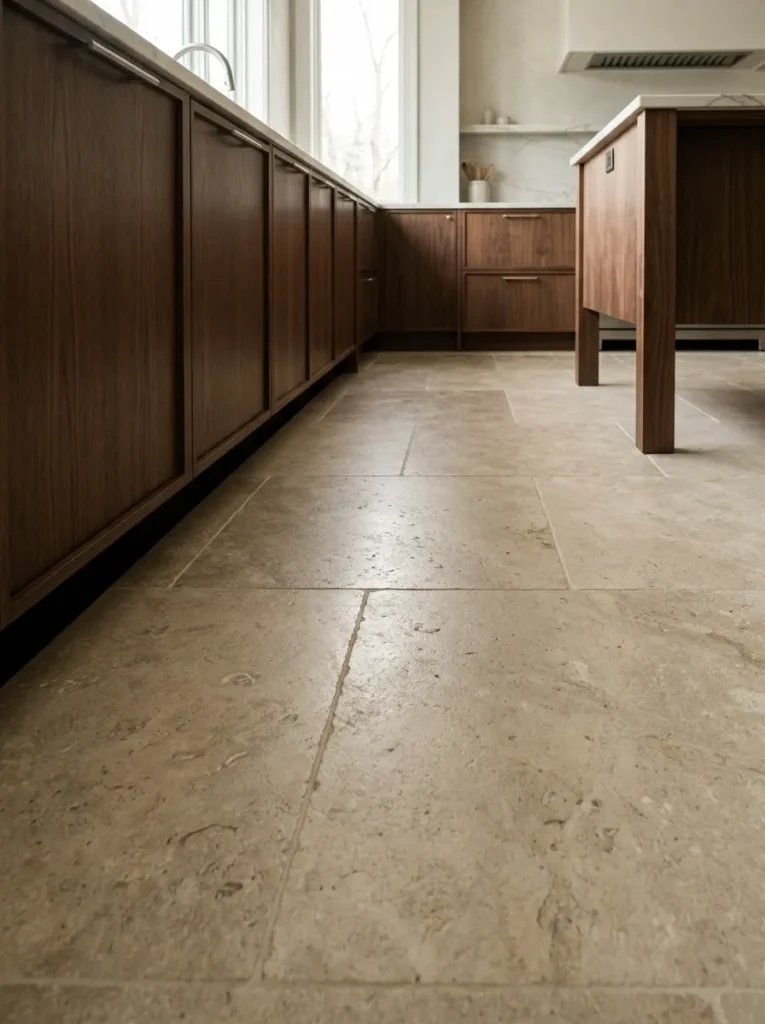
The flooring decision in a kitchen has a structural implication that most design articles skip over: if the floor tiles are laid before cabinetry is installed, the floor runs continuously under and behind the units, making future layout changes easier and giving the kitchen a more finished edge at the toe kick. If tiles are laid after cabinetry is in position — which is cheaper and faster — the tiles stop at the cabinet edge and any future reconfiguration requires floor patching.
In a kitchen that represents a significant design investment, laying the floor first is worth the additional cost. Large-format stone or porcelain tiles (60x120cm or larger) in warm limestone, aged travertine effect, or simple large-format warm white stone read as substantial underfoot and reduce the number of visible grout lines. Genuine stone flooring in a kitchen requires regular sealing; engineered stone and porcelain alternatives offer similar aesthetics with lower maintenance requirements in a high-traffic space.
20. Design the Sink Position Around the View, Not Just the Plumbing
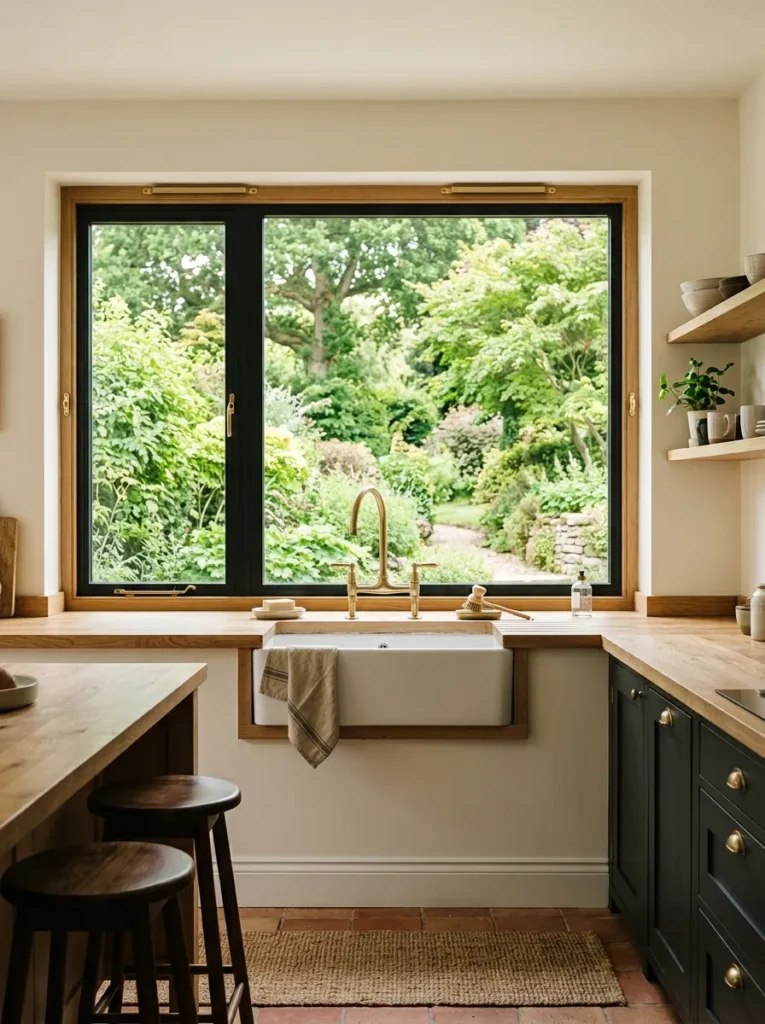
In most kitchens, the sink goes where the plumbing already is, which means against an interior wall or in a run dictated by structural constraints. In a kitchen where the design is being built from scratch — or where relocation is within scope — the sink position is actually a quality-of-life decision: looking out of a window while washing up is a meaningfully different daily experience from facing a tiled wall.
An island sink is another direction: integrated into the island surface facing the living or dining space, the person at the sink participates in conversation rather than being oriented away from the room. This requires running plumbing to a central island location, which adds cost and should be designed into the floor or the island structure during the build rather than retrofit. The practical limitation of an island sink is visibility — any washing up is in direct sightline from the living area — which some households find acceptable and others do not.
21. Install a Handmade Ceramic or Unlacquered Tile Splashback for Character
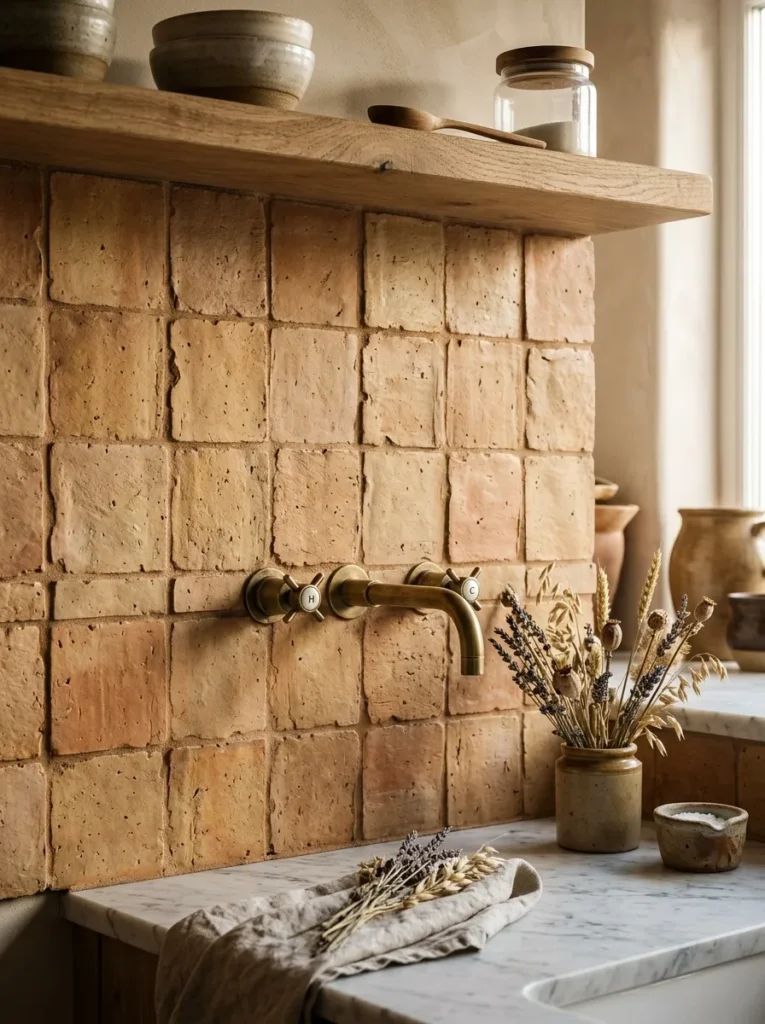
Not all luxury kitchens are defined by seamless, monolithic surfaces. A handmade ceramic tile splashback — in a warm terracotta, a deep forest green, or a textured artisanal glaze — brings a different quality to a kitchen: one that reads as more individual, more referential to craft, and less showroom-polished than a marble or sintered slab. The tile becomes an expression of a specific aesthetic rather than a demonstration of material investment.
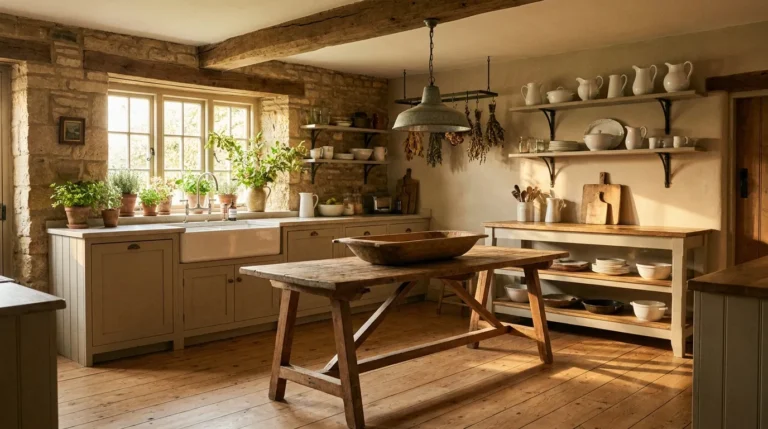
This direction suits kitchens that lean toward French farmhouse, Italian country, or Japandi-adjacent aesthetics, where the warmth of natural materials and imperfection of craft processes are part of the intended character. Handmade tiles are available from specialist ceramic makers and are manufactured in small batches with tonal variation between individual pieces — which is part of their appeal and not a quality issue. The grout choice matters considerably: a warm matching grout maintains the surface’s visual warmth; a contrasting bright white grout cuts against it.
22. Design a Dedicated Breakfast or Baking Counter at a Lower Height
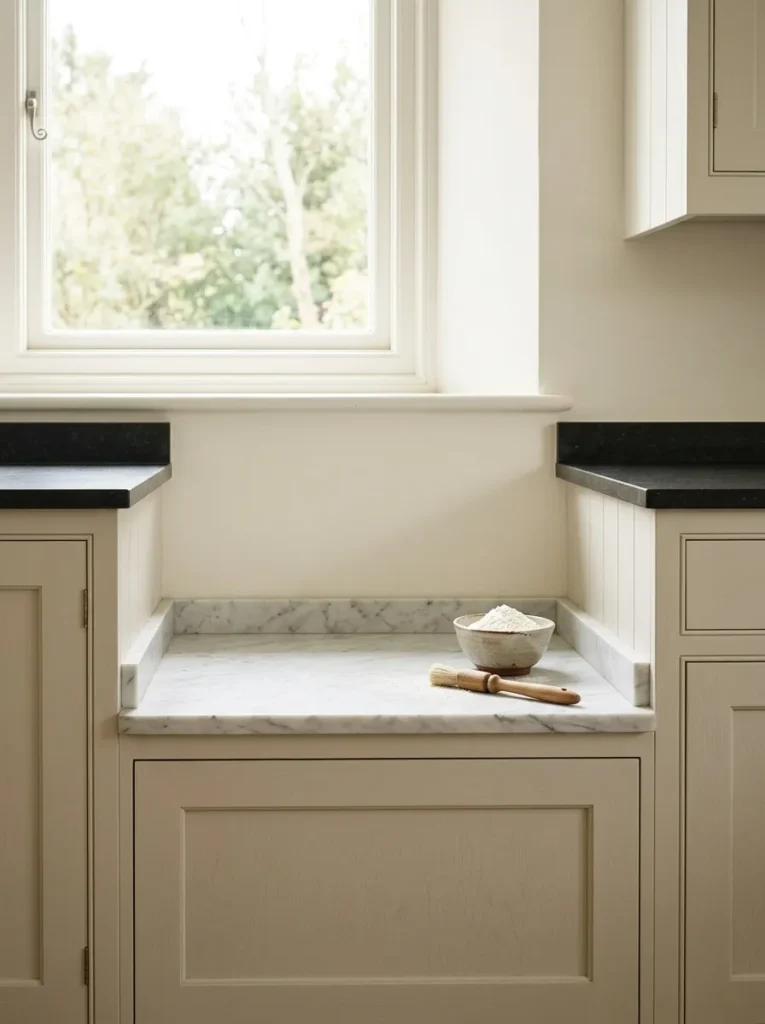
A counter section at a reduced height — roughly 80–85cm rather than the standard 90cm — is one of the most practically useful features of a kitchen designed for genuine cooking rather than Instagram. At this height, rolling pastry, working bread dough, or any task requiring downward pressure is significantly more comfortable because the arms can bear weight without being at shoulder height. It also creates a natural zone distinction within the kitchen that signals real use rather than decoration.
In layout terms, a lower counter works best at the end of an island (where the differentiated height reads as a deliberate proportion) or in a dedicated baking alcove off the main kitchen circulation. The lower counter also naturally accommodates lower seating — bar stools at standard height become too tall; dining-height chairs work better, creating an informal dining spot that’s distinct from both the worksurface and the formal dining area.
23. Choose Pendants Over the Island That Suit the Ceiling Height
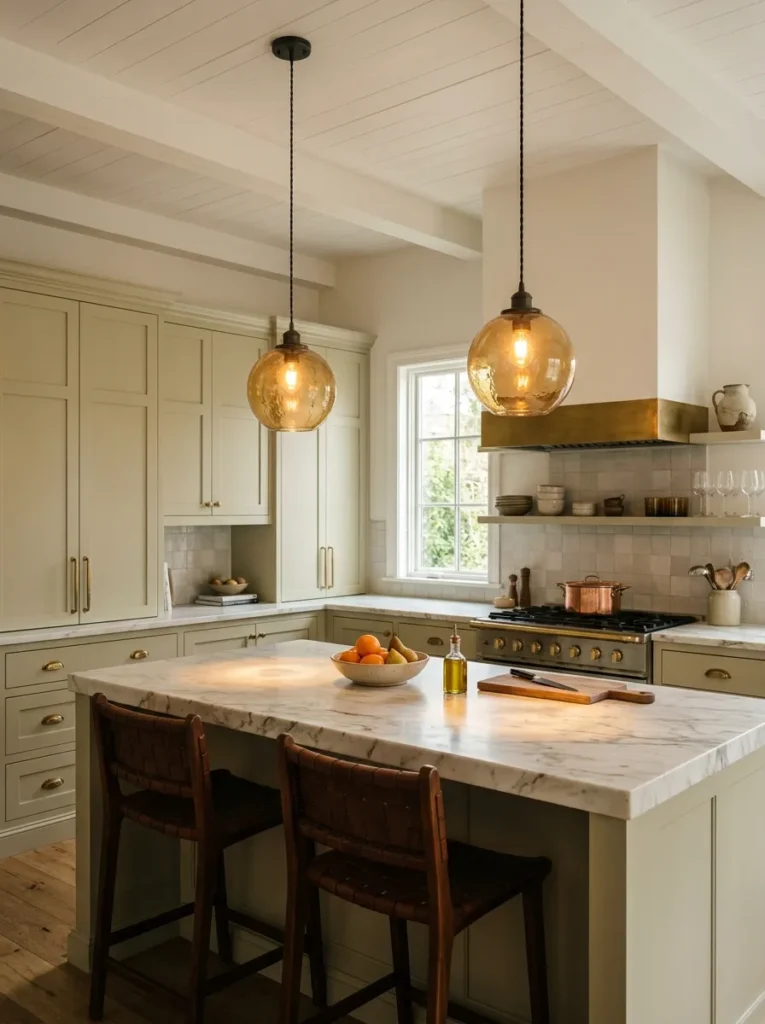
Pendant lights over the island are one of the most visible design decisions in a kitchen, and one of the most frequently misproportioned. Too small, and the pendants look tentative and undersized for the island below. Too many, and the row of lights dominates the room’s visual weight. Too high, and they lose the sense of domestic scale that makes them work.
As a proportional starting point: pendants that are roughly 20–30cm in diameter suit islands up to approximately 120cm in length; larger islands generally need either larger-scale pendants or a pair of slightly smaller ones rather than a row of three identical small ones. In rooms with ceiling heights above standard, pendants on extra-long drops can look dramatic but require careful consideration of the sightline — a pendant that hangs into the eye-line across an island creates a visual obstruction that quickly becomes irritating in daily use.
Material direction in a luxury kitchen: raw ceramic, beaten metalwork, blown glass, and woven natural fiber all read as considered rather than standard. Matching chrome or brushed metal pendant clusters in standard retail finishes tend to look like an afterthought against high-specification cabinetry.
The Five Decisions That Determine Everything Else
Luxury kitchens are complex enough that decision sequence matters. Getting the foundational choices right before committing to finishes and fittings saves significant rework — and money.
Layout first. The island position, the sink location, the range wall, and the circulation zones are structural commitments that are expensive to change once cabinetry is in. These decisions should be resolved before any supplier is engaged or any finish is chosen.
Appliances second. Integrated appliances, range cookers, and boiling water taps need to be specified before cabinetry is designed — the cabinetry must be built around them, not the other way around. This is particularly true for tall integrated refrigerators, undercounter wine fridges, and steam ovens, each of which has specific dimensional and ventilation requirements.
Lighting infrastructure third. Every ceiling recess, pelmet channel, and under-cabinet lighting run needs to be in the brief before any wall or ceiling surface is finished. This is the decision that most commonly gets deferred and then costs the most to retrofit.
Material palette fourth. Once the layout and appliance positions are confirmed, the surface choices — cabinetry finish, countertop material, splashback, floor — can be resolved as a coherent palette rather than as sequential individual decisions that may not relate to one another.
Hardware and fixtures last. Handles, taps, and lighting fixtures are the point where the palette is confirmed and the finish level is set. These choices should respond to the decisions above rather than lead them.
Final Thoughts
The kitchens that succeed at both appearance and function are almost always the ones where the brief was genuinely about daily use as much as visual outcome. A kitchen designed primarily to look impressive in photographs will reveal its compromises within weeks of being finished; one designed to function well first will look impressive as a consequence of that thinking.
Not all twenty-three ideas belong together. A kitchen with a statement range cooker and a handmade ceramic splashback is moving in a different direction from a sleek handleless kitchen with integrated appliances and a Calacatta slab — and that’s correct. Coherence of direction matters more than accumulating individual impressive details.
If you’re at the early stages of a kitchen renovation, start with the layout and appliance positions, and let the material and finish decisions follow from those foundations. The ideas in this guide are most useful as a reference point for that second stage. Pin the ones that genuinely suit the direction of your space — and come back to this guide when the structural planning is done.